
 Deutsch
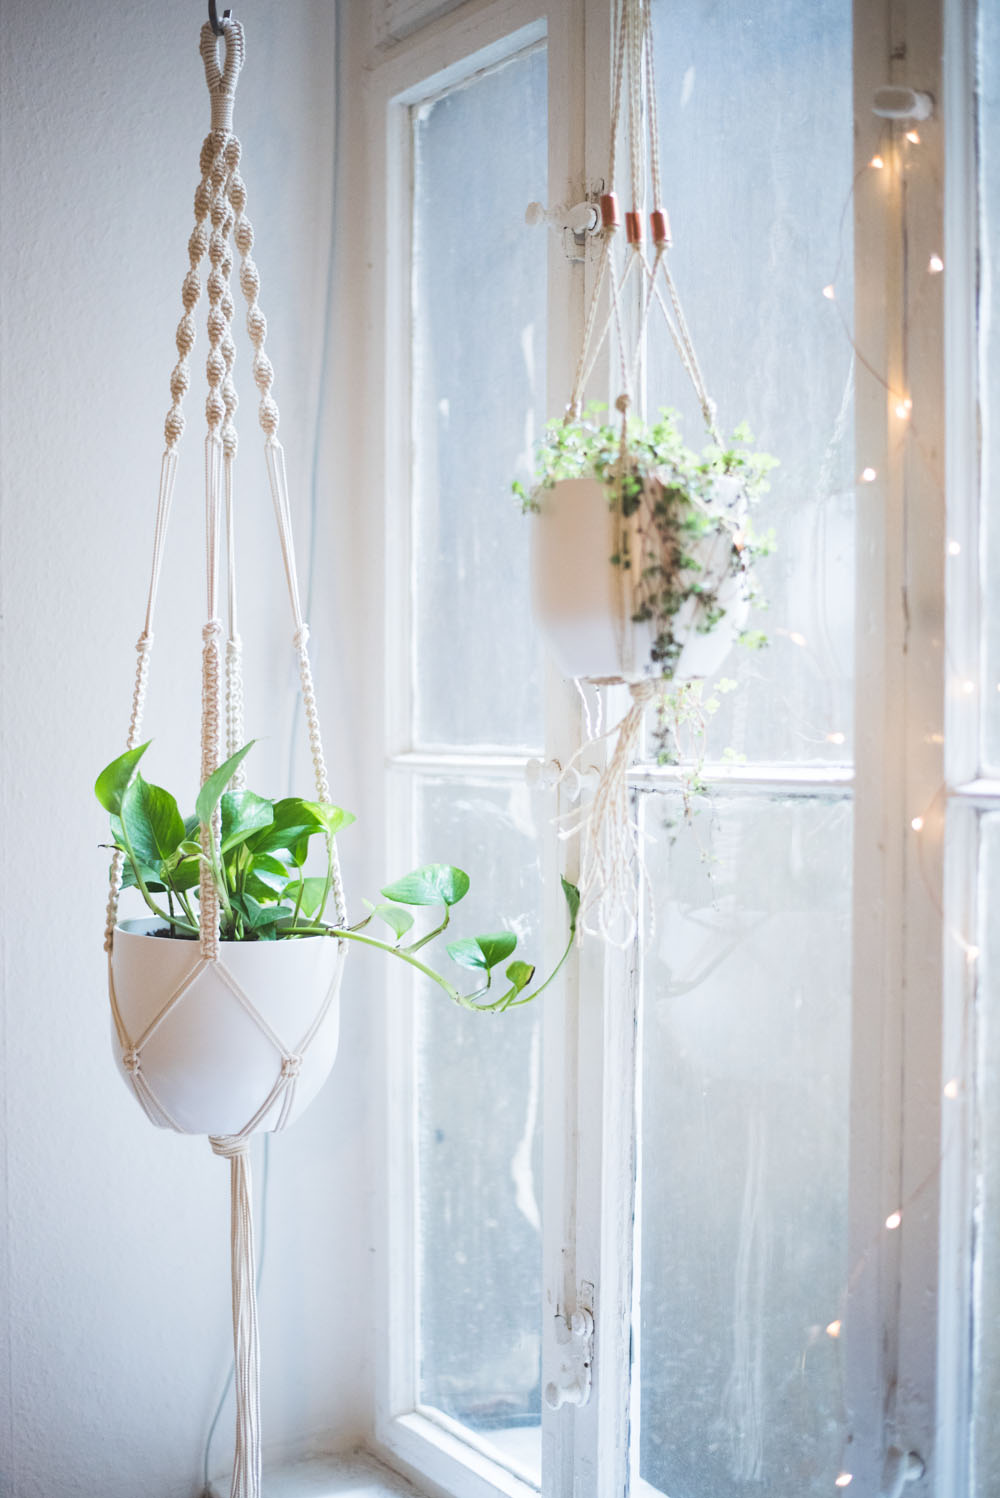
(German version HERE – Deutsche Version HIER – Also make sure to check out my macrame wall hanging tutorial!)
Also some more good news: I have created ANOTHER macramé wall hanging tutorial. This time a 15 pages detailed step by step tutorial as PDF. You can purchase it for a very cheap and fair price here (Affiliate Link/ Ad)! It also includes a detailed instruction how to create the four most important basics knots. Check it out:
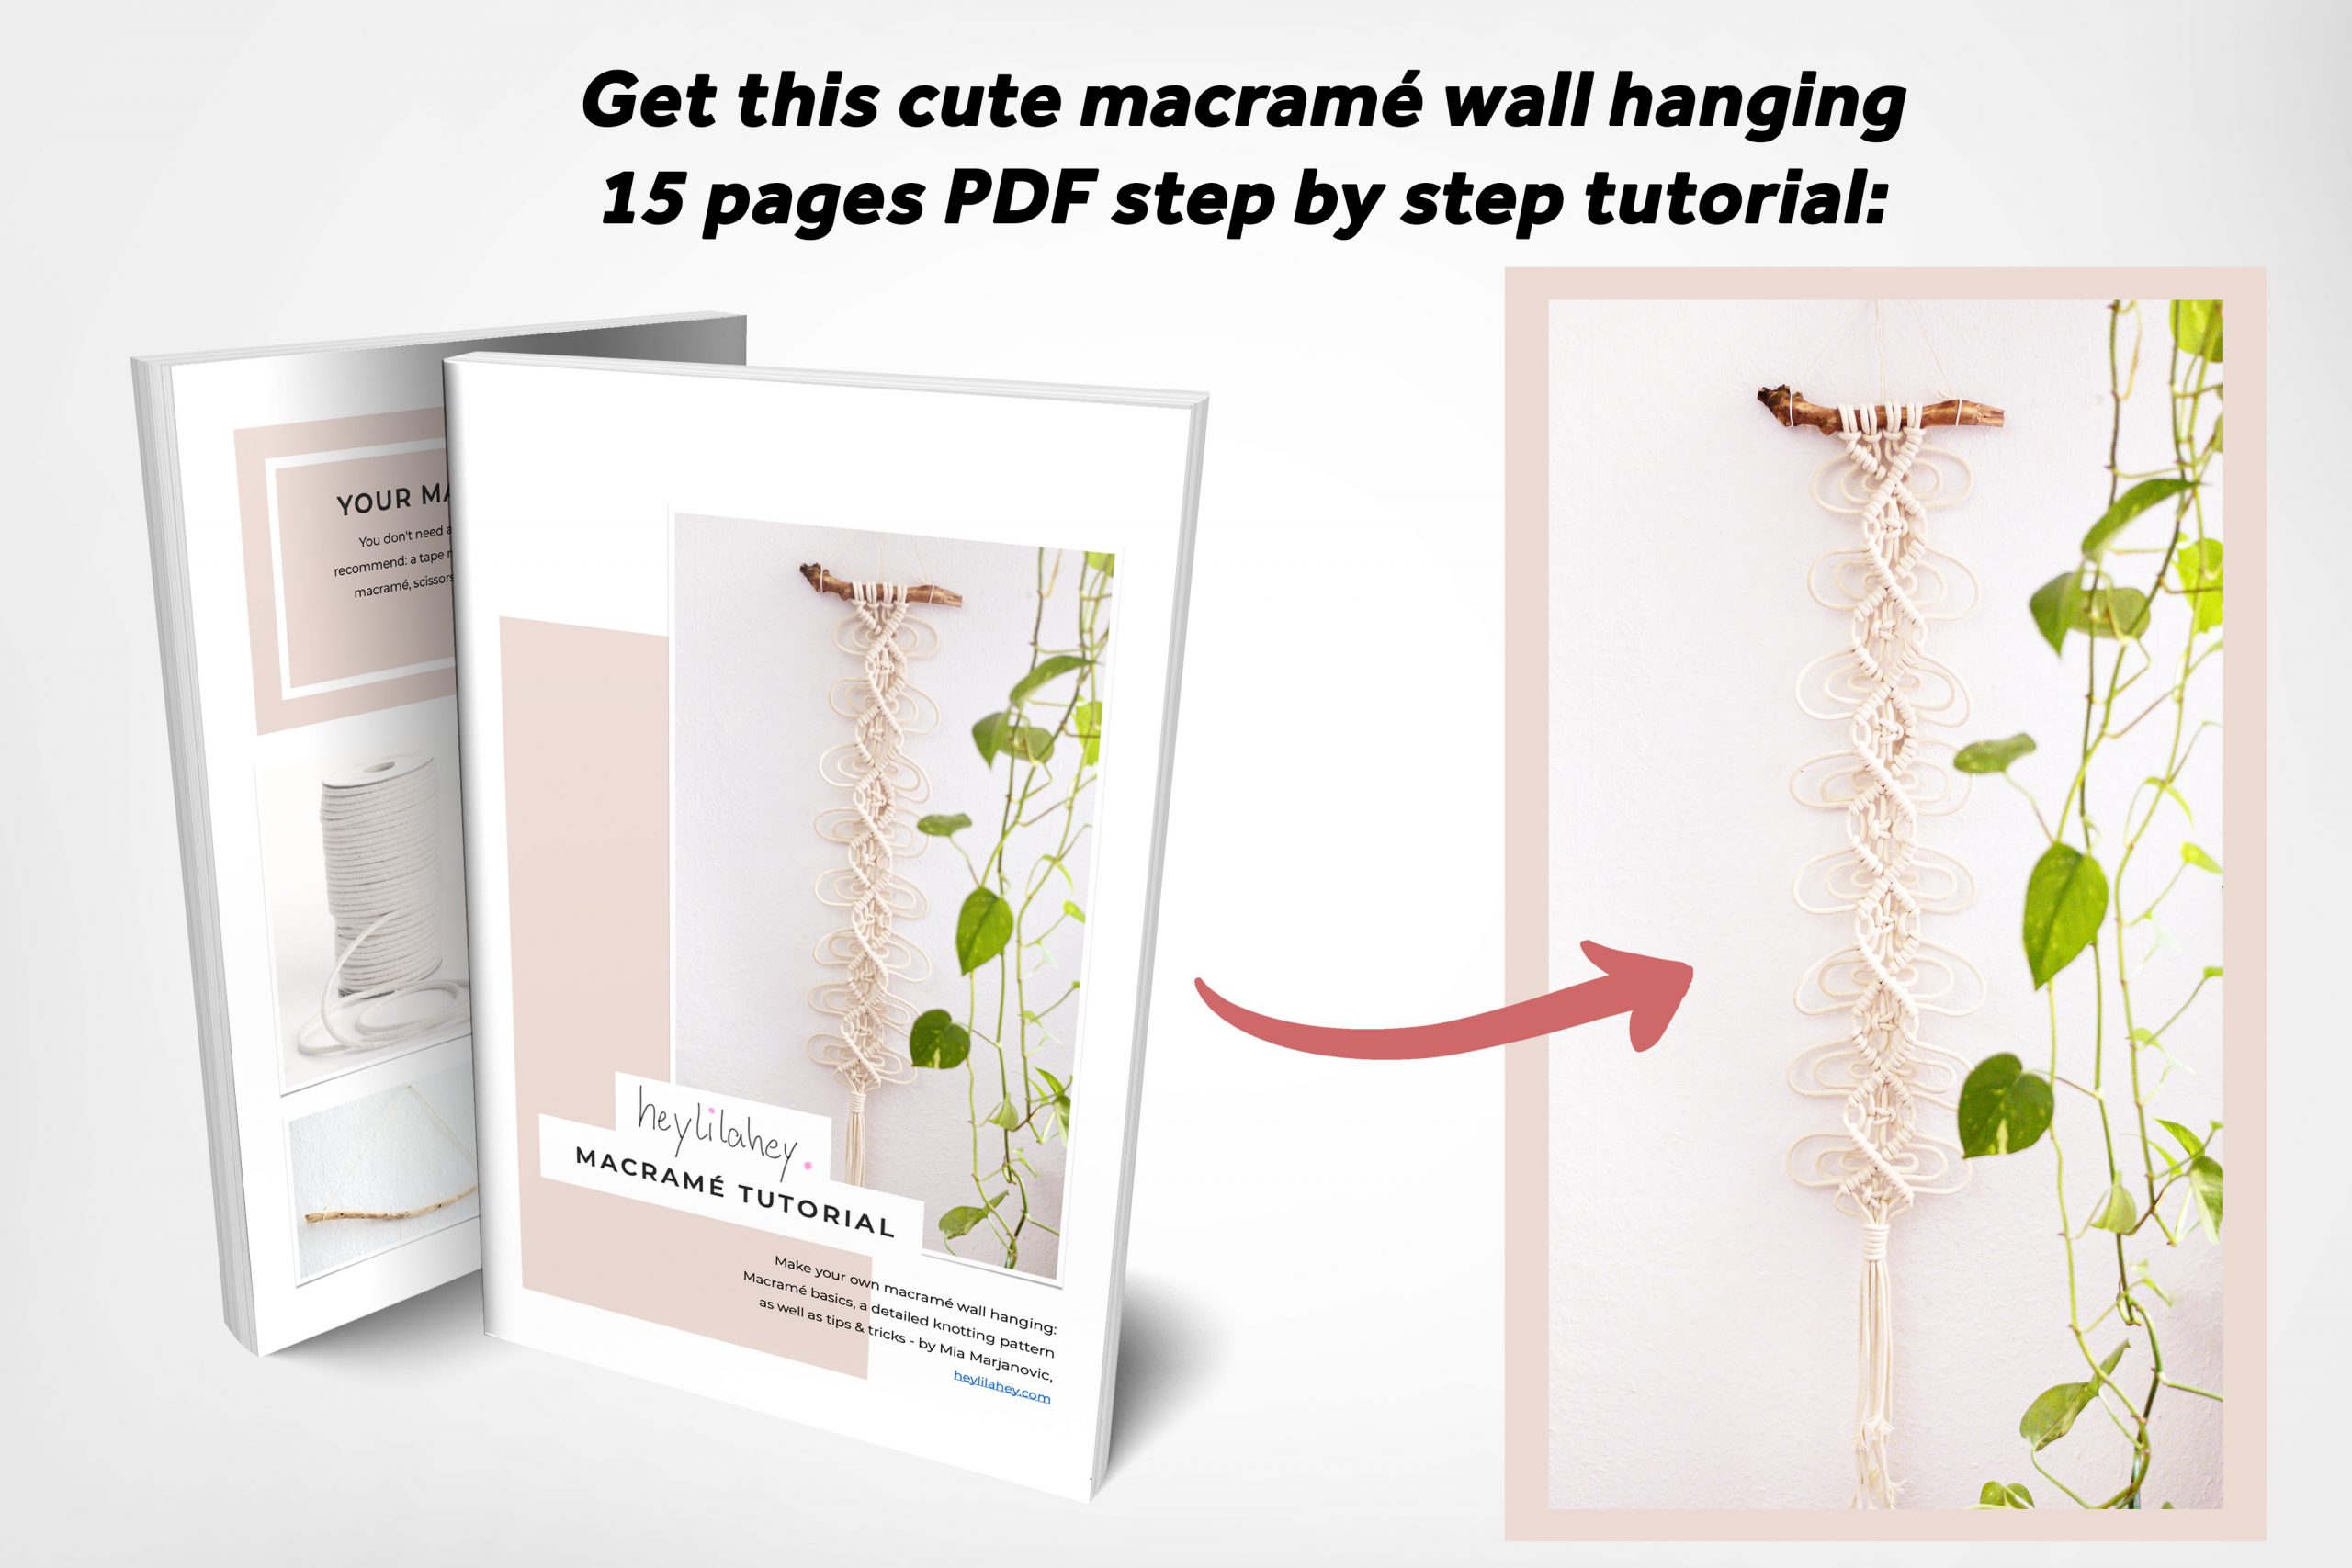
Click here to purchase it (Affiliate Link)!
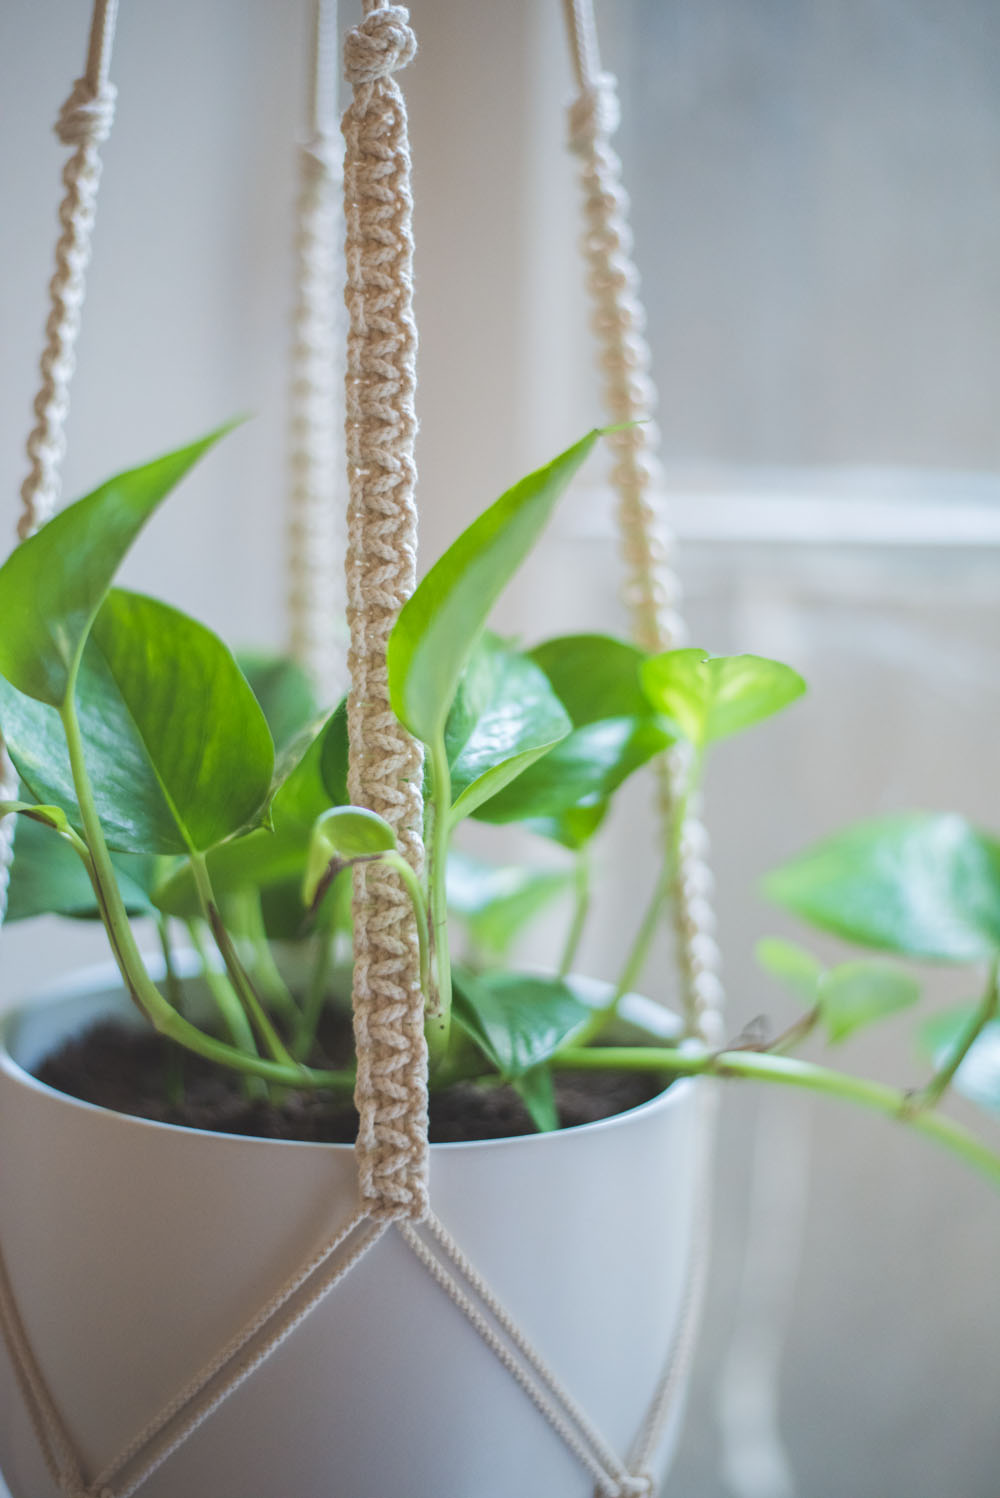
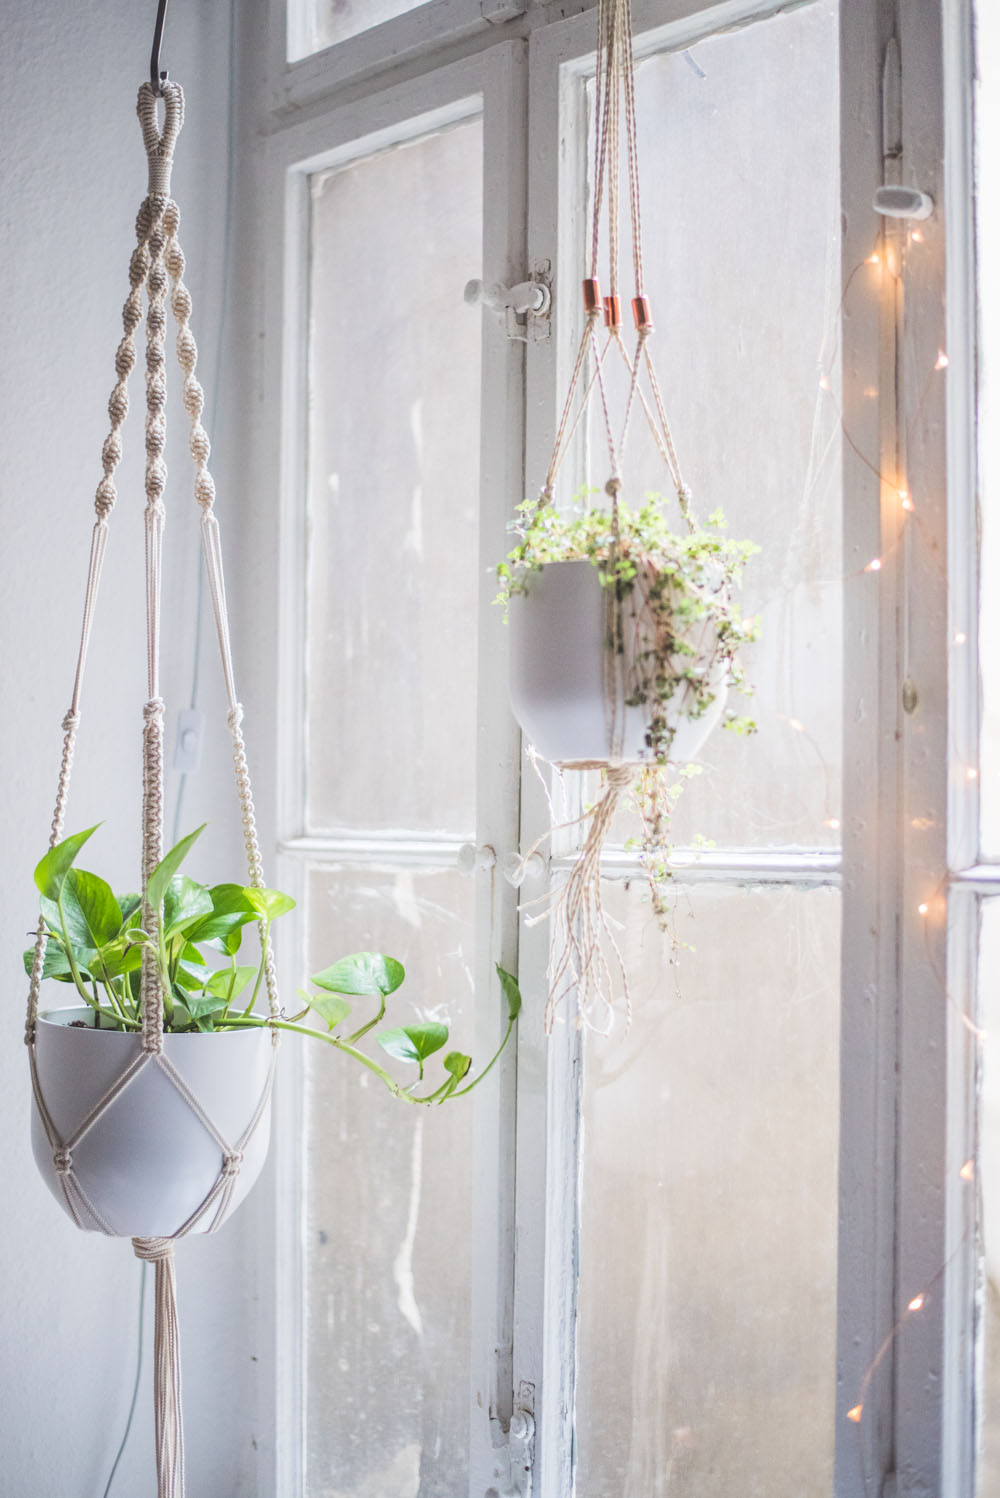
Back to the plant hanger: I’m addicted to macrame. Funnily enough, I found out later that my mom used love to “knot”. Who would have thought? I guess the saying is true, the apple doesn’t fall far from the tree. But I did not learn from my mom, instead I learned the first knots via Pinterest. I always use Pinterest to collect my inspiration pictures and usually find the best DIY tutorials there. But for Macrame that’s not the case. I’ve been looking for a while and have not found a good tutorial. Instead, I concentrated on learning the various knots, and then began to experiment with designing my own patterns. So that you guys don’t have to troal through the internet to find instructions, I have decided to explain them all today in detail.
Caveat: There are also mega simple versions, where you actually have to make only a handful of knots. But I love the slightly more complex patterns. But don’t worry, that doesn’t mean that today’s DIY is complicated. The hardest and most annoying step is actually measuring and cutting the cords. But let’s start from the beginning.
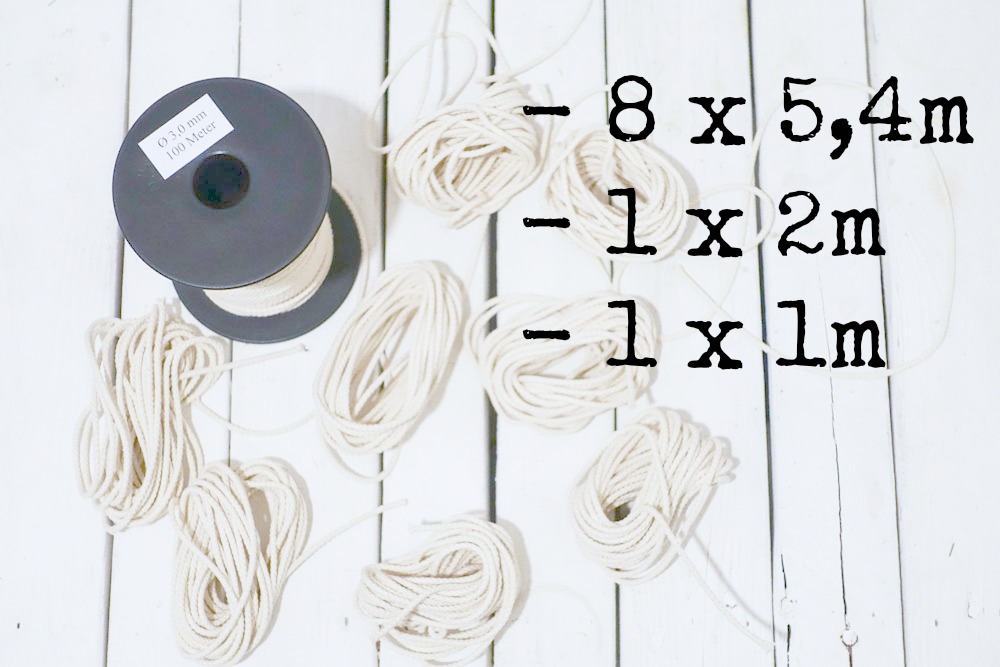
You need:
- 45-50 m cord. I used 3mm thick cotton string. Here is the exact one that I used
- scissors
- a tape measure
- Washi tape or some other tape
- a hook, doorknob, nail in the wall, etc. Just something to hang the plant hanger on while you knot
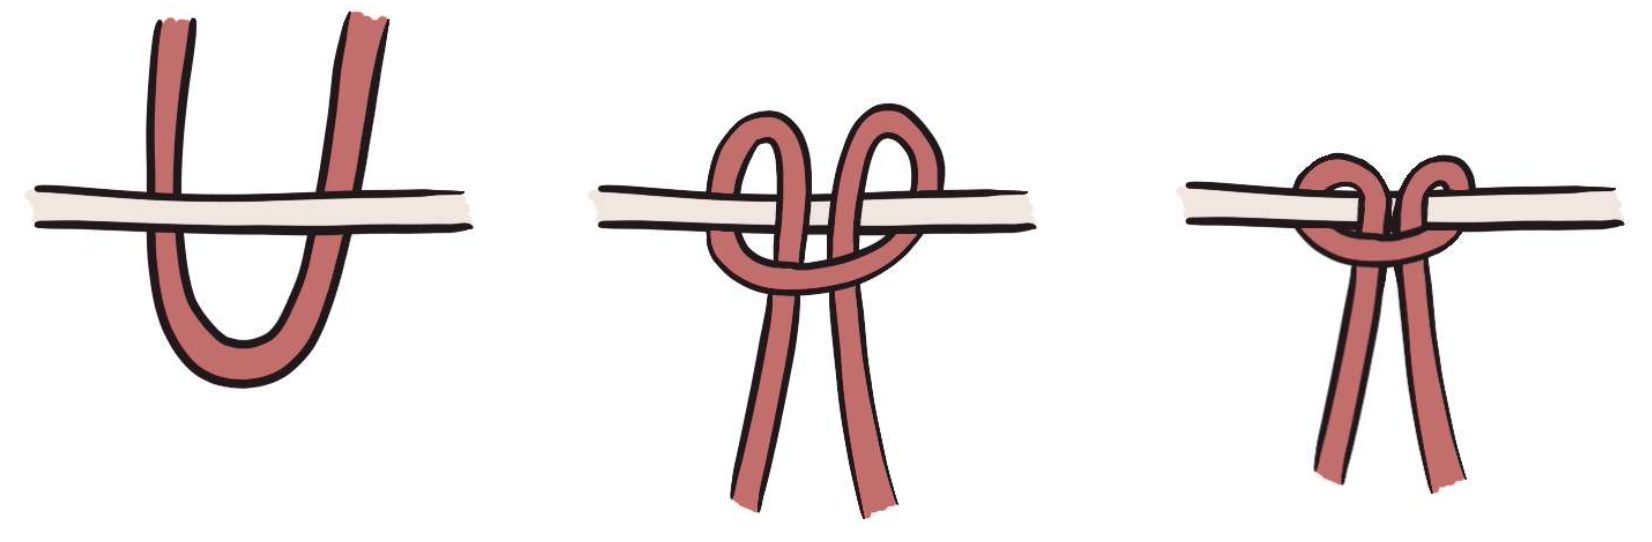
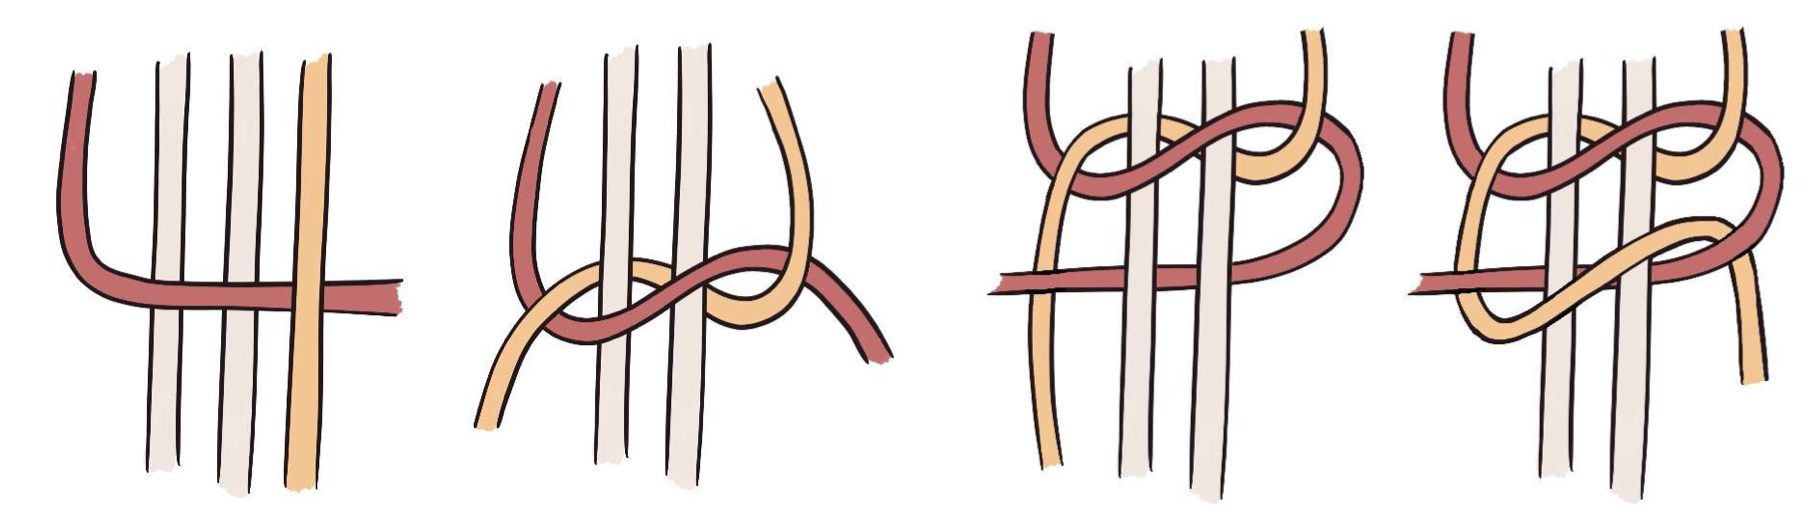
- Knowledge of the various knots (try this as an exercise first, otherwise you will be frustrated later): Learn more about them in my PDF tutorial or check out my little graphics here:
- larks head:

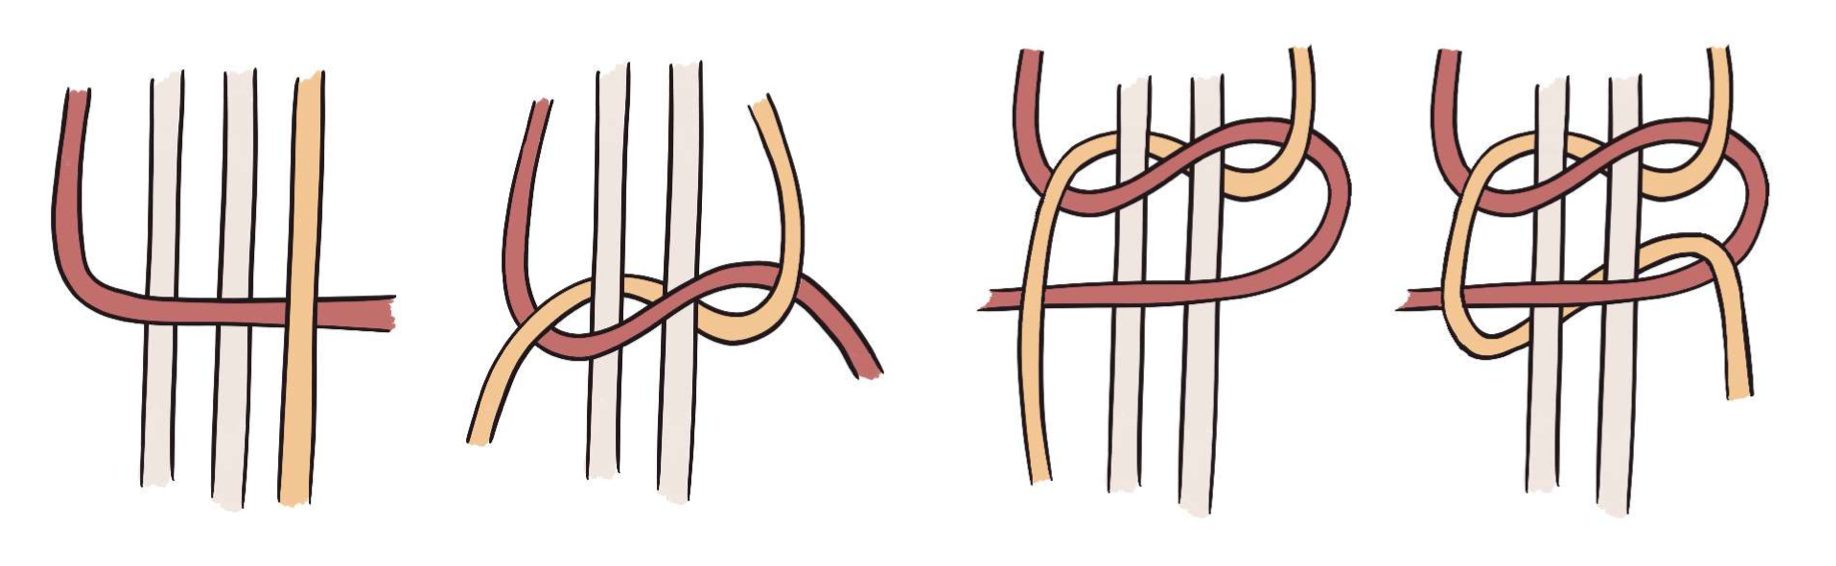
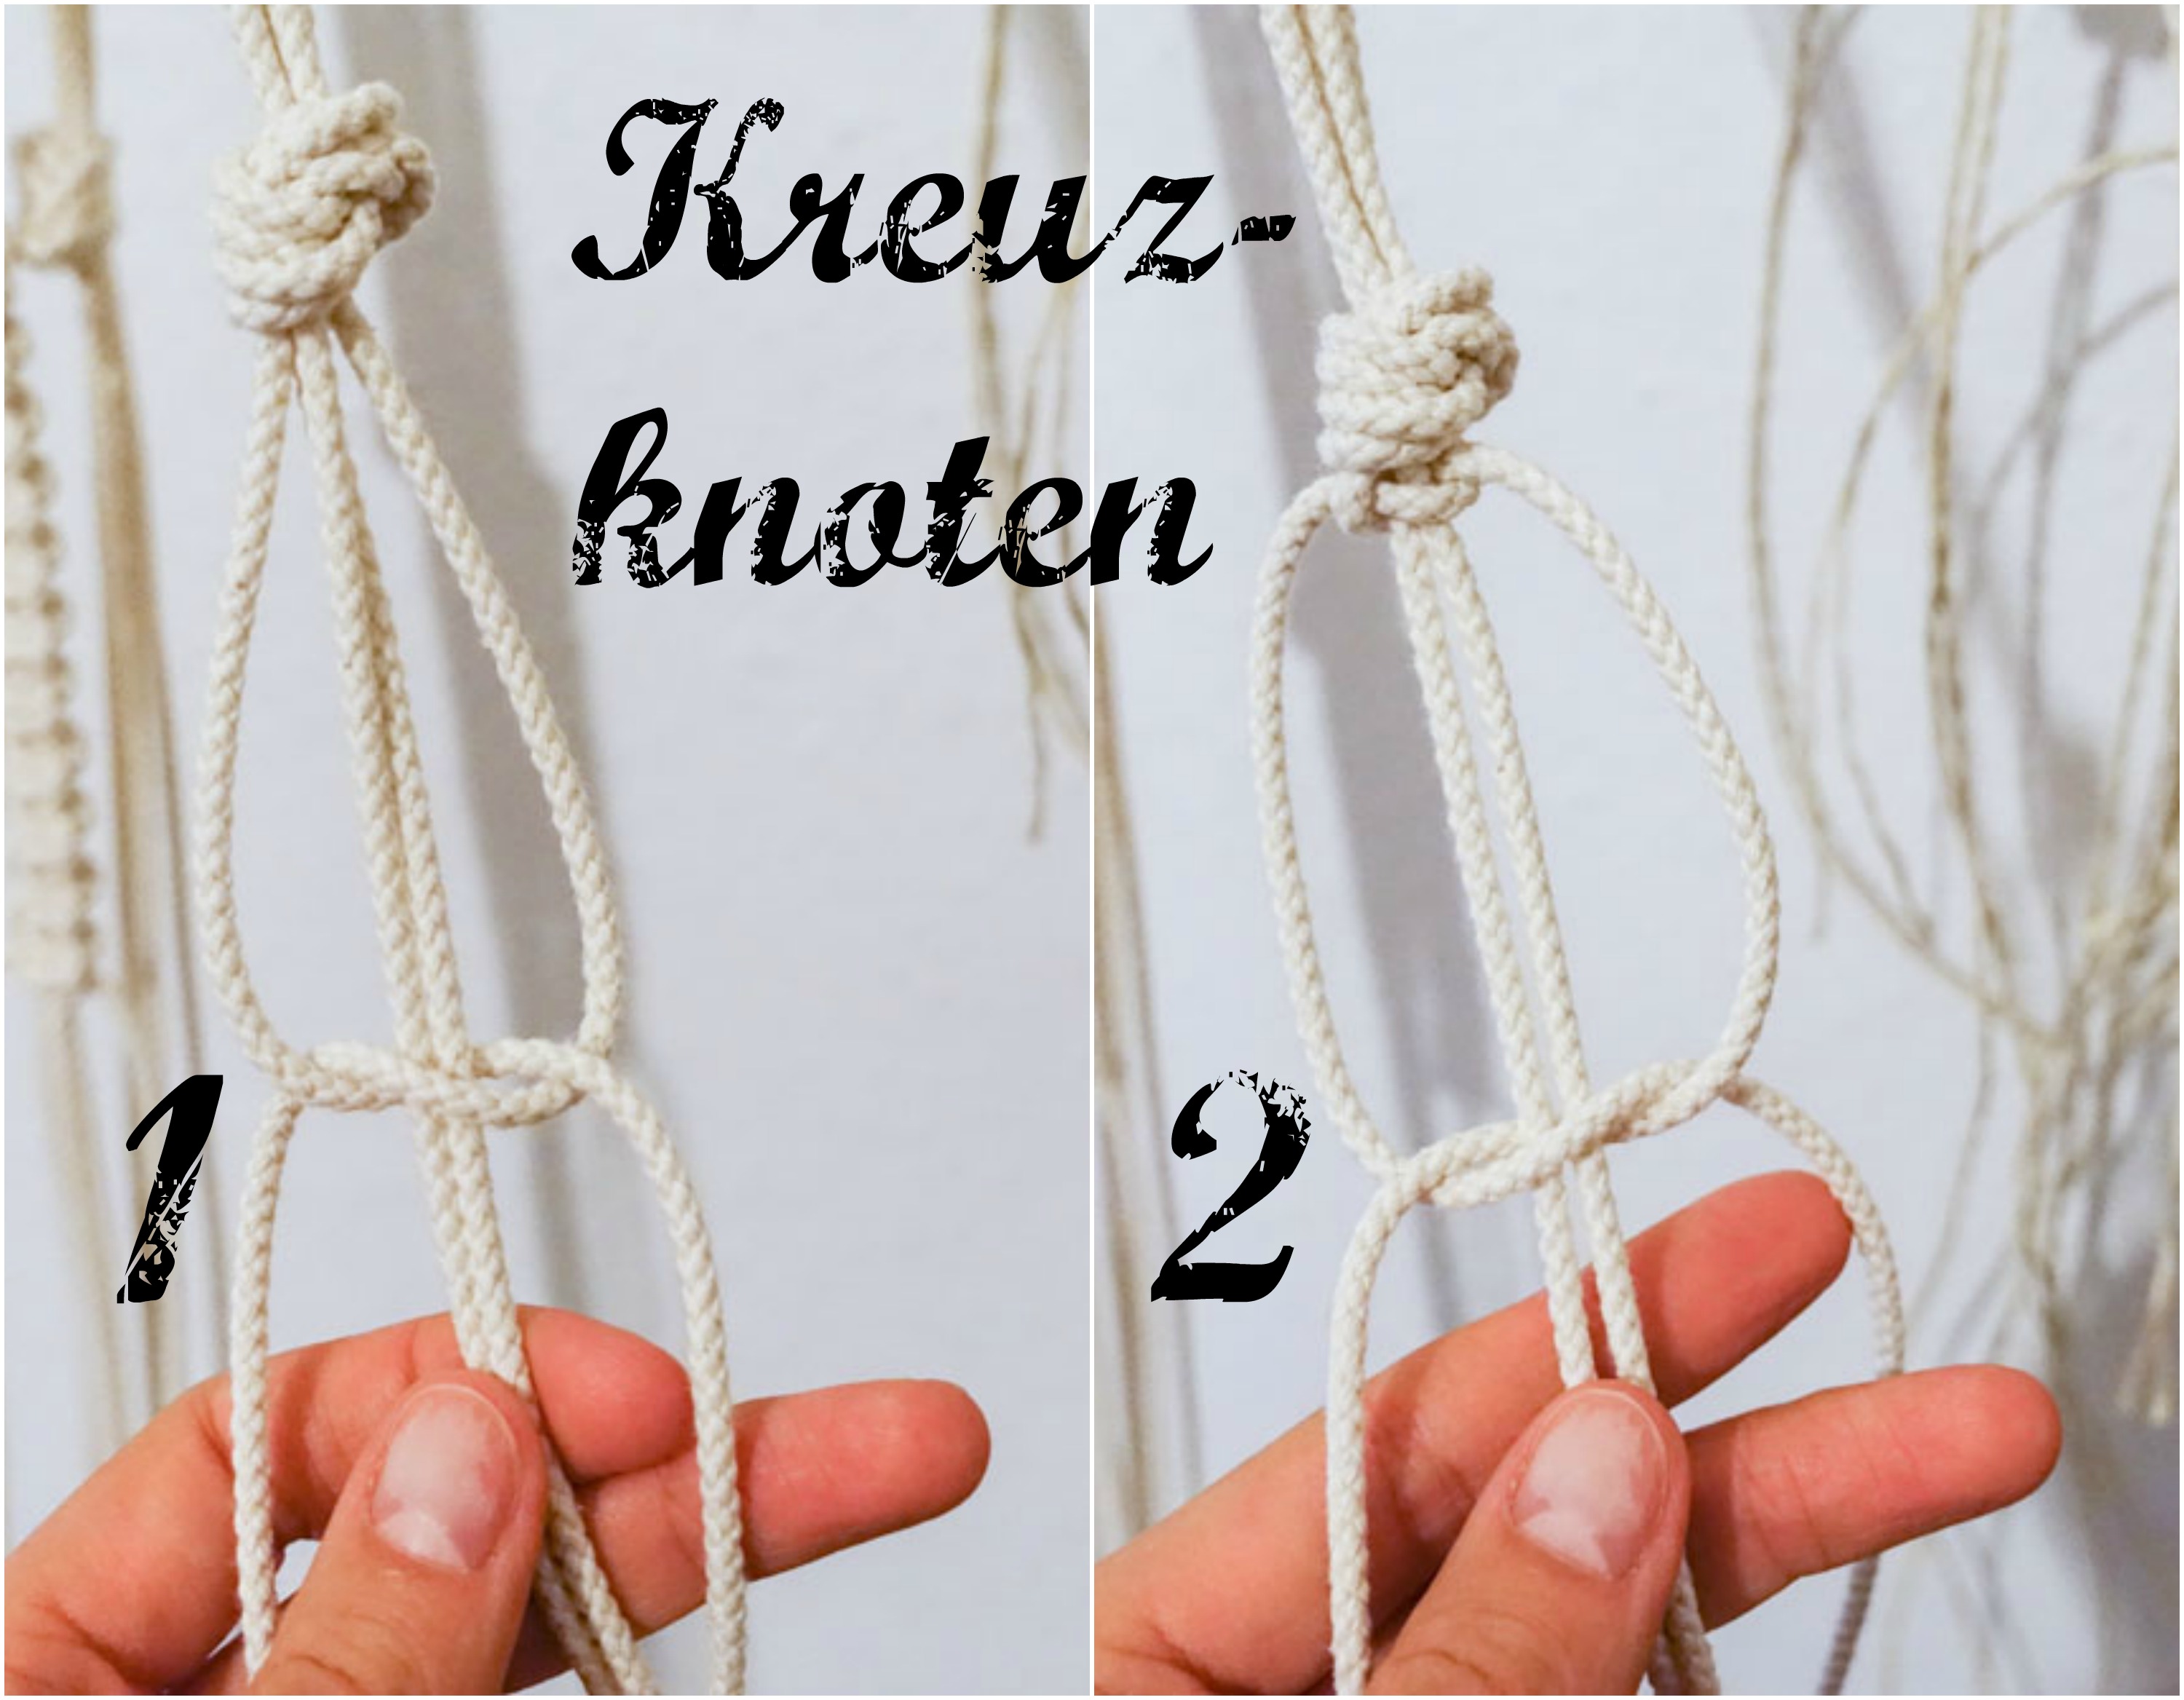
- square knot:

- spiral stich:

- larks head:
Step 1 – Measuring & Cutting
You need 8 x 5.4m cords. I always measure the first length of cord and then use it to measure the remaining seven, that way I don’t need to constantly use the tape measure. For this tutorial, you also need 1 x 1m and 1 x 2m.
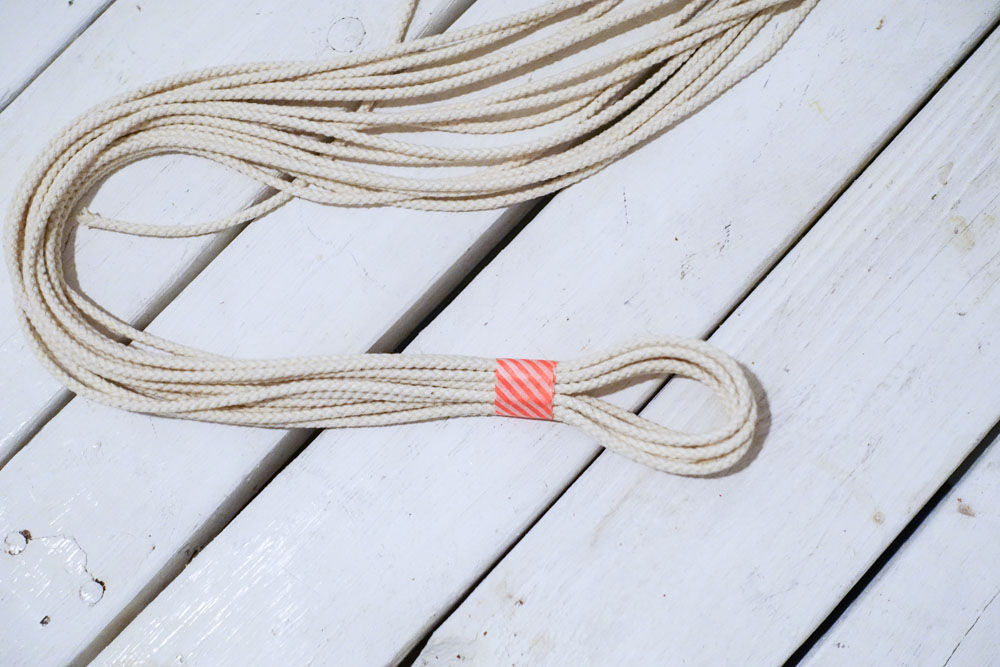
Step 2 – The loop
When you are done you will want to hang the plant hanger somewhere. Some use a metal ring. I didn’t have one, but you actually don’t need one if you make your own (this is a little more complicated, a simple variant is to use a metal ring):
- Set the eight cords together and fold it in half, so you have 16 strings with a loop top (see picture below, I do not know if my explanations are the best, just ask in the comments if you need clarification)

- Tape with washi tape about 7 cm below the top of the loop (see picture above)
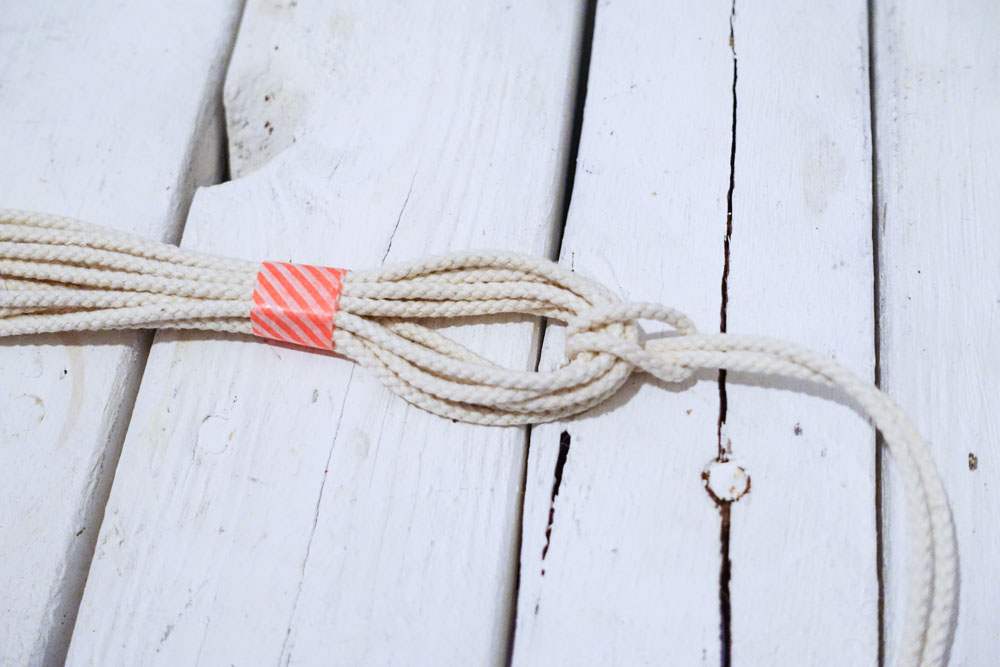
- Now you will take the 2m cord and tie it with a larks head to the top of the loop (see picture below)
- With the right string knotted you can now loop around the middle of the loop with a vertical larks head: take the right thread over the loop, then under the loop and then through the thread – tighten (not too tight, just so that that it holds). Then you take the same thread, passing through under the loop, upward through the loop and pull at the thread through – tightening. Continue doing that until one half of the loop is done and then you take the left-hand thread and do the same the other way (exactly you can find a description here, the Covering ring technique: http://www.free-macrame-patterns.com/vertical-larks-head.html)
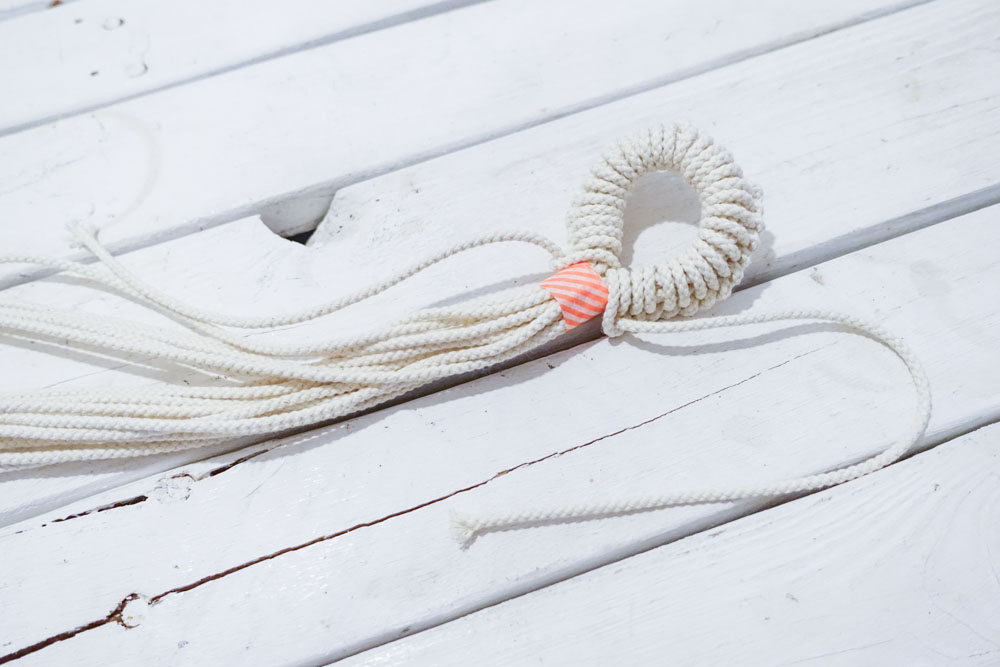
Step 3 – Secure the loop
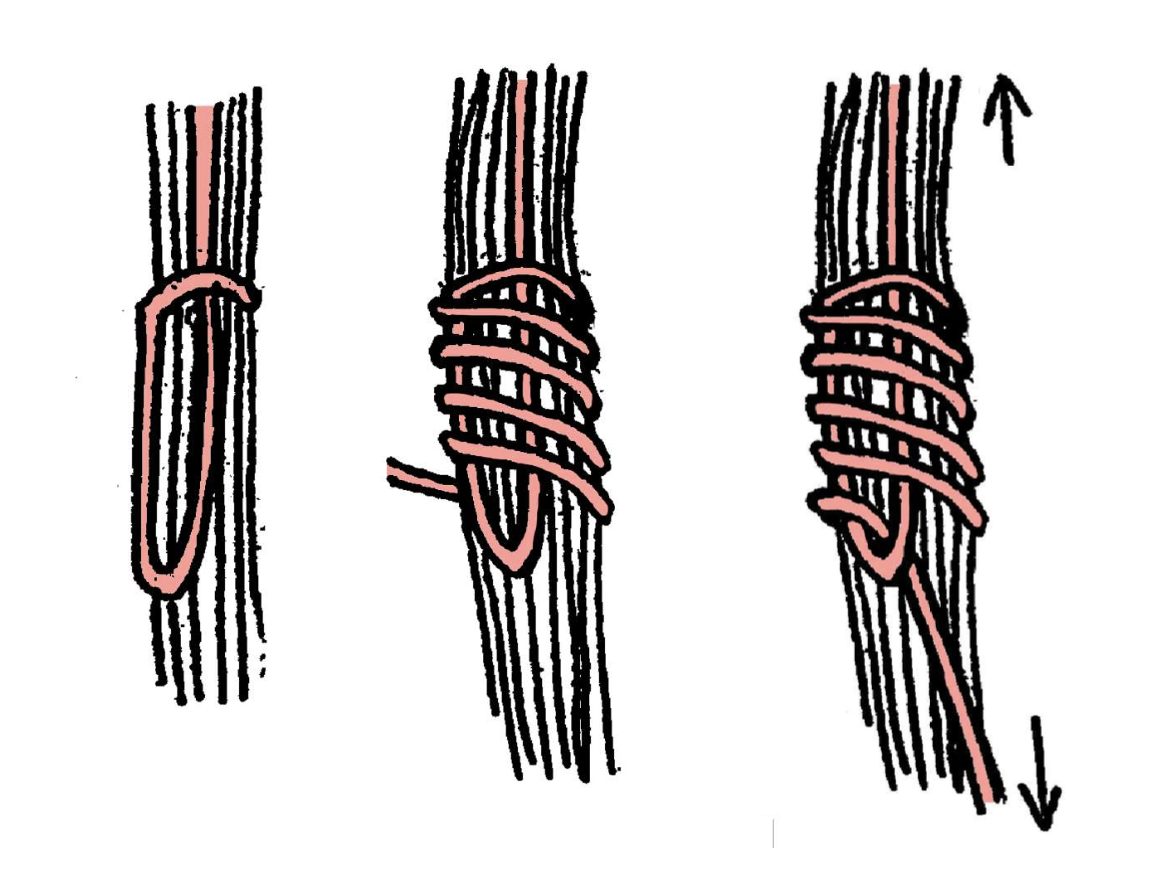
- Now you have a nice, decorative loop, but it’s not held together nicely. Take off the tape. With the 1m-string tie the loop together with a “Gathering knot” with this method (cut all the extras that hang out and using a screwdriver push them into the “Gathering Knot”):
Step 4 – actually Macrame
Finally we can really start, the hardest part, I think, is already done. As I said, you can also just use a ring, but I find a loop of string much prettier.
Now separate the 16 strings into 4 groups of 4 and start knotting:
- In one group knot a 25 cm long section with spiral stich (this is a variant of the square knot, see above). This it repeated for the other 3 groups, will ensure that the pattern is the same length everywhere.
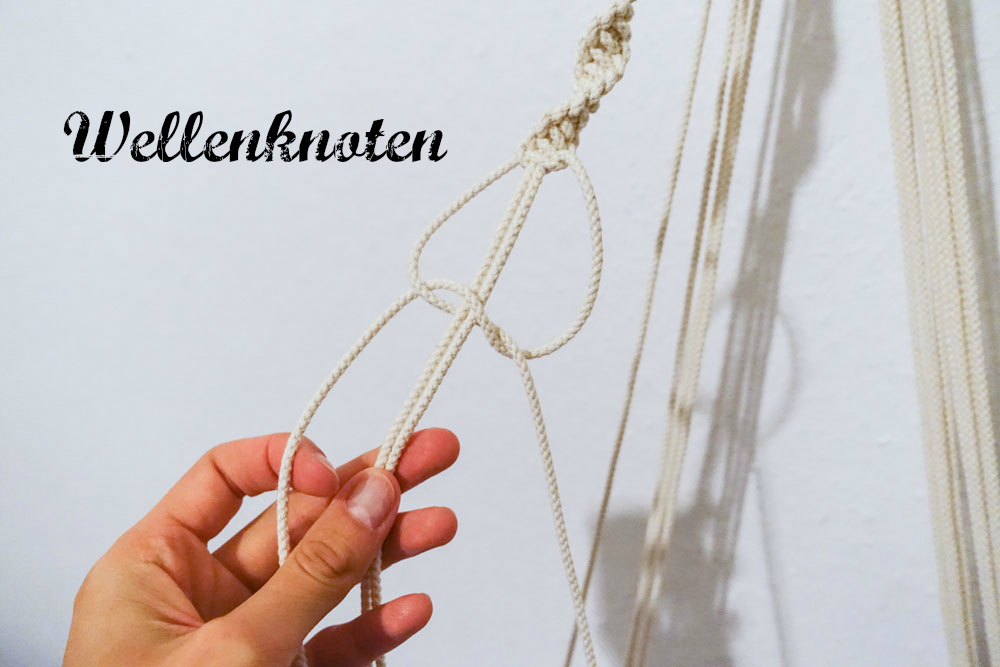
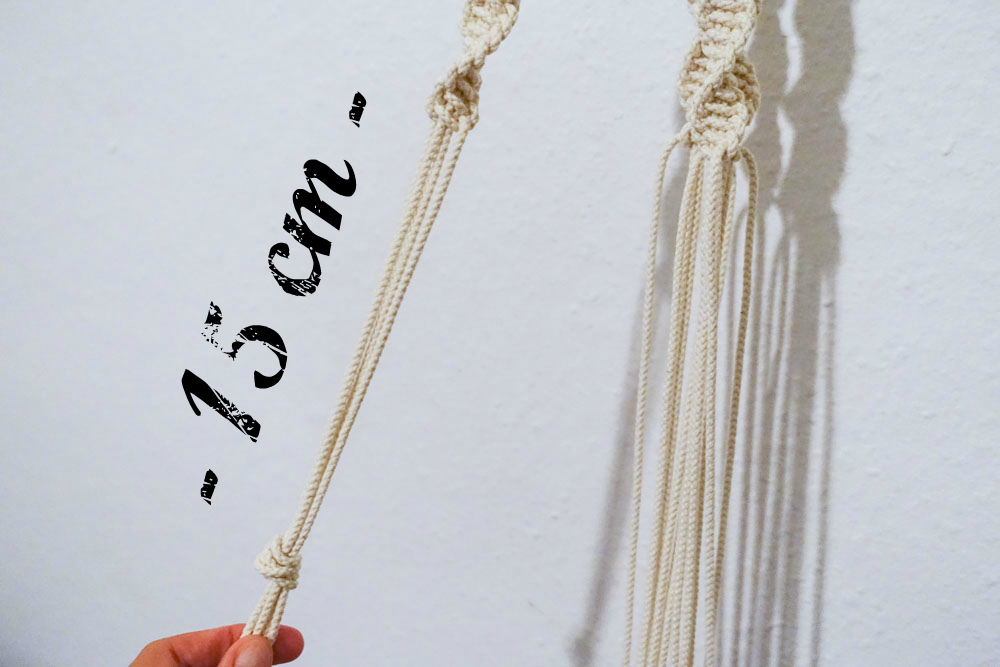
- Then for the next 15 cm make no knots, let the strings hang free, and then make a big normal knot. This it repeated for all groups.
- Now you knot 25 cm length with the square knot. This it repeated for the other 3 groups, again to ensure that the pattern is the same length everywhere.

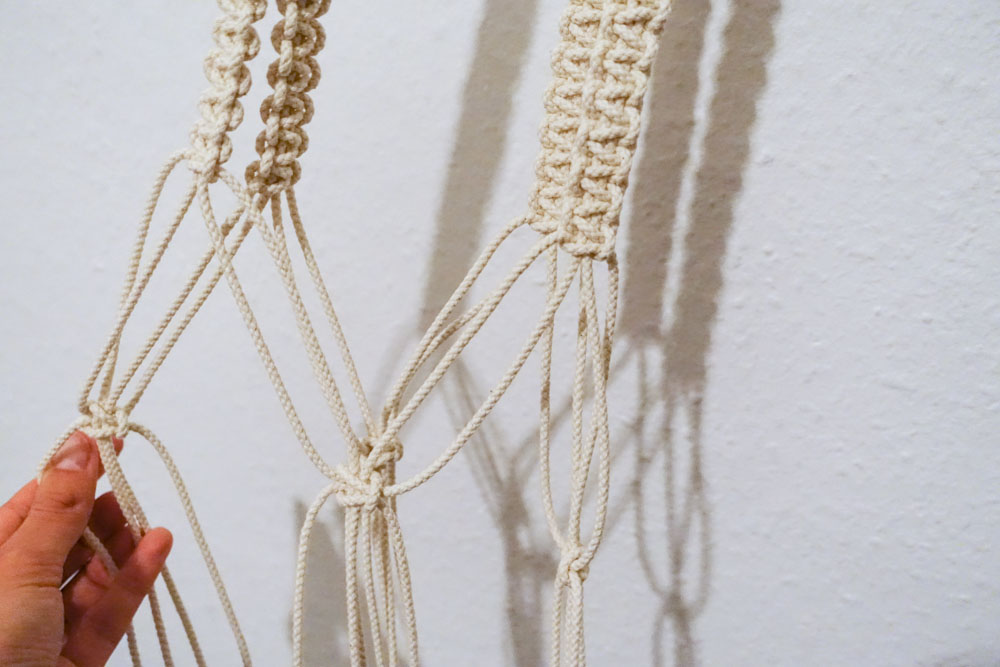
- Now you let the string free for 10 cm and then knot two square knot, BUT with two strings from one group and two strings from the adjacent group (see figure below). This it repeated for the other 3 groups, make sure that no strings cross over any strings and that only adjacent strings are knotted together.
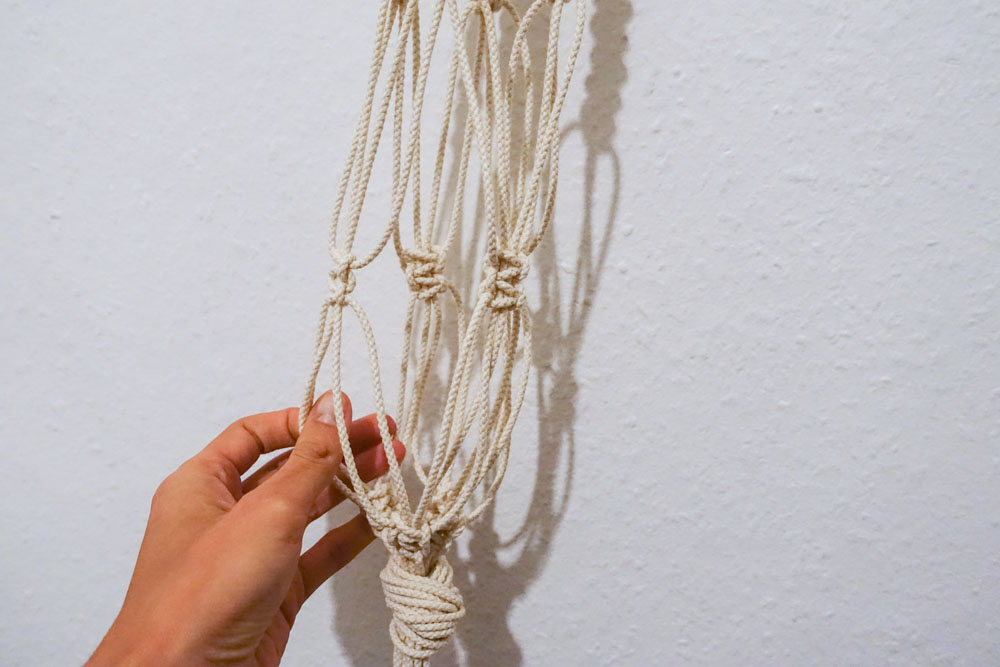
- Next you again leave 10 cm free and again take the neighboring threads each and knot them together with 2 square knots.
- Now you have arrived at the end and you can just tie all strings together in a large knot
Pay attention to:
- do not overtighten the knots, otherwise the pattern will bend
- try to keep the knots uniform, but as long as you don’t pull too hard on the knots it should be easy
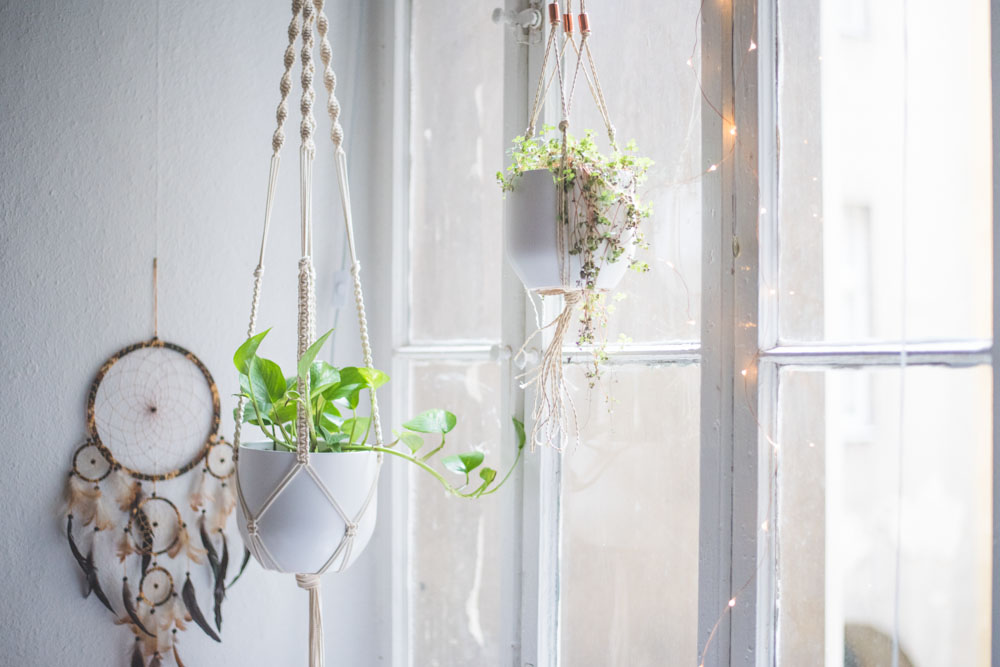
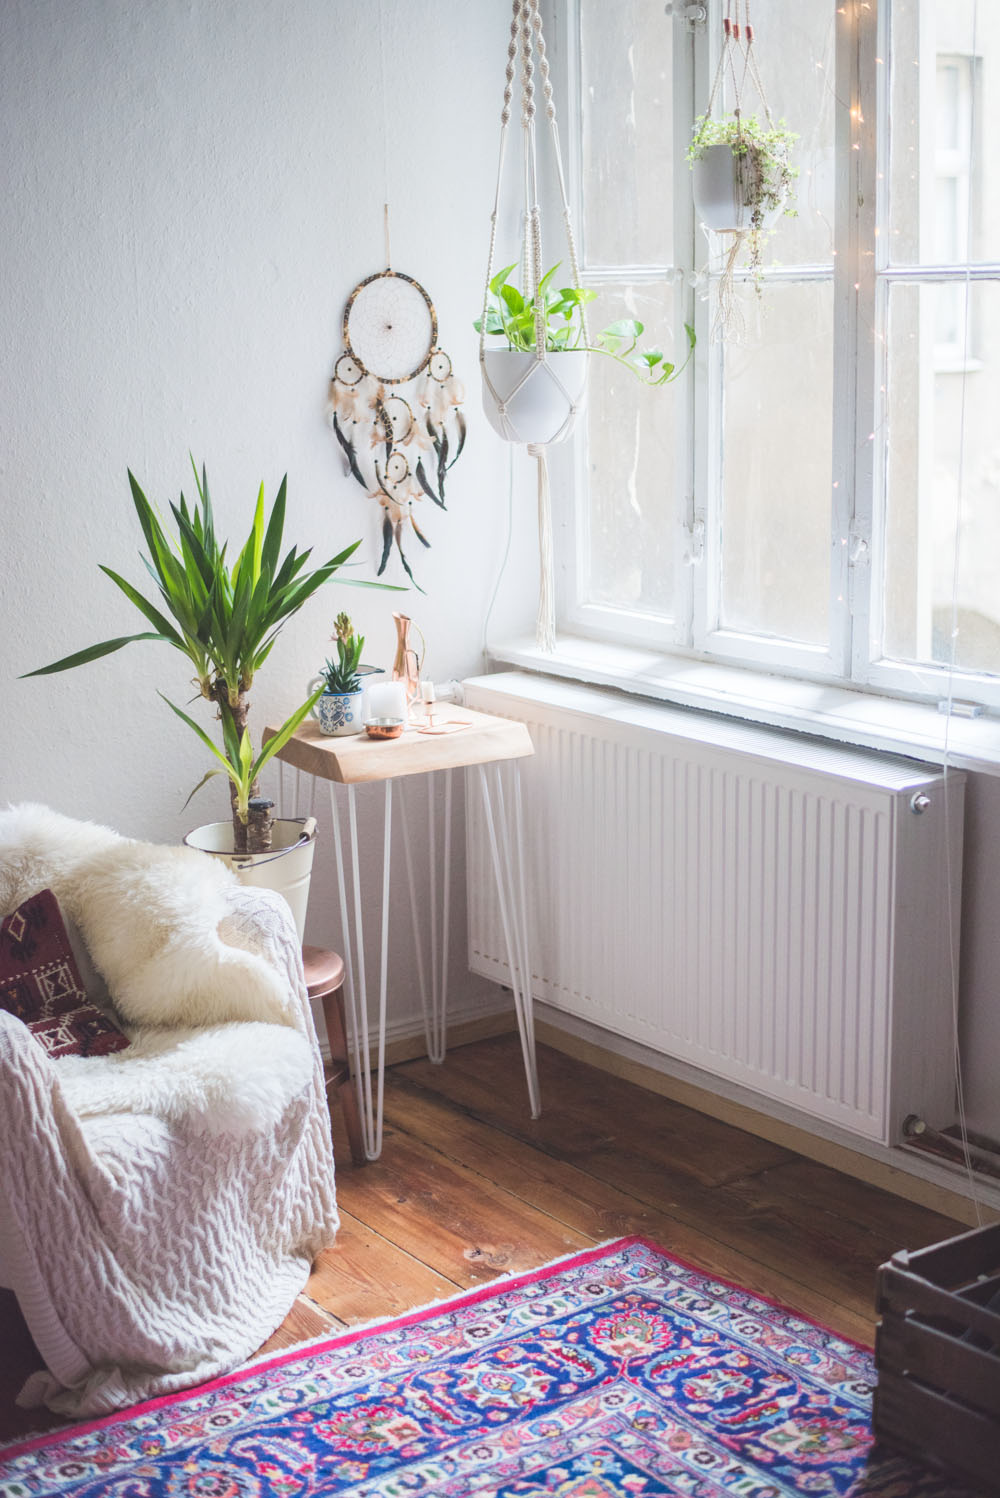
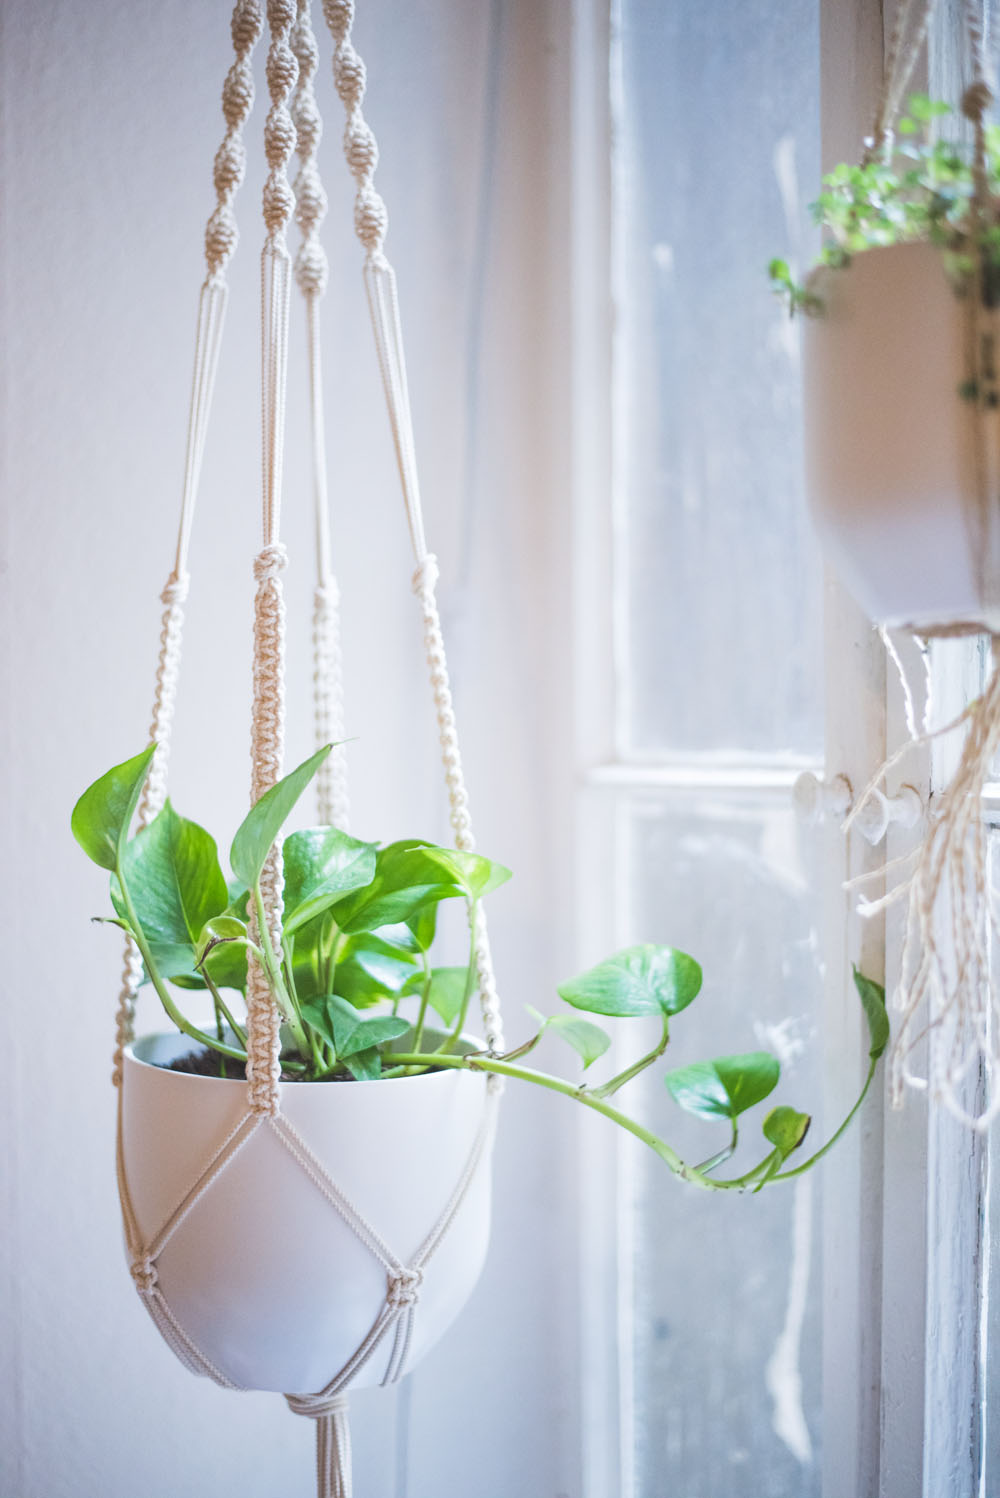
- The plant hanger will end up being about 1.4 meters long and fits well for pots 15-25 cm diameter. Mine has a diameter of 19 cm, but it also accommodates smaller
- Practice the knots before or else you will become really frustrated
- Using another thread size / thickness / type, will result in the plant hanger being smaller or larger.
Have fun with this Macrame Plant Hanger Tutorial and if you have any questions, writes the like in the comments! Check out my macrame tutorial PDF!


248 comments
Na also jetzt habe ich wirklich keine Ausreden mehr, es einfach mal selbst auszuprobieren – außer meine beiden linken Hände haha. Die Ergebnisse sehen aber echt so schön aus und ich kann mir vorstellen, dass es richtig entspannend ist, etwas selbst mit den eigenen Händen zu schaffen. Ich hatte auch immer überlegt, ob ich mal Stricken lernen sollte.
Liebe Grüße
Lena | http://www.healthylena.de
Haha, probier es einfach mal, zumindest du Knoten mit einem Testfaden oder so. Dann siehst du ja, wie es läuft 🙂
Eine tolle Sache! Super schönes Design. Anleitung wird gleich ausgedruckt 🙂 Das muss ich irgendwann definitiv ausprobieren!
oh wie cool viel Spaß!!!
Wow!
Solche Knoten seh ich gerade zum ersten Mal.
Werd nun auch mal bei Pinterest stöbern und vllt probier ich’s sogar selbst mal aus.
Haha, mach das! Ich liebe Macrame!
Das sieht echt toll aus:))! Vorallem hast du die Knoten durch die Bilder und Videos auch echt gut erklärt:)
Liebe Grüße
Zoe von http://www.lifeofaprettynormalgirl.wordpress.com
Oh sehr gut, ich habe versucht, alle Schritte detailliert zu beschreiben, aber natürlich ist das schwer, vielleicht mache ich irgendwann mal ein Video!
Ohhh vielen lieben Dank – war jetzt schon so lange auf der Suche 🙂
Ganz liebe Grüße Lisa <3
hellobeautifulstyle.blogspot.de/
https://www.youtube.com/channel/UCPoU_ebFxQsjhAwy8bjlPiA
Das freut mich!!! Viel Spaß!
ein wirklich tolles DIY, obwohl es doch ein bisschen tricky ausschaut 😉 aber genau das was ich gesucht habe. Yay! danke dafür ♥
Danke! Ja, wie gesagt, am besten erst einmal die Knoten üben 🙂 Dann klappts!
hej,
super schön.
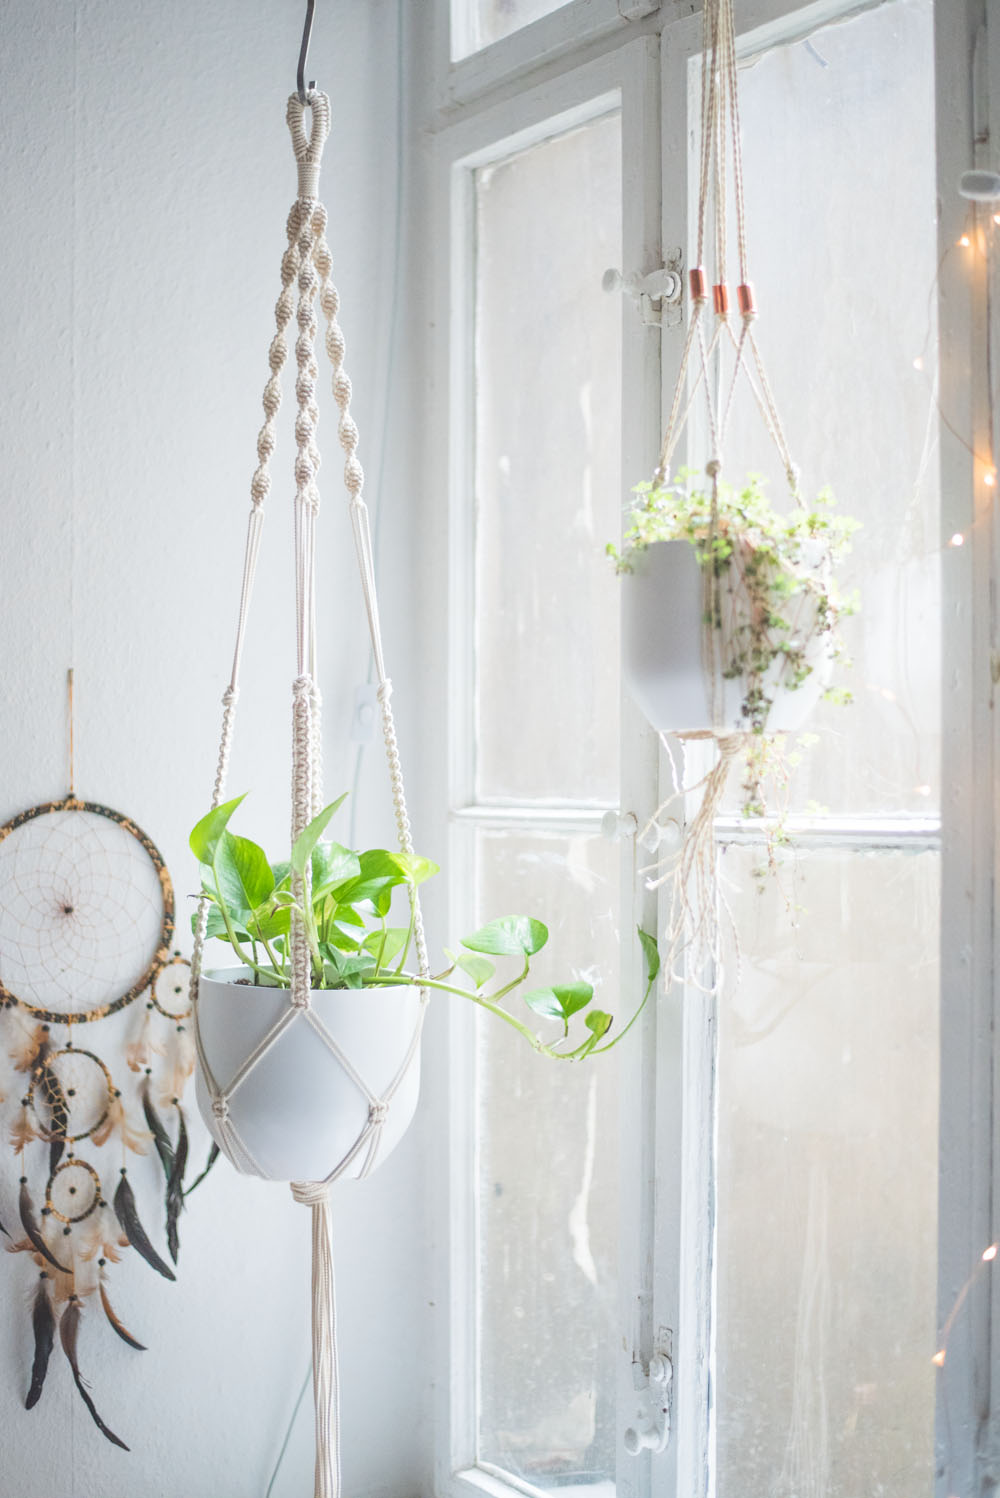
möchte es auch in Angriff nehmen, habe mich für das größere Modell mit Kupferrohr von deinem vorherigen Post entschieden, welches an die Wand gehängt wird.
Hast du dafür auch die hier verlinkte 3mm dicke baumwollschnur verwendet?
Hi Clara,
danke!
Nein, dafür habe ich einfach beige Wolle genommen und die dann mehrfach (4x so viele Fäden jeweils) gelegt.
Hat beides unterschiedliche Effekte. Mit Wolle ist es etwas weicher aber nicht so exakt.
Deine Hängepflanzen sehen so toll aus! Die Bilder sind soooo schön und dein Fenster hätte ich auch gern! Da kommen die schönen Pflänzlein so richtig gut zur Geltung! Einfach toll!
Liebe Grüße
Dörthe
I have never tried macrame, but when I do, I am going to try this one…. It has clean lines, and does not look too complicated. Thanks
Danke! Instructions are perfect. I made this as a present for Mother’s Day and will make one for my own home. It is very special and will be loved for ages.
Toll beschrieben! Ich werd es genau so machen,wie du es erklärst mit hoffentlich dem gleichen Ergebnis.:) Danke für die ausführliche Erklärung und die Bilder dazu!
Sobald das Seil geliefert ist leg ich gleich los 😉
Ich freue mich! Ich hoffe, alles klappt gut 🙂
Amazing tutorial!! Can’t wait to try this! Thank u so much. Would love to see a tutorial about ur other macrame hanger we see in the picture as well 🙂
Oh thank you so much! I am happy you like it! I will try 🙂
Beautiful! What is the size of pot used in this pattern?
Schön! Was ist die Größe des Topfes in diesem Muster verwendet ?
This is perfect! Thank you so much. It’s exactly what I’ve been looking for. yes, there is nothing online… I’m not on pinterest… I used to macrame waaay back in the day, but don’t have any patterns and needed to know some measurements! Thank you thank you Thank You!!!
Oh how cool, I am so happy I was able to help you! Did it work out?
Great tutorial! Thank you so much for sharing. Just made the plant hanger and it turned out great.
Oh that makes me so happy! Thank you!!!
I followed your tutorial and made a beautiful plant hanger! Thanks for taking the time to post the tutorial. Your instructions were easy to follow!
Tolles tutorial ganz lieben Dank! Ich verschenke die Blumenampeln dieses Jahr zu Weihnachten
Tolles Tutorial ganz lieben Dank! Bin schon richtig süchtig nach Makramee. Ich verschenke die Blumenampeln dieses Jahr zu Weihnachten (: für mich mache ich natürlich auch welche.
Great Tutorial!!
I did this as my first macrame project and it worked great!!! I made it for a Christmas present and she loved it. I just have a question. My rope hanging down at the end did not look like yours did in the photo. The rope lengths were all uneven, and I ended up cutting them to make them the same, but it was short and didn’t look as good. What are some tips to making sure the ropes end up the same length? Thanks so much.
They won’t come out the same length, but it should be long enough, so you can cut them all the same length but not too short. Maybe try to knot the knots tighter next time? Just dont pull it too tight.I also think the more often you make macrame the more even the whole pattern becomes! Also an important factor is when you tie the little knots in between, be super careful there! Thank you so much for your comment! I am happy, you enjoyed it so much!!!
Hey,
ich liebe deine Anleitung und will mich auch unbedingt mal an ein Projekt wagen.. Mich würde interessieren, ob man das Garn/die Kordel denn wohl einfärben kann, oder ob es beschichtet ist?
Ich hätte so gerne auch bunte Blumenampeln, kann nur leider keine bunte Kordel finden…
Liebe Grüße,
Katja
Liebe Katja,
das weiß ich leider nicht und ich kann es gerade auf unserer Reise nicht ausprobieren! Sonst hätte ich das mal für dich getestet 🙂 Sonst im Bastelladen mal fragen? Die können sonst auch andere Farben extra bestellen! Ich drück die Daumen!
LG
Mia
Hallo Mia,
vielen Dank für deine Antwort. Ich bin dann schließlich bei Amazon fündig geworden. Im Bastelladen gibt es leider nur kurze Kordeln bis 5m.
Ich wünsche dir noch eine tolle Reise!!
LG,
Katja
Where did you get those pots!
Just from a simple hardware store, nothing fancy 🙂
Oh so toll, vielen Dank! Bin auch schon länger auf der Suche nach einen guten Tutorium und mit deinem nun endlich fündig geworden! Ich glaube sogar, dass wir die Knoten schon als Kinder für Schlüsselanhänger benutzt haben. Ich bin gespannt! 🙂
Oh wie toll, freut mich, dass dir das Tutorial gefällt! Hoffentlich klappt es gut 🙂
Hello, I was wondering how to make the ‘wave knot’ . I can’t seem to find the pattern for it. Thank you so much
Hier are some step by step pictures: http://www.basteldichblue.com/Basteln/teckniken-5330-wellenknoten.deco hope it helps 🙂
Love this! It was super easy and quick to make, even though I had never done macrame before. A quick note- in English, the wave knot is called a half knot, which is why some may be having trouble finding the directions for it.
Hi!
This is my first time doing macrame and I just wanted to double check I actually (8) 5.4 metre cuts. It just seems very long and I don’t want to screw it up.
Thanks for the tutorial! It’s one of the best I have found online.
Sorry for the super late reply! Yes, the cuts are so super long because you fold it all in half and the knotting takes up a lot of the length. In macrames you usually need 2-3 times the desired length and then I folded the cord, so I had to double the lenght…seems complicated now that I type it 🙂 sorry, I hope you understand what I mean!
HI!
Ich hab die Anleitung grad gefunden, hab es noch nie gemacht und einfach mal losgeknöpft, weil ich es als Geschenk morgen gern hätte für eine Freundin. Es sieht klasse aus! Deine Knotenbilder sind detailliert genug, dass ich es auch ohne Trockenübung hinbekommen habe! Ein Lob an deine Anleitung!
Danke, diesen Blumentopfhänger mach ich dann gleich nochmal für mich selbst! Der ist wunderschön und einfach!
LG Franzi
I tried this pattern! Very cute and helpful. It is well written. Thanks!
Thank you so much for this GREAT DIY tutorial! I was searching for a macrame planter DIY design that was interesting yet simply enough for me to create for my plants. They turned out so pretty!
Do you have english version
The Blogpost has an English AND German version, they are both in the text! <3
Sieht super aus die Blumenampel.
Wie lange ist sie wenn sie fertig ist?
Danke! Ich schätze so 1m?
To clarify–8 cuts at over 17 feet each? My guess is the knotting uses up a lot of length?
Yes that’s true and you also fold the cord in half, that’s also why one is so long!
wonderful
I am in the middle of making this and I seem to have run into a problem. I am doing the wave knot and it’s using up almost all the string with the two pieces that are knotting over the middle two strings that are still really long. I don’t think I will have enough string left on the two pieces to finish the project. Am I doing it wrong? How do you even them out? Thanks!
Some will end up longer than others, thats normal. Did you do all the measurements like I suggested? Which thickness of string are you using?
Hi! I’m having the same problem… I’m using 4 mm cord so maybe that’s why? Would it help to switch which cords are working cords after the normal knot?
Thank you! – Tess
Thankyou for providing this DIY pattern, I found your explanations very straight forward and I’m really happy with my hanger.
I just made this last night and it came out perfectly with the measurements and happens to use one spool of 50 yd macrame cord almost exactly. This is the first macrame I’ve ever done and it came together very quickly! I signed in to comment to Nicole: when you do the second set of square knots, you will use the shorter 2 cords as the middle ones and use the longer ones as the ‘working’ cords. It all evens out perfectly by the time you are finished following the pattern. Thank you for this fun pattern!
This is an important comment!! Please consider putting this as a disclaimer in the text, as I had to untie the knots and retie it…
Thanks for this, just finished one for my livingroom 🙂
Wow, I made this plant hanger over the weekend and it turned out perfectly! It was the first time doing any sort of macramé and I really enjoyed the finished product. Thank you for sharing 🙂
I just made it, this was my first one and it’s beautiful ! Thank you so much for english version, i’m french and i don’t speak german.
Hi,Mia!Would You please telefono me where You found this rope,I am in italy and was asking myself if i could order it on web,thank you,
I added a link to amazon, you will have to search for a similar one on Italian Amazon. I don’t speak any Italian, sorry!
Welche Pflanzen sind mit deinen Makrames befestigt? Die Pflanze dieses Tutorials ist eine Art Efeu, oder? Und die aus dem Holzmakrame auf den Fotos oben?
Thank you so much for the pattern and fantastic instructions Lena. I just finished my plant hanger and I’m thrilled with it!
thank you!!! so happy you like it!!!
hey lila hey 🙂
super tutorial, danke für die detaillierte und ausführliche beschreibung … ich habs hingekriegt ..! jetzt hab ich ein super geburtstagsgeschenk, jippiee ! ..
Vielen Dank für so ein tolles Tutorial! Es ist wirklich gut nachvollziehbar und das Ergebnis sieht klasse aus! 🙂
Ein einziger kleiner Punkt meinerseits ist,dass ich nach dem ersten normalen Knoten zu Beginn der Kreuzknoten je Gruppe zwei längere und zwei etwas kürzer Fäden hatte und zunächst die Kreuzknoten mit den kürzeren um die beiden langen begonnen hatte…wodurch ich recht schnell natürlich zu wenig Faden übrig hatte und nochmal aufknüpfen musste … 😉 da wäre – sofern ich da zuvor nicht selbst einen Fehler gemacht hatte- ein kleiner Hinweis ganz nett,das man hier die längeren Fäden für außen nehmen sollte 🙂
Viele Grüße!
Hi!
Thanks for the tutorial. I am about to try it but I have a very important question –
My plant is inside a pretty big pot. Should I change the length of the cords? make it a bit bigger?
Thanks!
Great tutorial, thanks! One question: how can I make it a bit smaller to accommodate a smaller pot?
Thank you! In general, you can always do the macrame shorter. also if you want to fit a smaller pot, they usually fit in a bigger size as well, but if you specifically want it a bit smaller, I would shorten the strings at the bottom of the macrame, where you just let them loose and don’t add any knots. When you leave 10cm, you can leave less!
I just made this beautiful plant hanger and it was my first macrame ever! Clear instructions and great pictures helped make this project so simple and I’m so happy with the result. Thank you
uh I’m so happy you liked it!!!
Just finished my macrame pot holder and I love it. Thanks for taking the time to add an English translation. It was really easy to follow as a first timer. Your macrame is now hanging pride-of-place in our lounge room Australia.
ooooh I’m so happy you liked it!!! 🙂 So cool that you tried it and it worked :)))
Hi!
Bin eben auf deine Anleitung gestoßen. Mega schön und voll gut beschrieben. Danke schonmal dafür. Würde den Wellenknoten gerne für ein Schaukelseil machen. Wie dick sind denn deine “Bänder” beim Wellenknoten geworden? Du hast ja das 3 mm Seil genommen, oder?
Vielen Dank für eine kurze Info.
LG Tine
Vielen lieben Dank! Ich glaube, meine Wellenknoten sind circa 1-Finger-Breit geworden. Von der Dicke her nicht viel, vielleicht 5mm? Ich bin mir unsicher, bin gerade unterwegs und kann es nicht nachmessen!
Is there a specific size pot you used for the project?
hm I think from 15-30cm it should fit!!
Amazing! Nice macrame plant hanger making.
Why do I always end up with two short cords? I no something I am doing is wrong but can’ t figure it out. ekosi
That’s normal! As long as you have enough cord left to finish the macrame! The rest you cut off 🙂
Thank you so much! I’ve never done macrame before and wanted to find a first project…well this was perfect! Your links to knot instructions were so helpful and it turned out GREAT!! I think I might just make another, it’s so cute!
amazing!!! I am happy it worked :)))
I made a few with different versions they came out nice, detections were easy to follow
I just finished my plant hanger today and I am so proud! It turned out really well and it’s going to hang in me and my boyfriends new apartment. Thank you, for the tutorial, I am for sure gonna make 1 or two more of these 😀
Sooooo happy you like it!!!
Hi There – This is beautiful! Can you tell me the finished size of this piece using the cord lengths you suggested? Just want to make sure the length is correct for the space I’m putting it!
Great job I really like this one ! You may have one already and I could have missed it but a video of this particular one would be of great help for those like me who understand directions better by seeing it be done instead of reading it..
This is a very pretty piece i only have 1 TINY suggestion & that is when you take photos of a light colored piece it would show it off so much better if it was against a darker back ground ie: darker sheet, towel etc. Other then that its a perfect tutorial
Dona C.
Love the outcome of this plant hanger! Your instructions are super thorough and easy to follow. Thank you 🙂
Hi. Thank you for sharing this tutorial with us. I am making a Xmas present and already got a pot that is smaller than the one in the picture. Do I need to do something different having a smaller pot or it will fit fine? thanks.
How much smaller is it? Usually it should be fine…
How much cord should I add if I’m have 4mm cord? Would it be bigger or smaller? Maybe I should use less rope?1. Help! 🙂
I think it should be fine…it will be a bit shorter, but not much I think, but I didn’t try it, sorry!! Maybe add 10 cm more just to be sure?
Hi! I’ve never done macrame before but I really like this design and I need somewhere to display some seasonal things. My problem is that for the contents I have, I may need a more spherical bowl with a 10 in diameter. How could I adapt the pattern to make it fit? (Sorry if my terminology is off, I’m a crocheter)
How long in inches are the cords? 13 inches seem to short?
5.4m is about 212 inches or just over 17ft.
I just finished making this plant hanger; it’s very nice! It was easy to do, and the instructions that you gave were very clear. I have a large spider plant, so it was kind of a tight fit, but once I got the plant centered and arranged the leaves, it was fine. Thank you!
Thanks for the pattern and the links to the knots. It was easy to follow. The only difficulty I had was using a ring at top (rather than creating my own using string) meant the connection was different. Still worked out okay though 🙂
You don’t mention swapping the working cords and fillers after each section??? This makes the ends even when finished.
where would you swap them exactly? I never got that to work.
This was soooo much fun to make! Thank you for your easy instructions & the links to knot tutorials. My sister & cousin want me to make them some as well. Can’t wait to start! Thank you!
happy to read that 🙂
I love how easy to follow your tutorial has been. I have a hanging pot with 3 pre-drilled holes for the cording. Your other pot hanging in the background appears to have 3 wrapped cords coming down from the hanger. Please, please give a tutorial on that one also. I need 3 major wrapped cords coming down and not 4. Every tutorial I find has 4 coming down. I think I can follow you with no problem. Thanks….
First time trying Macrame and it turned out amazing! Thank you for the easy to follow instructions. I am excited to make more as presents !
Hi! I plan to try my first macramé with your tutorial! The explanations are perfect!
Just wandering about the size. You say I would end up with a 1,4m plant holder. Do the measurement includes the fringes at the end of it ou the 1,4m is from the hook to the bottom of the pot?
Thanks!
Liebe Mia,
ich hab deine Anleitung zu den Macrames bei Pinterest entdeckt und dann direkt ausbrobiert. Das ist nun schon ein paar Monate her und inzwischen bin ich ein absoluter Fan. Deine Anleitung war die perfekte Grundlage zum Einstieg und es macht mir großen Spaß meine eigenen Varationen herzustellen und zu verschenken. Großes Dankeschön an dich!
Liebe Grüße,
Lena
Oh das freut mich, vielen lieben Dank!!!
Thank you for the easy instructions. First macramé completed and it looks like the picture!!
Hey just a question, I made this macrame plant hanger and I don’t understand why by the last square knots my rope is so short I barely made them. So now I have three strings going to the last big knot instead all four. And then I have a lot of string hanging down. Did I do something wrong? Cuz I followed all measurements and know how to do the knots. Everything else seems to look the same. Did u cut the rope at the end to be equal?
In the end the ropes were different sizes and I cut them to the same length but I still had enough length to finish the square knots. Maybe one rope was attached asymmetrically, maybe you didn’t fold them in perfect halves? Hard to say from here 🙂 Maybe also a mistake in measuring?
Hi, Thank you for the great tutorial. I am wondering about doing this with a group ladies for a fun project where we can all go home with something we created. Can you tell me approximately how long this would take to make for a bunch of complete beginner?
Thanks so much,
Wilhelmina
hey, good question! It took me quite a while but if you cut all the cords beforehand, it should go quick, maybe 2-3 hours? But measuring and cutting beforehand takes a while as well as practicing the knots for the first time. Maybe I would recommend the wallhanging!
Thank you! I am really happy with how mine turned out. I made the mistake of making the knots too lose, and then cutting the remaining string, and then going back to tighten everything which resulted in strings that are too short. But I ended up cutting my hanging thread and then brushing the ends out, and it looks quite nice.
I got a 16cm pot and I ordered the exact macrame thread your recommended. Here is my result: https://ibb.co/YXJG3yg.
Great Article! I find it very useful for beginers like me. I’m new to Macrame hangers and this article is very detailed in explaining all the process. But for those of you who don’t want to go through all the process of making it yourself. You can check out this website that offers macrame hangers at a very low cost.
link: https://www.digfordeals.com/products/4-pack-macram-plant-hangers
What do you do if you’re running out of string ? The pieces used to do the spiral knot are now so short
it should still be long enough if you measured it right, otherwise you have to make it shorter than planned!
Thanks for the easy to follow pattern!! It turned out better than I was expecting. I needed a pattern to make a Christmas gift for my friend. She really wants one. I used to make necklaces when I was younger so I was familiar with the knots. The hardest part of lining all the sections up with all the spaces, but that’s were we can find beauty in imperfection.
Hi Mia,
I just bought a booked called “macrame” by Catherine Duval on Amazon.ca and it contains your pattern exactly word for word and picture for picture. Did you agree to have your pattern put in this book I wonder?
https://www.amazon.ca/Macram%C3%A8-complete-Beginners-Advanced-illustrated-ebook/dp/B07Z3Y3V3W/ref=sr_1_1?keywords=macrame+catherine+duval&qid=1576372623&sr=8-1
crazy, thank you for writing me! No, it was not approved of course, I reported the issue with amazon. Thank you so much, it was definitely copyright infringement. Thank you again for writing me!
Hello! This pattern seems so nice and I want to do it but my pot is bigger! I’m just wondering if and what I should modify. My pot is 10 inches (25.5cm) in diameter and 6 inches (15cm) tall! Thank you very much.
Hello! I just tried to make a post but I’m not sure if it worked! I want to make this but I’m not sure it’s big enough for my plant. The pot I have is 10 inches (25.5cm) in diameter and 6 inches (15cm) tall. Do I need to do anything differently than this pattern? Thank you so much!
you can make the lowest part a bit longer, you can always undo it if the pot doesnt fit 🙂 And add 10 more centimeters to the cords 🙂
Hi Mia,
Thank you for the amazing tutorial. I loved making my first plant hanger.
Will surely check out others.
I had so much fun making this! Thank you for the instructions!
After I complete the first step, I almost run out of two of the strings… This means I won’t be able to do the rest of the pattern. Please help!
In one group knot a 25 cm long section with spiral stich (this is a variant of the square knot, see above). This it repeated for the other 3 groups, will ensure that the pattern is the same length everywhere. (STRING GETS SHORT AFTER THIS FIRST PATTERN)
I just finished making this! Thank you, this was my first attempt at macrame and now i’m obsessed:) This was a fun and easy project….YAY
Thank you for your very thorough tutorial. I am unfortunaly artistically challenged so I cannot figure out my own Macramé plant holder design without wrecking it . So I will instead use your tutorial until I can master the knots and possibly be a good designer of plant holders one day . Thanks again ..
What is the finished length?
Can’t wait to try it! What lenght of cord will you use for a 3-5 inch pot and to make it a little less long? Thanks 🙂
I used to do a lot of macrame back in the 70’s when I was a young teen, mostly plant hangers. I saw this and I want to do it again, as I love plants and have many. I don’t remember how to do any of the knots, but I’m hoping it will come back to me with ease. Your plant hangers are Beautiful! I’m excited to get my supplies and get started! Thank you for my first lesson. Brenda
I love this plant holder and want to make it but I need it smaller then what yours turns out to be. I was hoping for mine to be about 0.75 meters long and fit a plant holder that is smaller than 15cm in diameter, is there a way to adjust the amount of cord needed to fit my needs?
Thanks!
Hello, I have a ring that I want to use rather that the string made one- how would you begin if you were using a ring instead? Love the pattern!!
Please also include measurements in inches and feet please
Thank you for this! Mine turned out beautiful, mom loves it!
Gefunden und für gut befunden. Ich bin fast fertig mit dem Makramee und bis auf ein zwei Stellen hat es wirklich gut geklappt. (lag aber nicht an der Anleitung sondern an meinen zwei linken Händen die ich teilzeit habe)
Und das Ergebnis kann sich wirklich sehen lassen!
Super Anleitung! Hab ich auch schon an ein paar freunde weiter geschickt! Weil ich ewig gesucht habe bis ich, zum Glück, hierdrauf gestoßen bin!
Grüße
Thank you for great tutorial, like you mentioned, it’s not easy to find a good one on the web. What I particularly love is the various macrame methods used especially the loop. I tried it and for the bottom, I wanted a fuller set of strings and improvised using another set of strings folded in half and secured using the gathering knot. Turned out beautiful!
Thank you! It’s been decades since I’ve done macrame and this made it easy to produce a lovely plant hanger. Now, only 3 more to go! This gave me the information, simply linked, to add some variety to the others. You’ve given an old “flower child” a groovy isolation pastime.
I have a question. When working on the spiral, is it 25cm untied cord or 25cm of spiraled knots?
Hello,
Did you ever get an answer? I haven’t. I ran out of 2 cords after making the 25cm of spirals. Did you? How did you fix it?
Thank you for this amazing and super easy to follow tutorial! I’m super happy with my creation! Amazing!
Love to get back to makingcraft again. Where can I find plastic rings .?
This was such a wonderful tutorial!! I made the hanger and it turned out even better than I imagined. Thank you so much!!
I have just finished making this as my first macrame project. Thankyou so much for your instructions, I’m so happy with the result!
Was I supposed to do something with the 1 m piece of chord?
Waste of string..
Thank you, it worked out great. Can you tell me what size pot you used?
Hi….this tutorial is pretty helpful, one because in the beginning itself you have explained the type of knots used in this and secondly the measurements of the cord that you have given is so so so helpful for completely a newbie like me. I habe not gathered courage till now to go ahead and start it but with your awesome tutorial I will surely go ahead. Recently developed my love for macrame. Honestly I haven’t made a thing yet as gone through various tutorials but none mentioned the length of the cord to be used. For a biginner that’s thebmost important part.
Thanks once again.
Love
Beste und schönste macrame Anleitung :-)!! Habe nun meine 3. Blumenampel gemacht und finde sie einfach super toll. Alles ist prima erläutert und es schaut toll aus. Danke fürs teilen!
Super einfache und tolle Erklärung! Bin selber Anfängerin und habe es ohne größere Schwierigkeiten hinbekommen man sollte aber aufjedenfall die Knoten davor einmal testen, aber dann klappt es und sieht auch sehr schön aus.
https://backyardmash.com
Super einfache und tolle Erklärung! Bin selber Anfängerin und habe es ohne größere Schwierigkeiten hinbekommen man sollte aber aufjedenfall die Knoten davor einmal testen, aber dann klappt es und sieht auch sehr schön aus.
Just made this! It turned out wonderful and was super easy. Thanks for the tutorial!
I’ve been following your pattern above exactly. 54.meters (213 inches) of 3mm macrame cord 8 times. I created the loop as instructed. I’ve divided the 16 cords (8 folded in half) into 4 groups of 4 cords each. Then I’ve made 25 centimeters in length of left twist spiral stitch. At this point 2 of the 4 cords in each group are completely used up. How in the world do I finish your pattern with only 2 cords in each group?
Hey, I really wish I could help you but I don’t know where it went wrong. It shouldnt be used up after only 25cm…Did you use an extra 2m cord for the loop?
Very nice and clear instructions. Thank you.
Boah, was eine tolle Anleitung!
Vielen Dank! Dank Dir war mein erster Makramee-Versuch ein voller Erfolg 🙂
what did you use the 1m rope for??
Ach super! Ich habe ewig im Netz nach einer ordentlichen Anleitung für die Aufhängung gesucht. Vielen dank dafür und auch für die Anleitung der Knoten. Ich mache keine Blumenampel sondern eine Aufhängung für einen Baldachin 😉
Viele Grüße, Juli
Hey 🙂
Ich habe gerade die Ampel fertig geknüpft und war so begeistert, dass ich noch dein PDF kaufen wollte, wovon du ganz oben geschrieben hast.
Allerdings sagt mir die Seite, dass es das nicht mehr zu kaufen gibt. Gibt es noch einen anderen Weg an die Anleitung ran zu kommen?
Besten Dank!
Love this super easy plant hanger: https://www.youtube.com/watch?v=aC5oJFa2aww
There are only two holders!
Thank you for ein wirklich tolles DIY :))
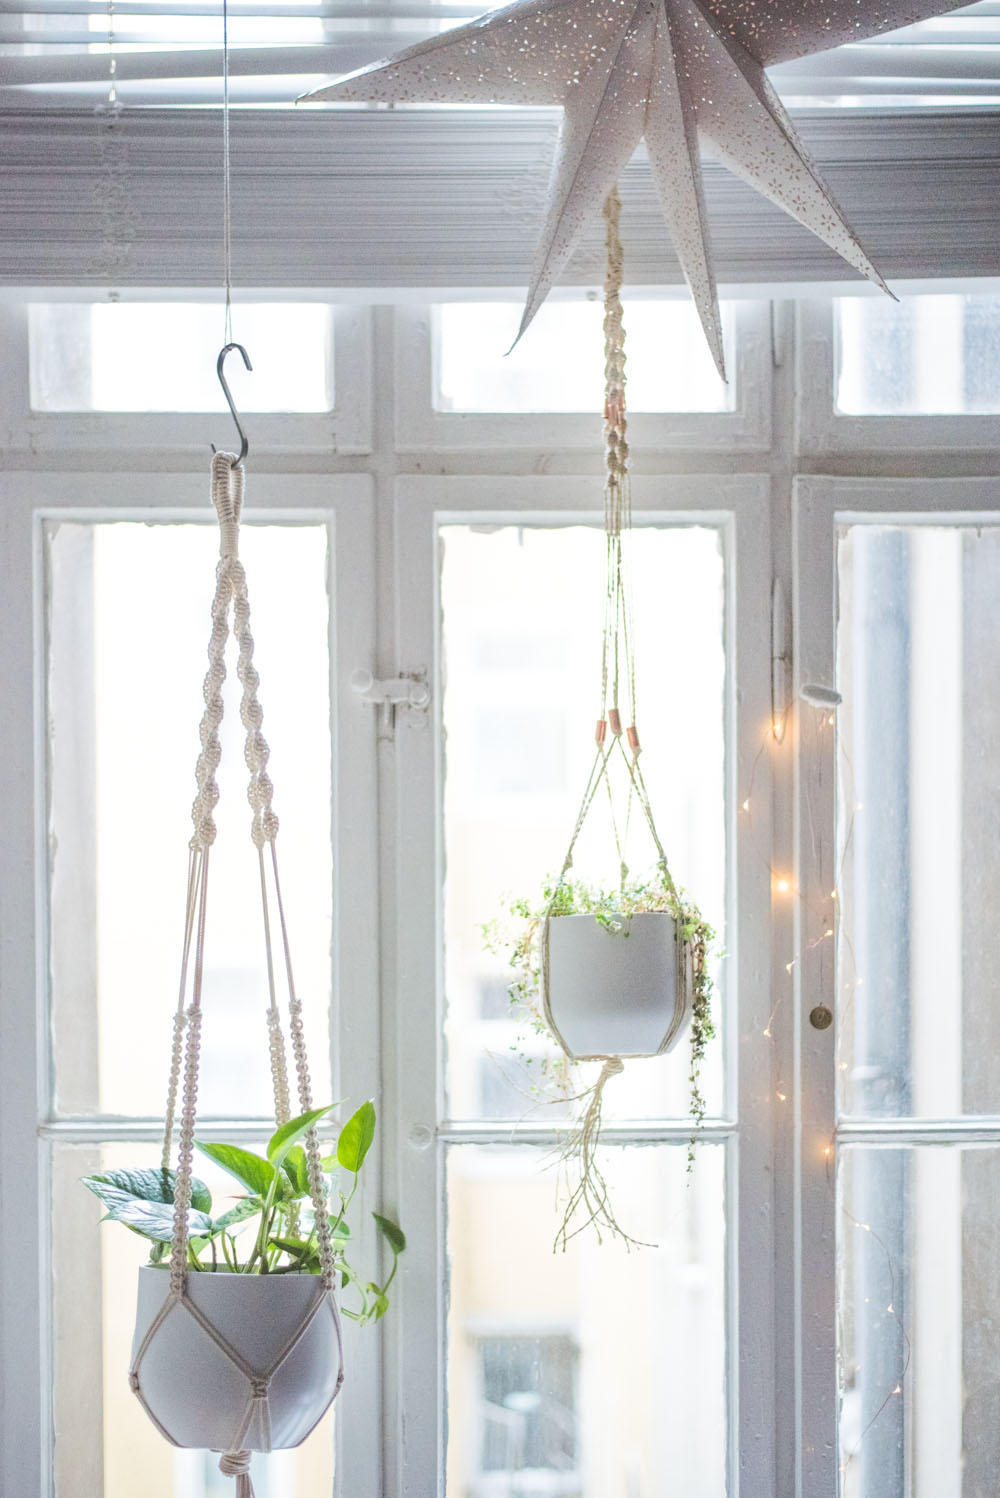
wow, das schaut mega gut aus ! probiere diese gleich mal aus 🙂 auf den bildern die rechte blumenampel – gibts dazu auch eine anleitung bzw. mit welcher schnur hast du das gemacht und was ist das rosegoldene ?
tolle erklärung !
I love your beautiful creation
I used this to make my first piece ever!!! Thank you
Thanks for the tutorial! Made my first macrame following your instructions and just finished the second one! Great tutorial for beginners.
Thank you for sharing this. It was fun to make and I love how it looks!
Thank you for the tutorial. It was my first go and I’m so pleased with the outcome!
Nice tutorial. Easy to understand. I Finished with a gathering knot instead of a normal knot. Thank you 🙂
I have never tried macrame before and I just made this today! Thank you so much for this amazing tutorial 🙂
Dankjewel voor je heldere handleiding.
Als ik dikker touw heb (5mm) moet ik dan neer of juist minder touw gebruiken?
Dankjewel voor je heldere handleiding.
Als ik dikker touw heb (5mm) moet ik dan meer of juist minder touw gebruiken?
Hab die Blumenampel gestern fertiggestellt. Sieht schick aus und war nicht sonderlich anspruchsvoll. Ich hoffe meine Schwester freut sich.
Do you have an approximate finished length on this hanger?
This was my first project and I was surprised at how nice it turned out!
Thank you! You’ve made macrame look so easy. The instructions are simple yet concise, and the pictures make it clearer still. I’m looking forward to making some of these!
THANK YOU I HAVE BEEN TRYING FOR 3 WEEKS NOW TO DO A SQARE KNOT AND I JUST GOT IT THANKN YOU VERY MUCH HAPPY HOLADAYS
Gday! How do I adjust the pattern for 4mm cord? I’m live in outback Australia and it takes ages to get in different products and I’m hoping to complete this little project for an upcoming birthday with the cord I already have. Any suggestions would be greatly appreciated!
Am I crazy or is the spiral stitch and square not the same on your tutorial? I just did the square when I wanted to do the spiral before I realized such a bummer.
Hi,
I found this pattern for Plant hanger on Pinterest, the instructions are so easy to follow. I’m a novice and so proud of my beautiful Macramé plant hanger. Thank you
hi I love this pattern , Iam I able to print it or do you sell a paper version thanks for your time