
 Deutsch
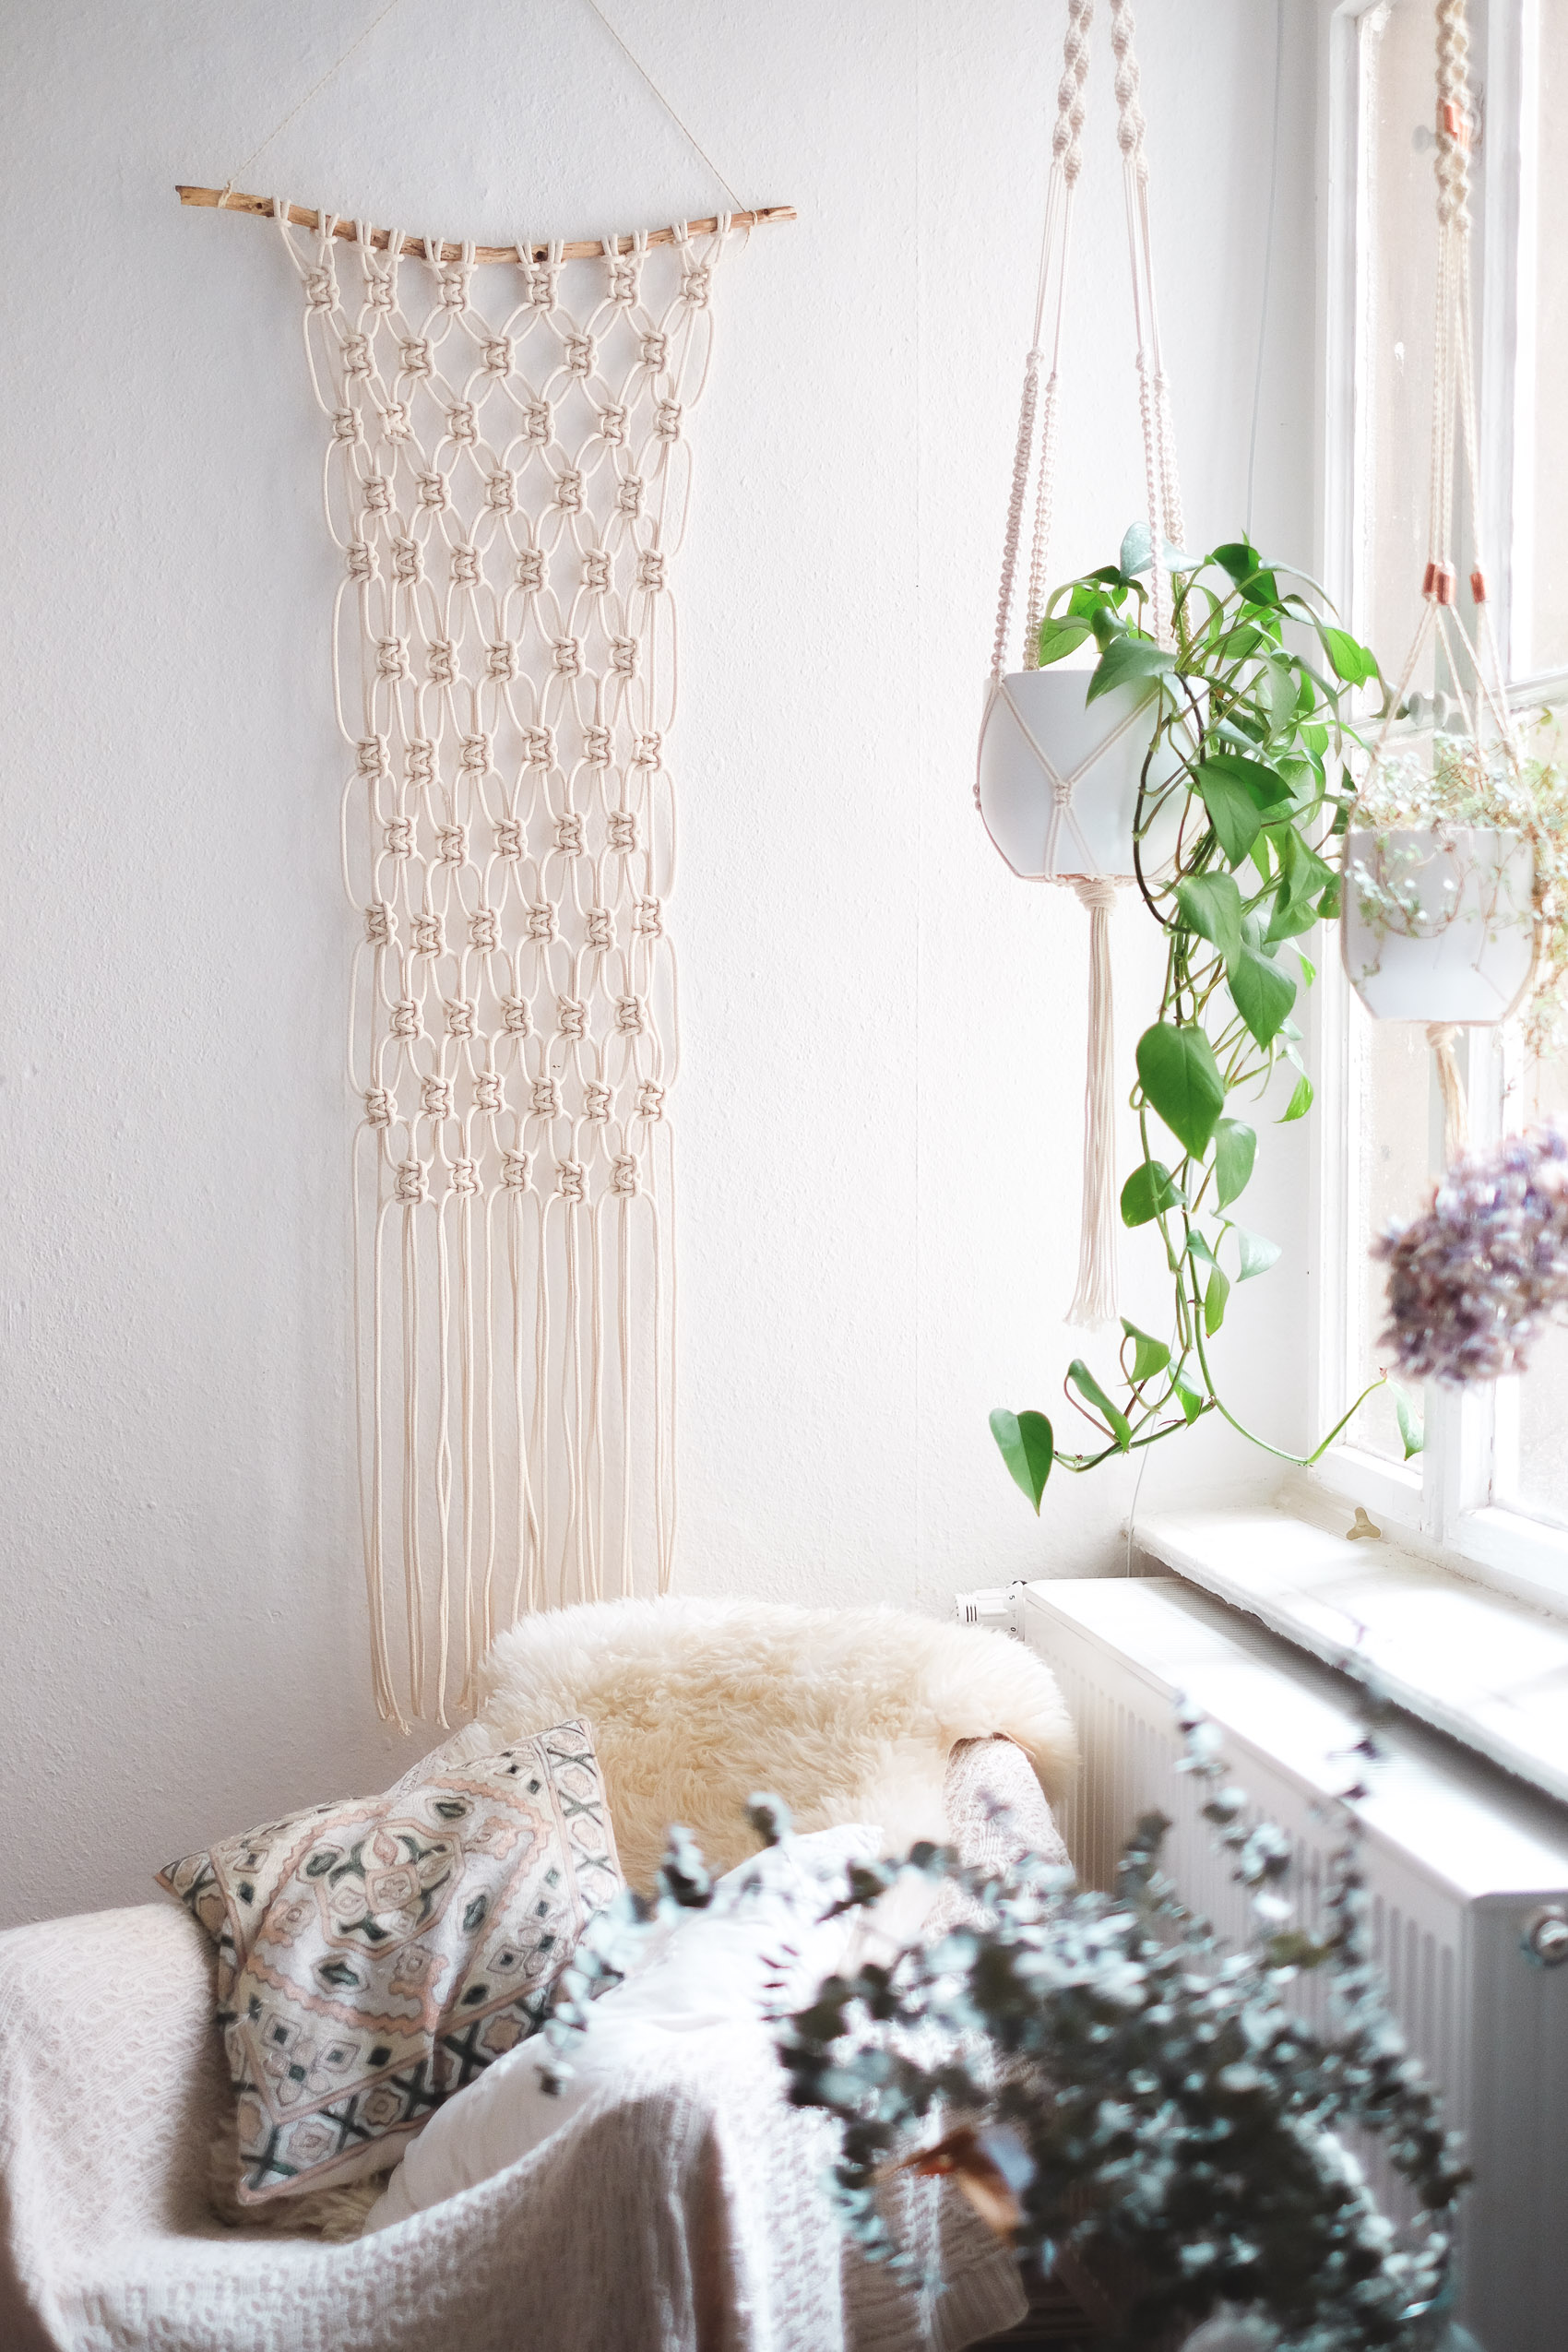
This post is also available in German (auf Deutsch)
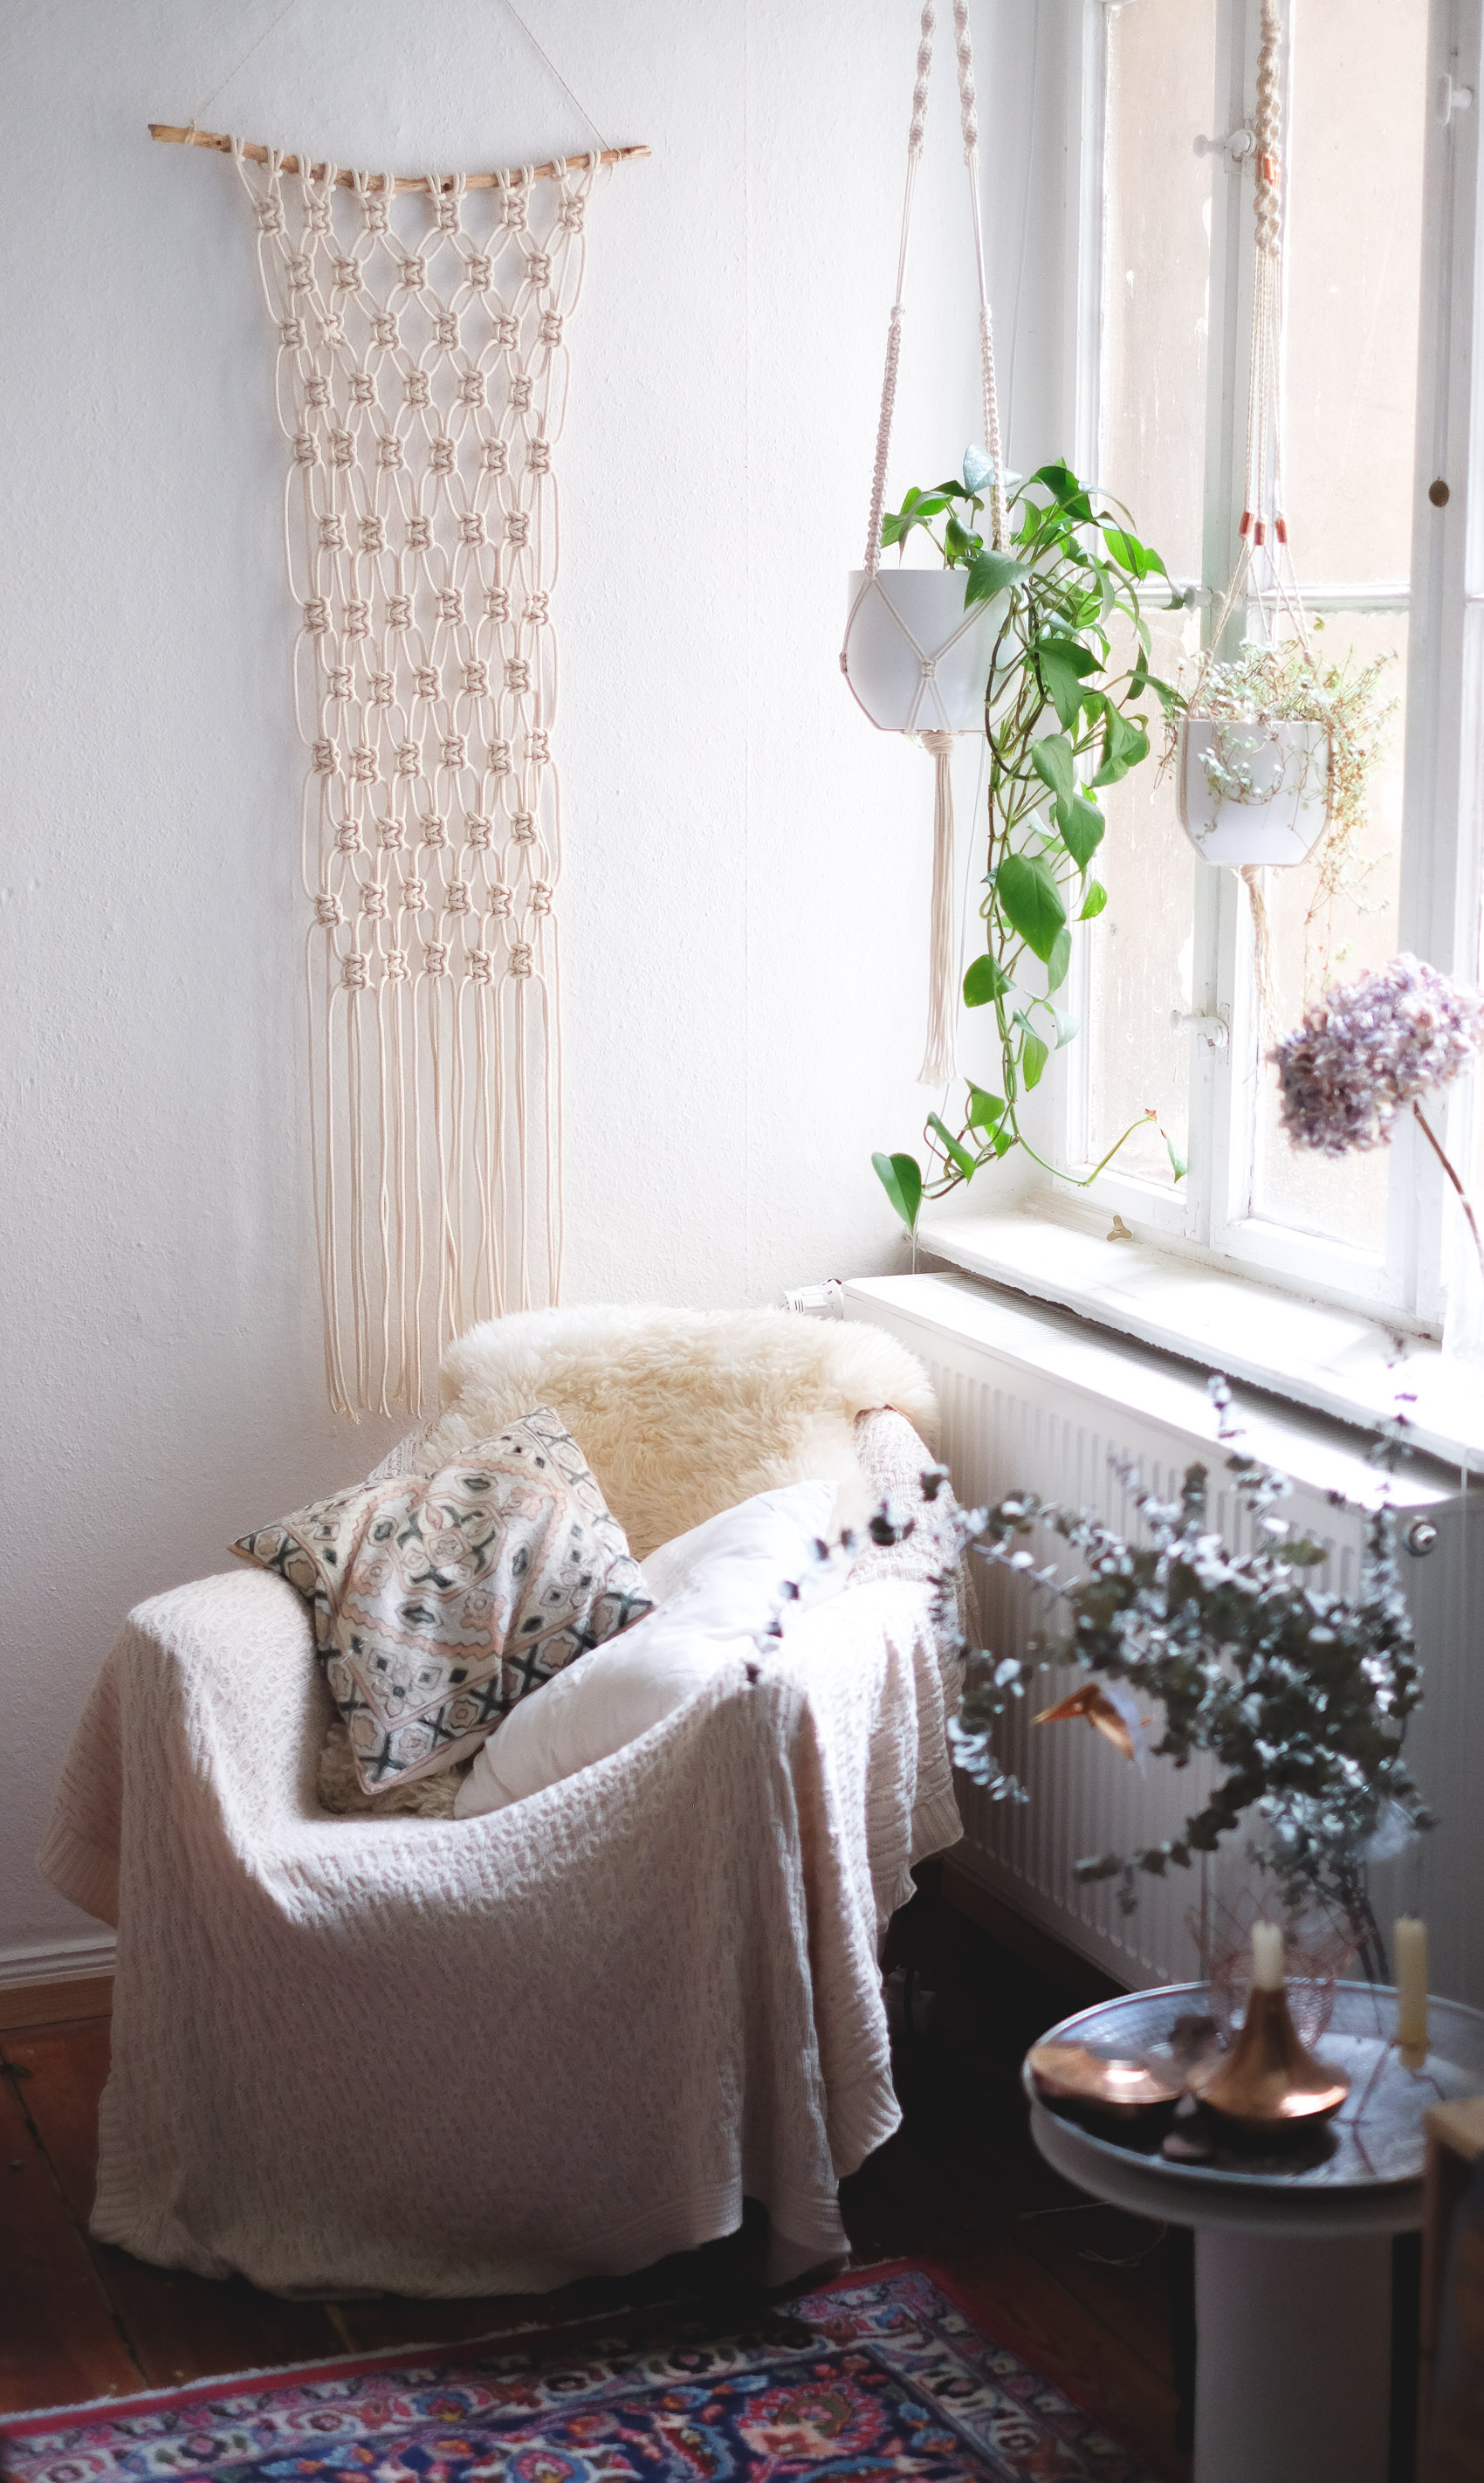
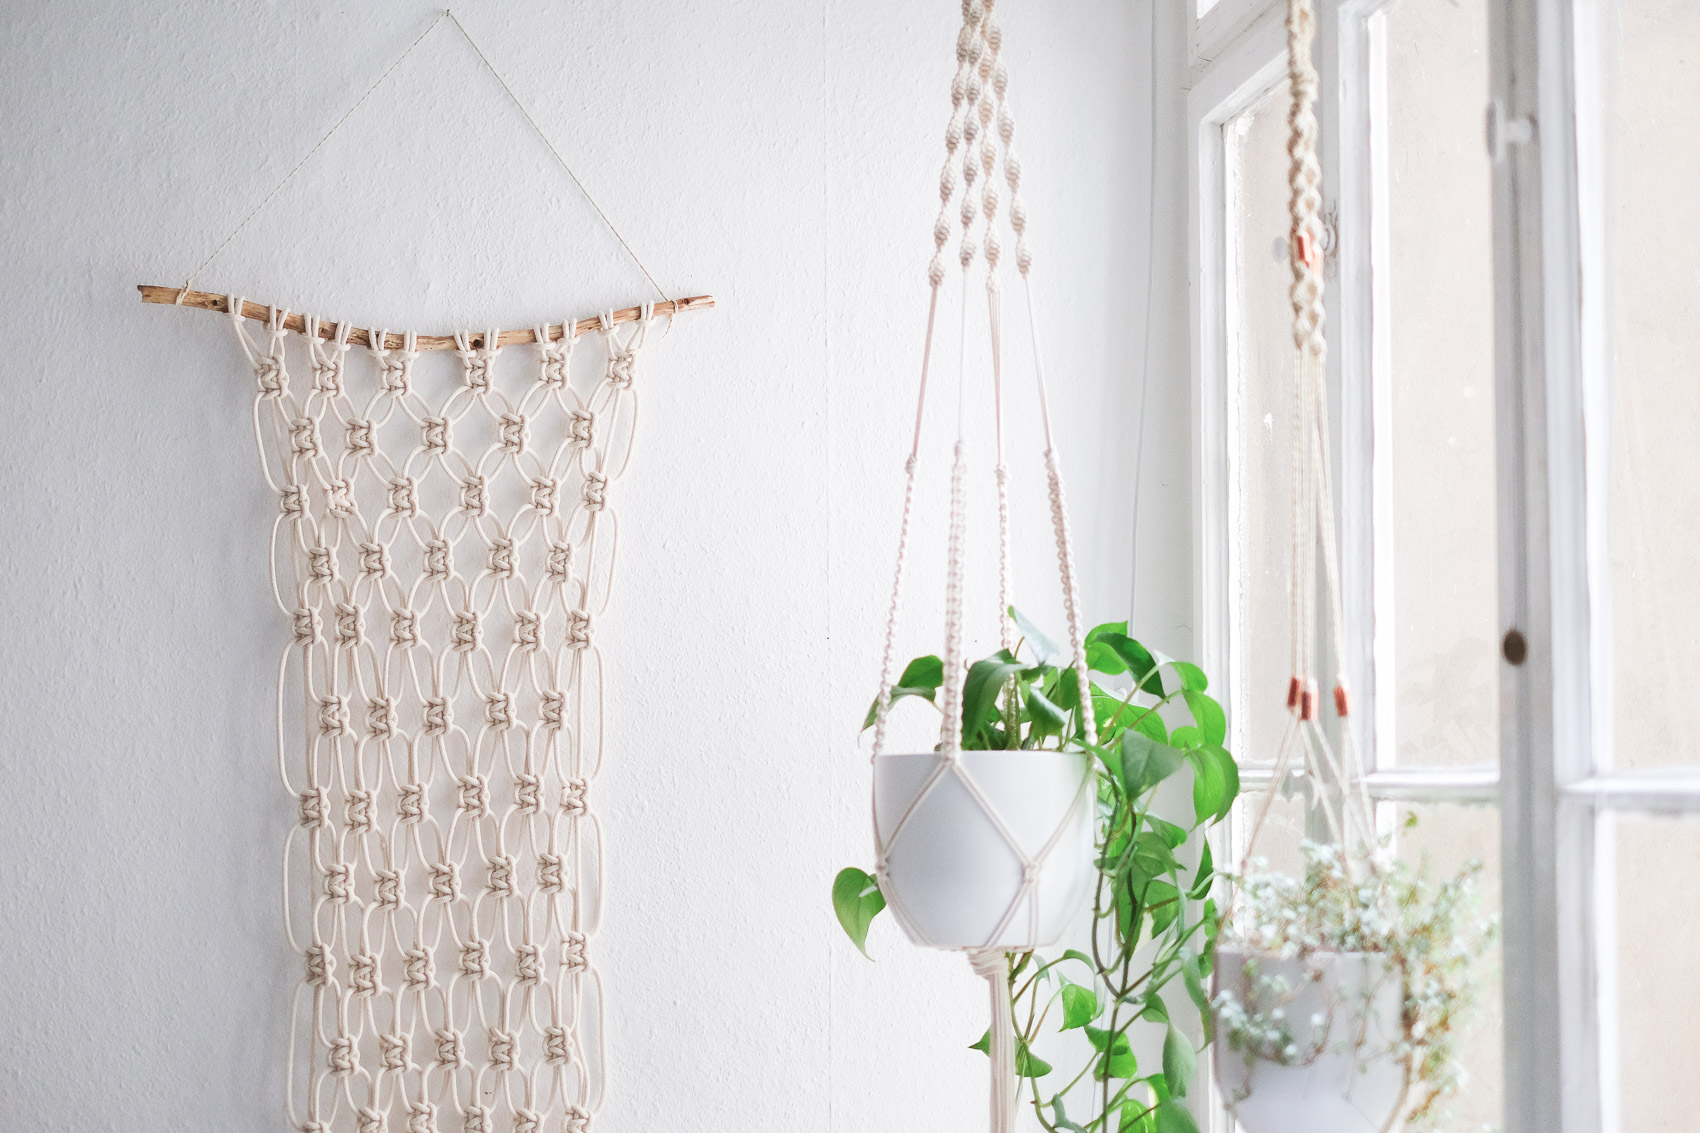
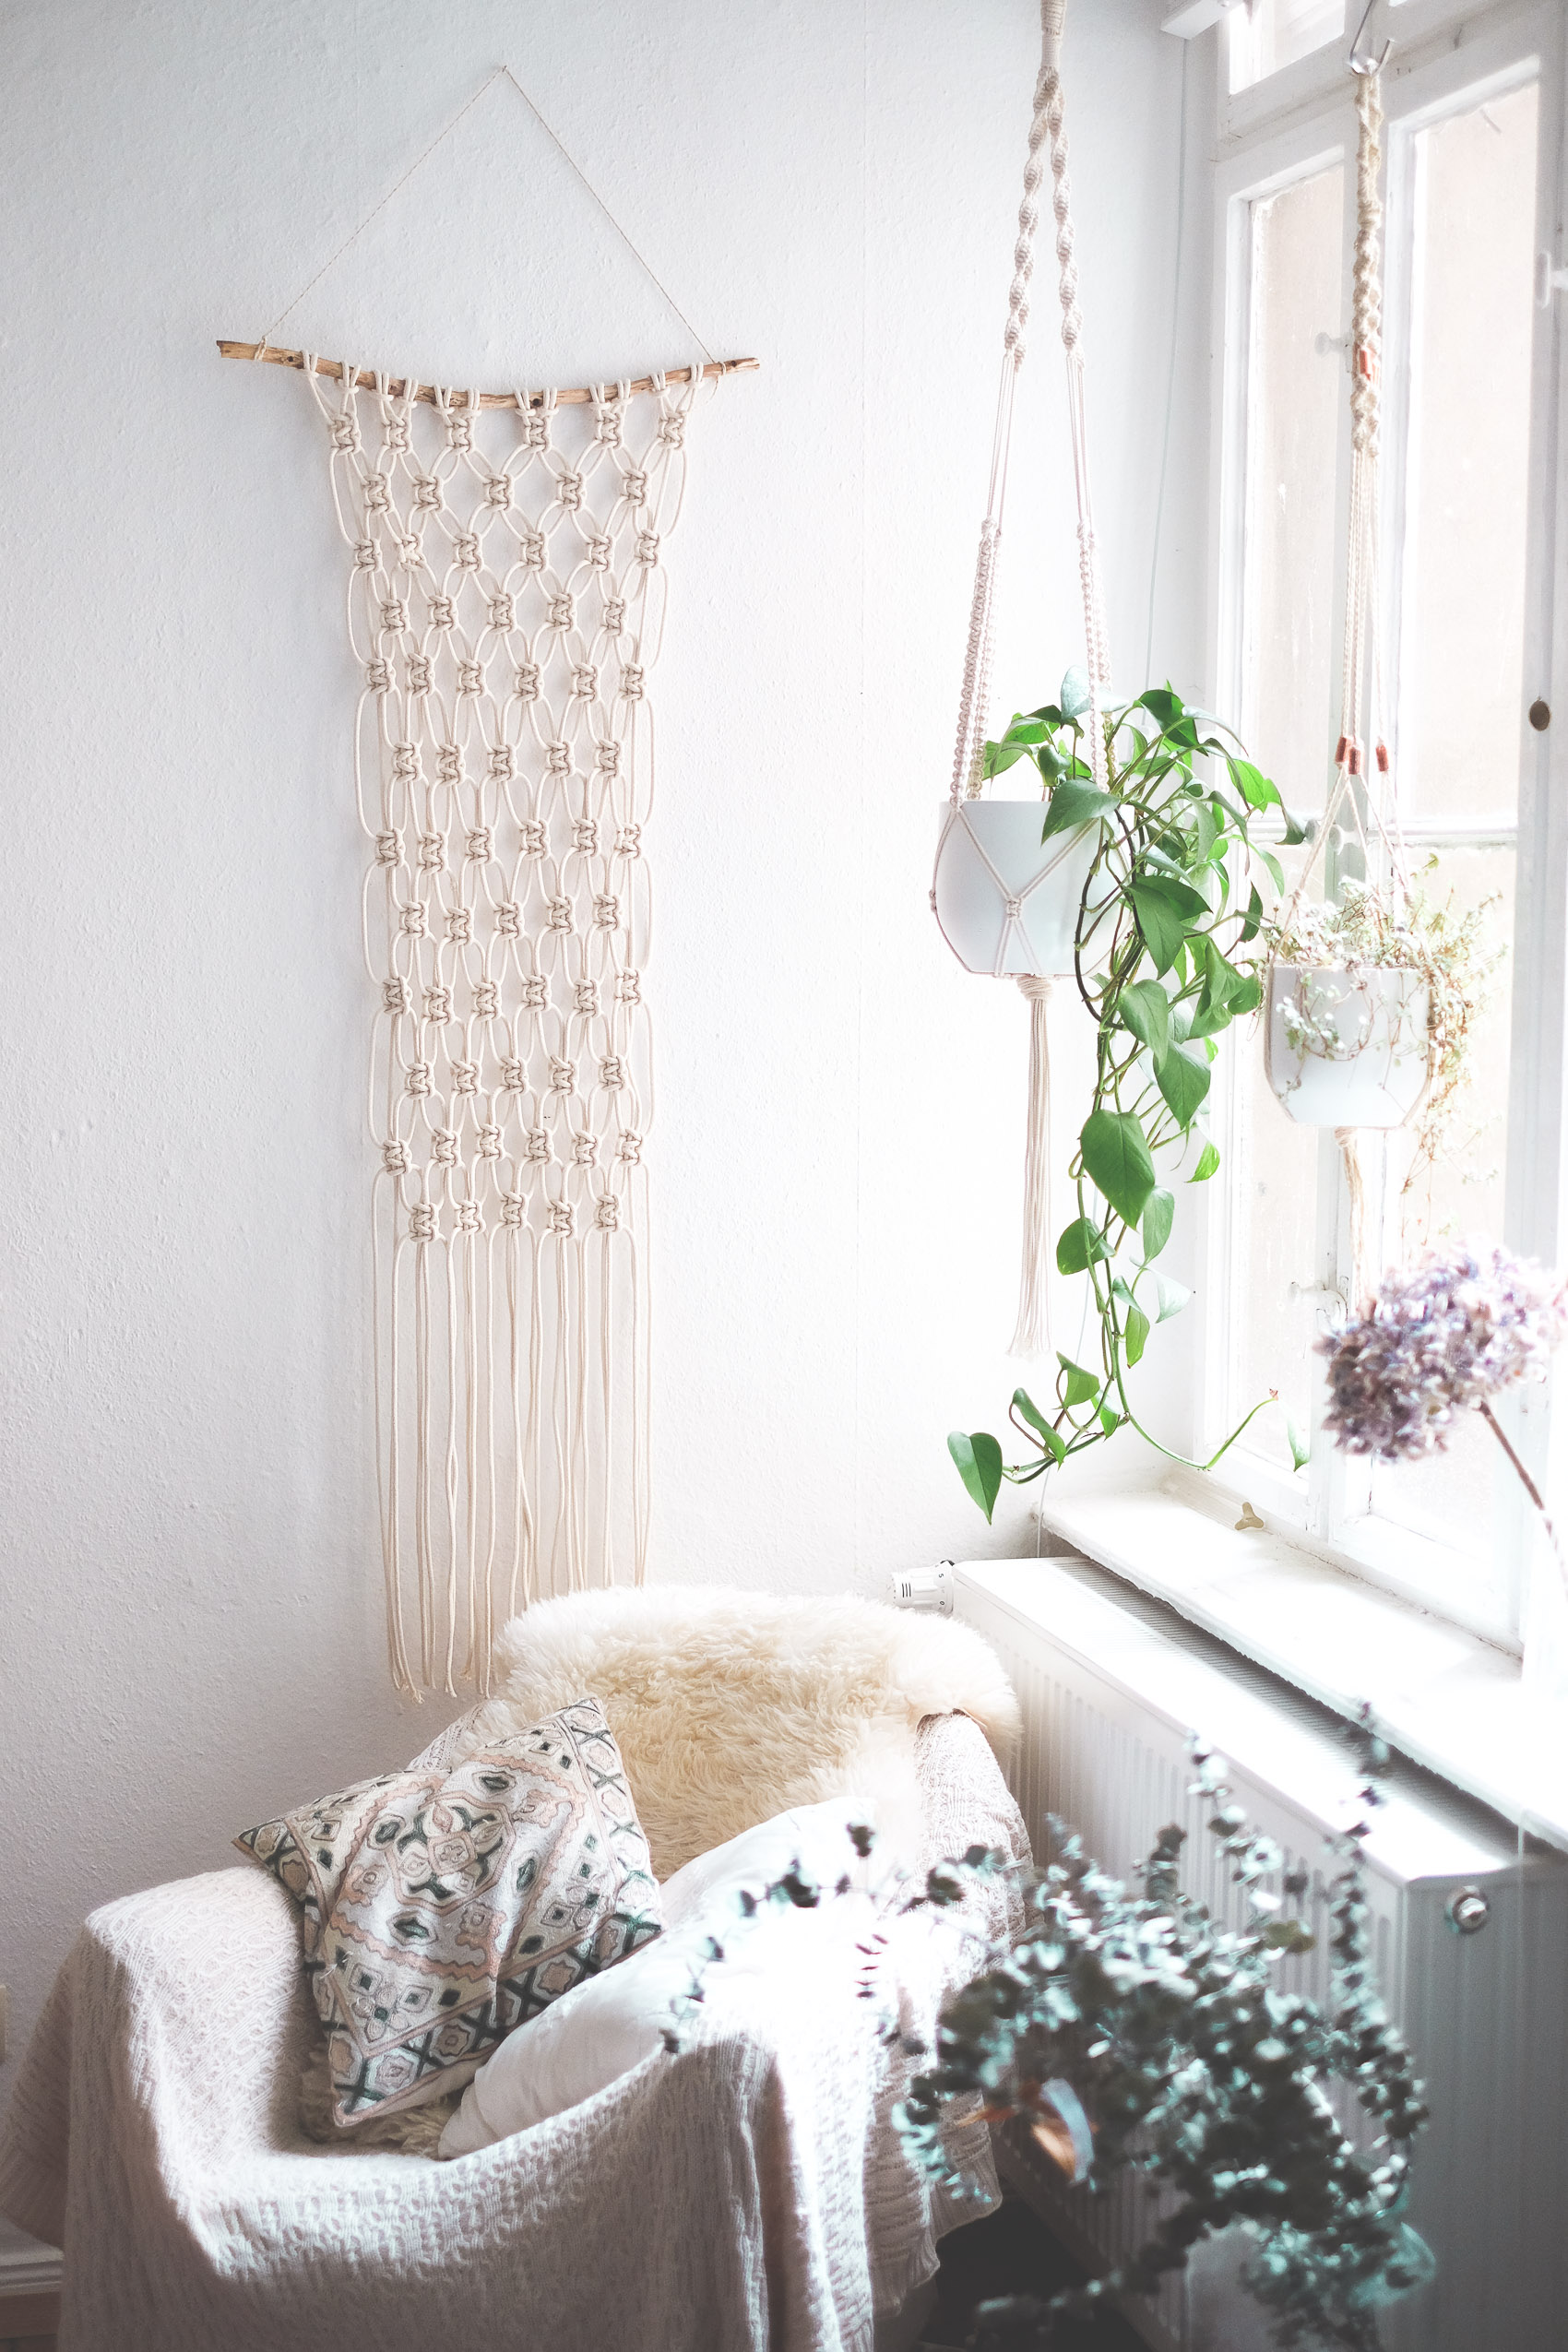
Since my last macrame tutorial was such a success (it’s still an incredibly popular article on the blog!), it was definitely overdue to share my next macrame DIY guide with you. Today I have an even easier DIY for you, because this macrame wall Hanging tutorial is especially suitable for beginners! Despite the simple pattern, the macrame still looks fancy, at least in my opinion.
Also some good news: I have created ANOTHER macramé wall hanging tutorial. This time a 15 pages detailed step by step tutorial as PDF. You can purchase it for a very cheap and fair price here (Affiliate Link/ Advertisement)! It also includes a detailed instruction how to create the four most important basics knots. Check it out:
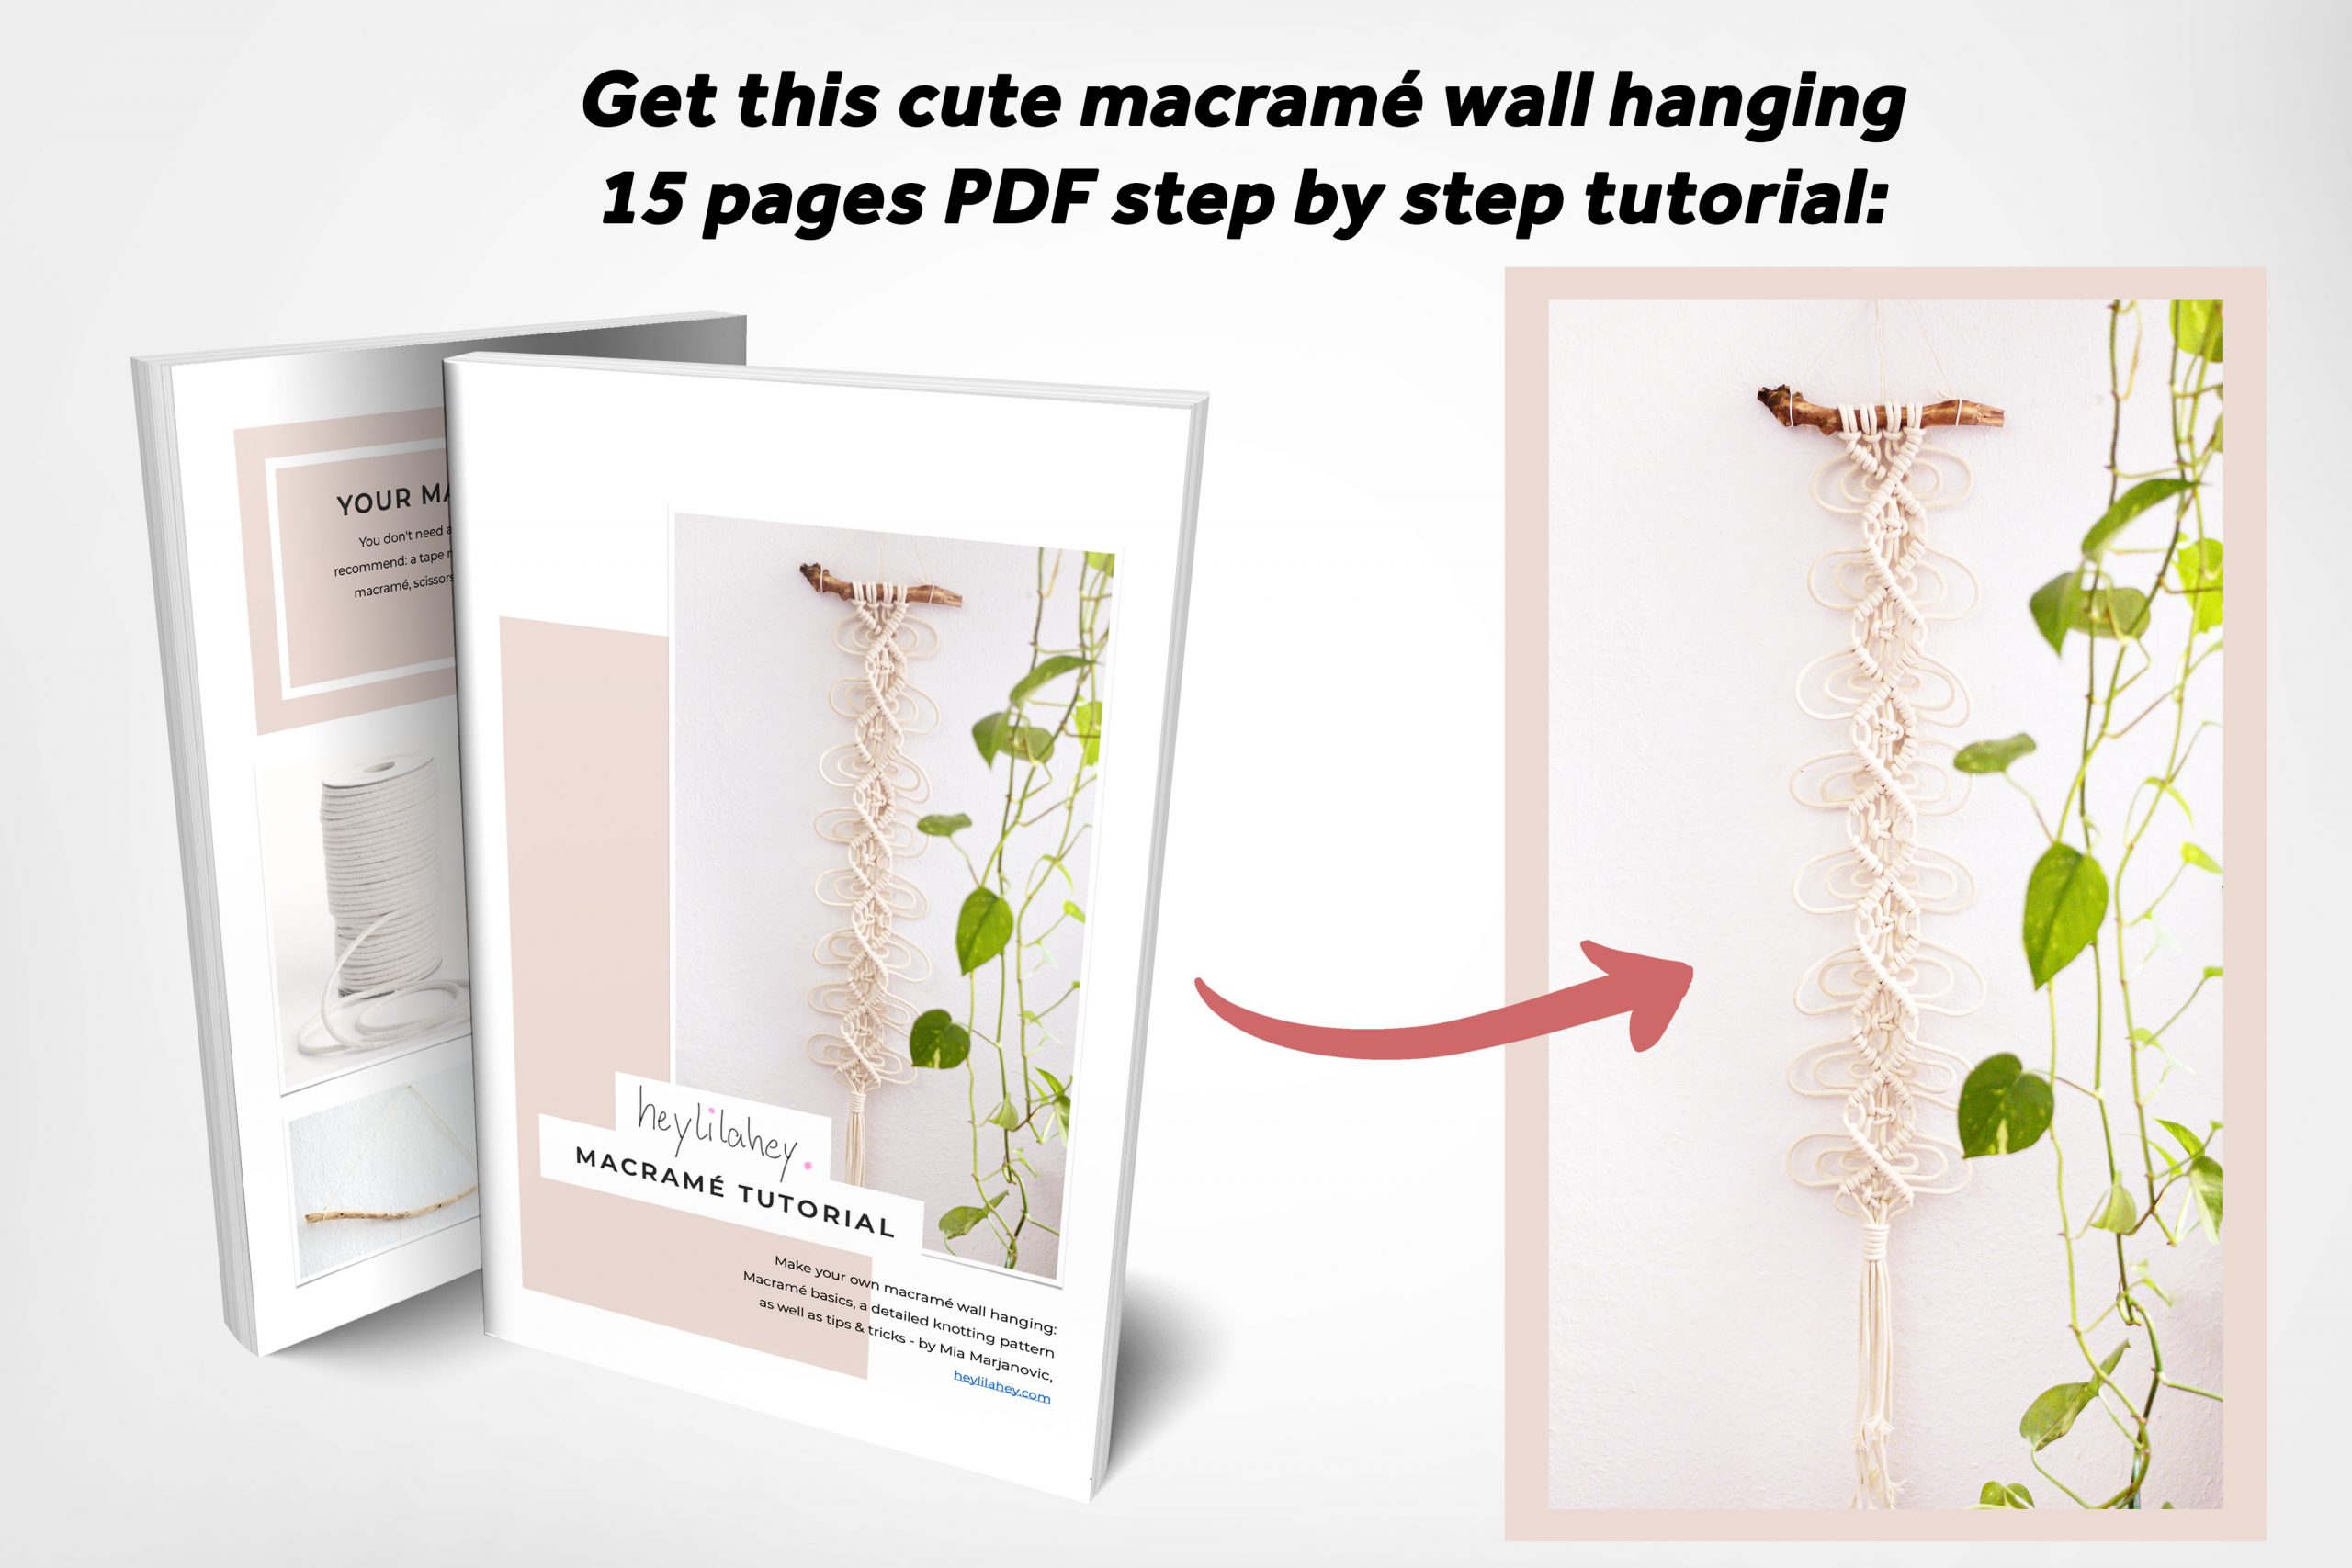
Click here to purchase it (Affiliate Link)!
Now back to the tutorial of this blogpost. The best way to follow the instructions would be to check out my video, but it is in German. That’s why I have added a written description here below!
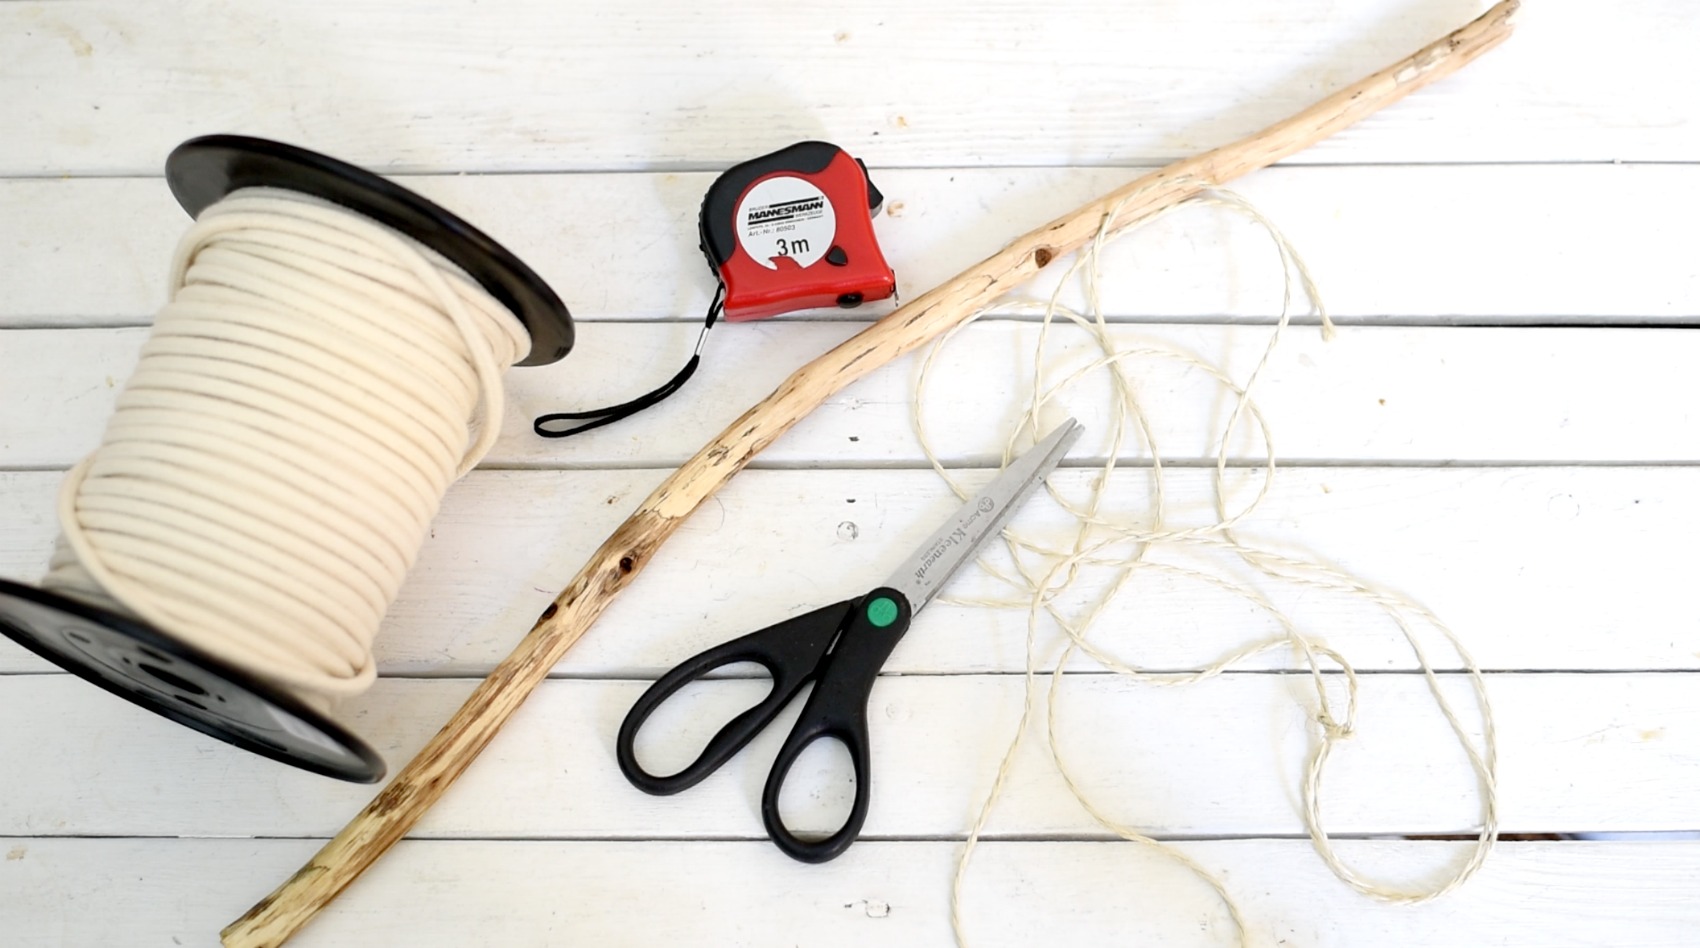
Step 1: What you need
- First, you need some kind of rope for this macrame wall hanging tutorial. I personally prefer to use cotton rope. You can get it either in the arts and crafts store, or here. Then you have to decide how thick or how fine you want the macrame. I have made a very thick and super super simple macrame for beginners with 5mm cotton rope.
- You also need a stick. Copper pipes are also very good for this macrame!
- In addition, you need a piece of string to hang your macrame
- And, most importantly, a pair of scissors
- You do not need a measuring tape, only if you want to measure the exact length
Step 2: Preparation
This step is, in my opinion, the most complex: measuring and cutting the strings. For this macrame, think about how long your DIY should be in the end and then double that number. Then double that again and then cut it. You have to do the second doubling because we hang it over the stick to make two strings. In my example one string was about 480cm long, because my macrame was supposed to be about 120cm long.
For more complicated macrames, you need about three to four times the desired length, but this pattern is very simple.
Then take the string and simply place it along the length of the next string. Cut 12 strings – less or more is of course ok, but it’s important that you have an even number.
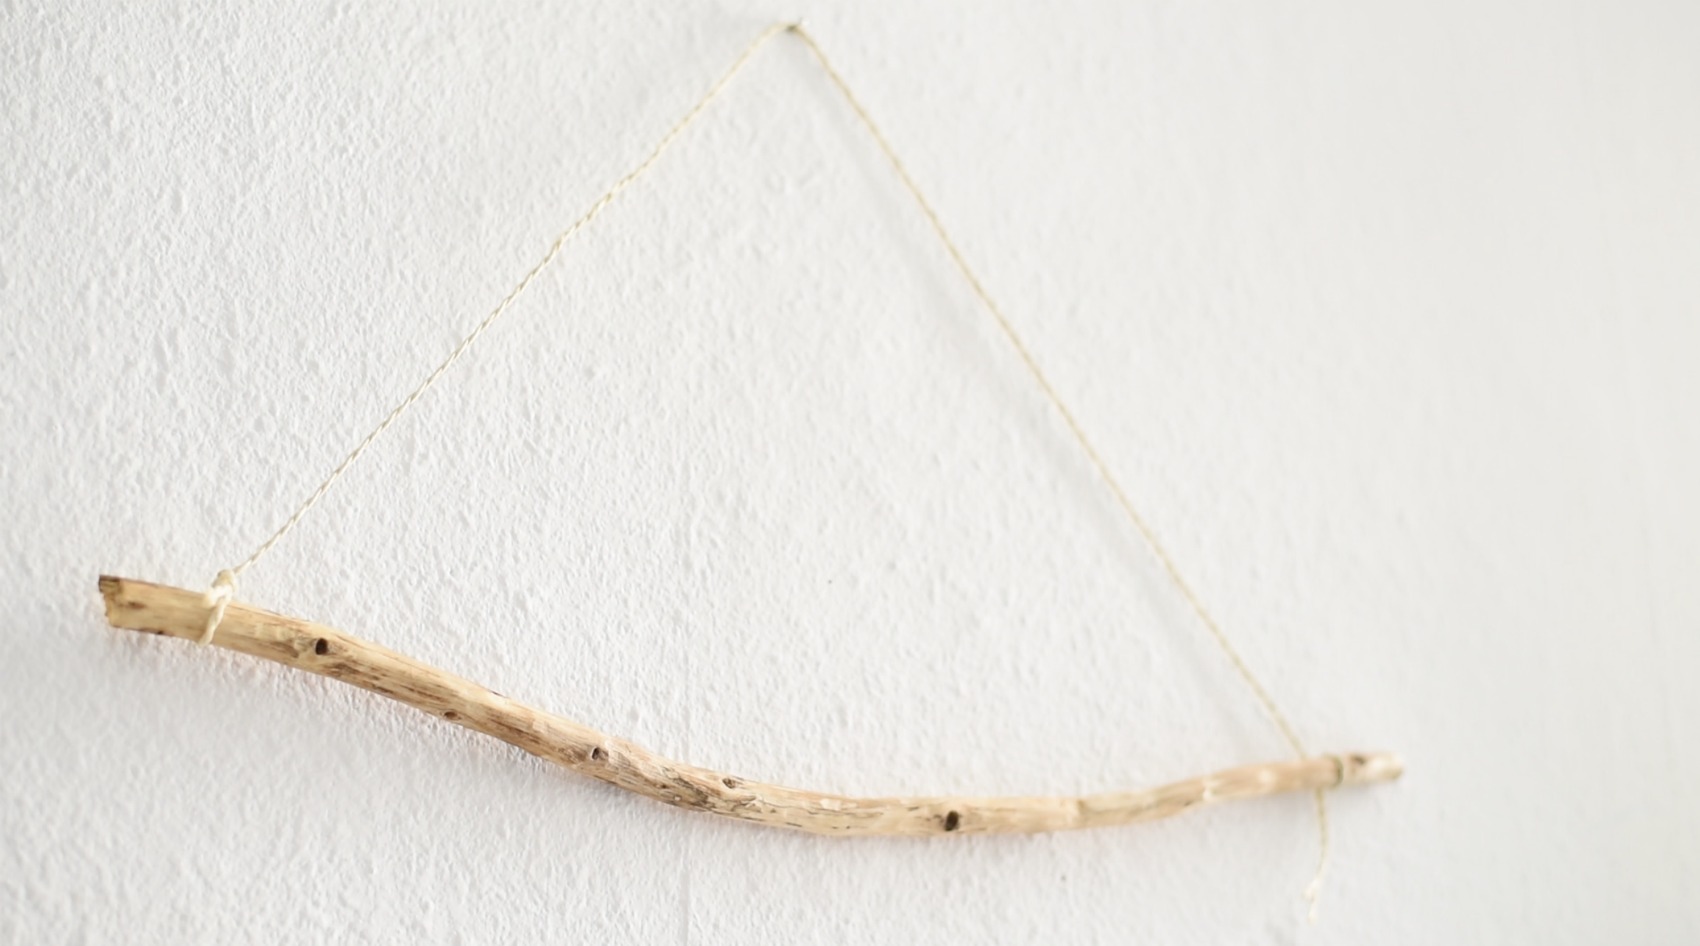
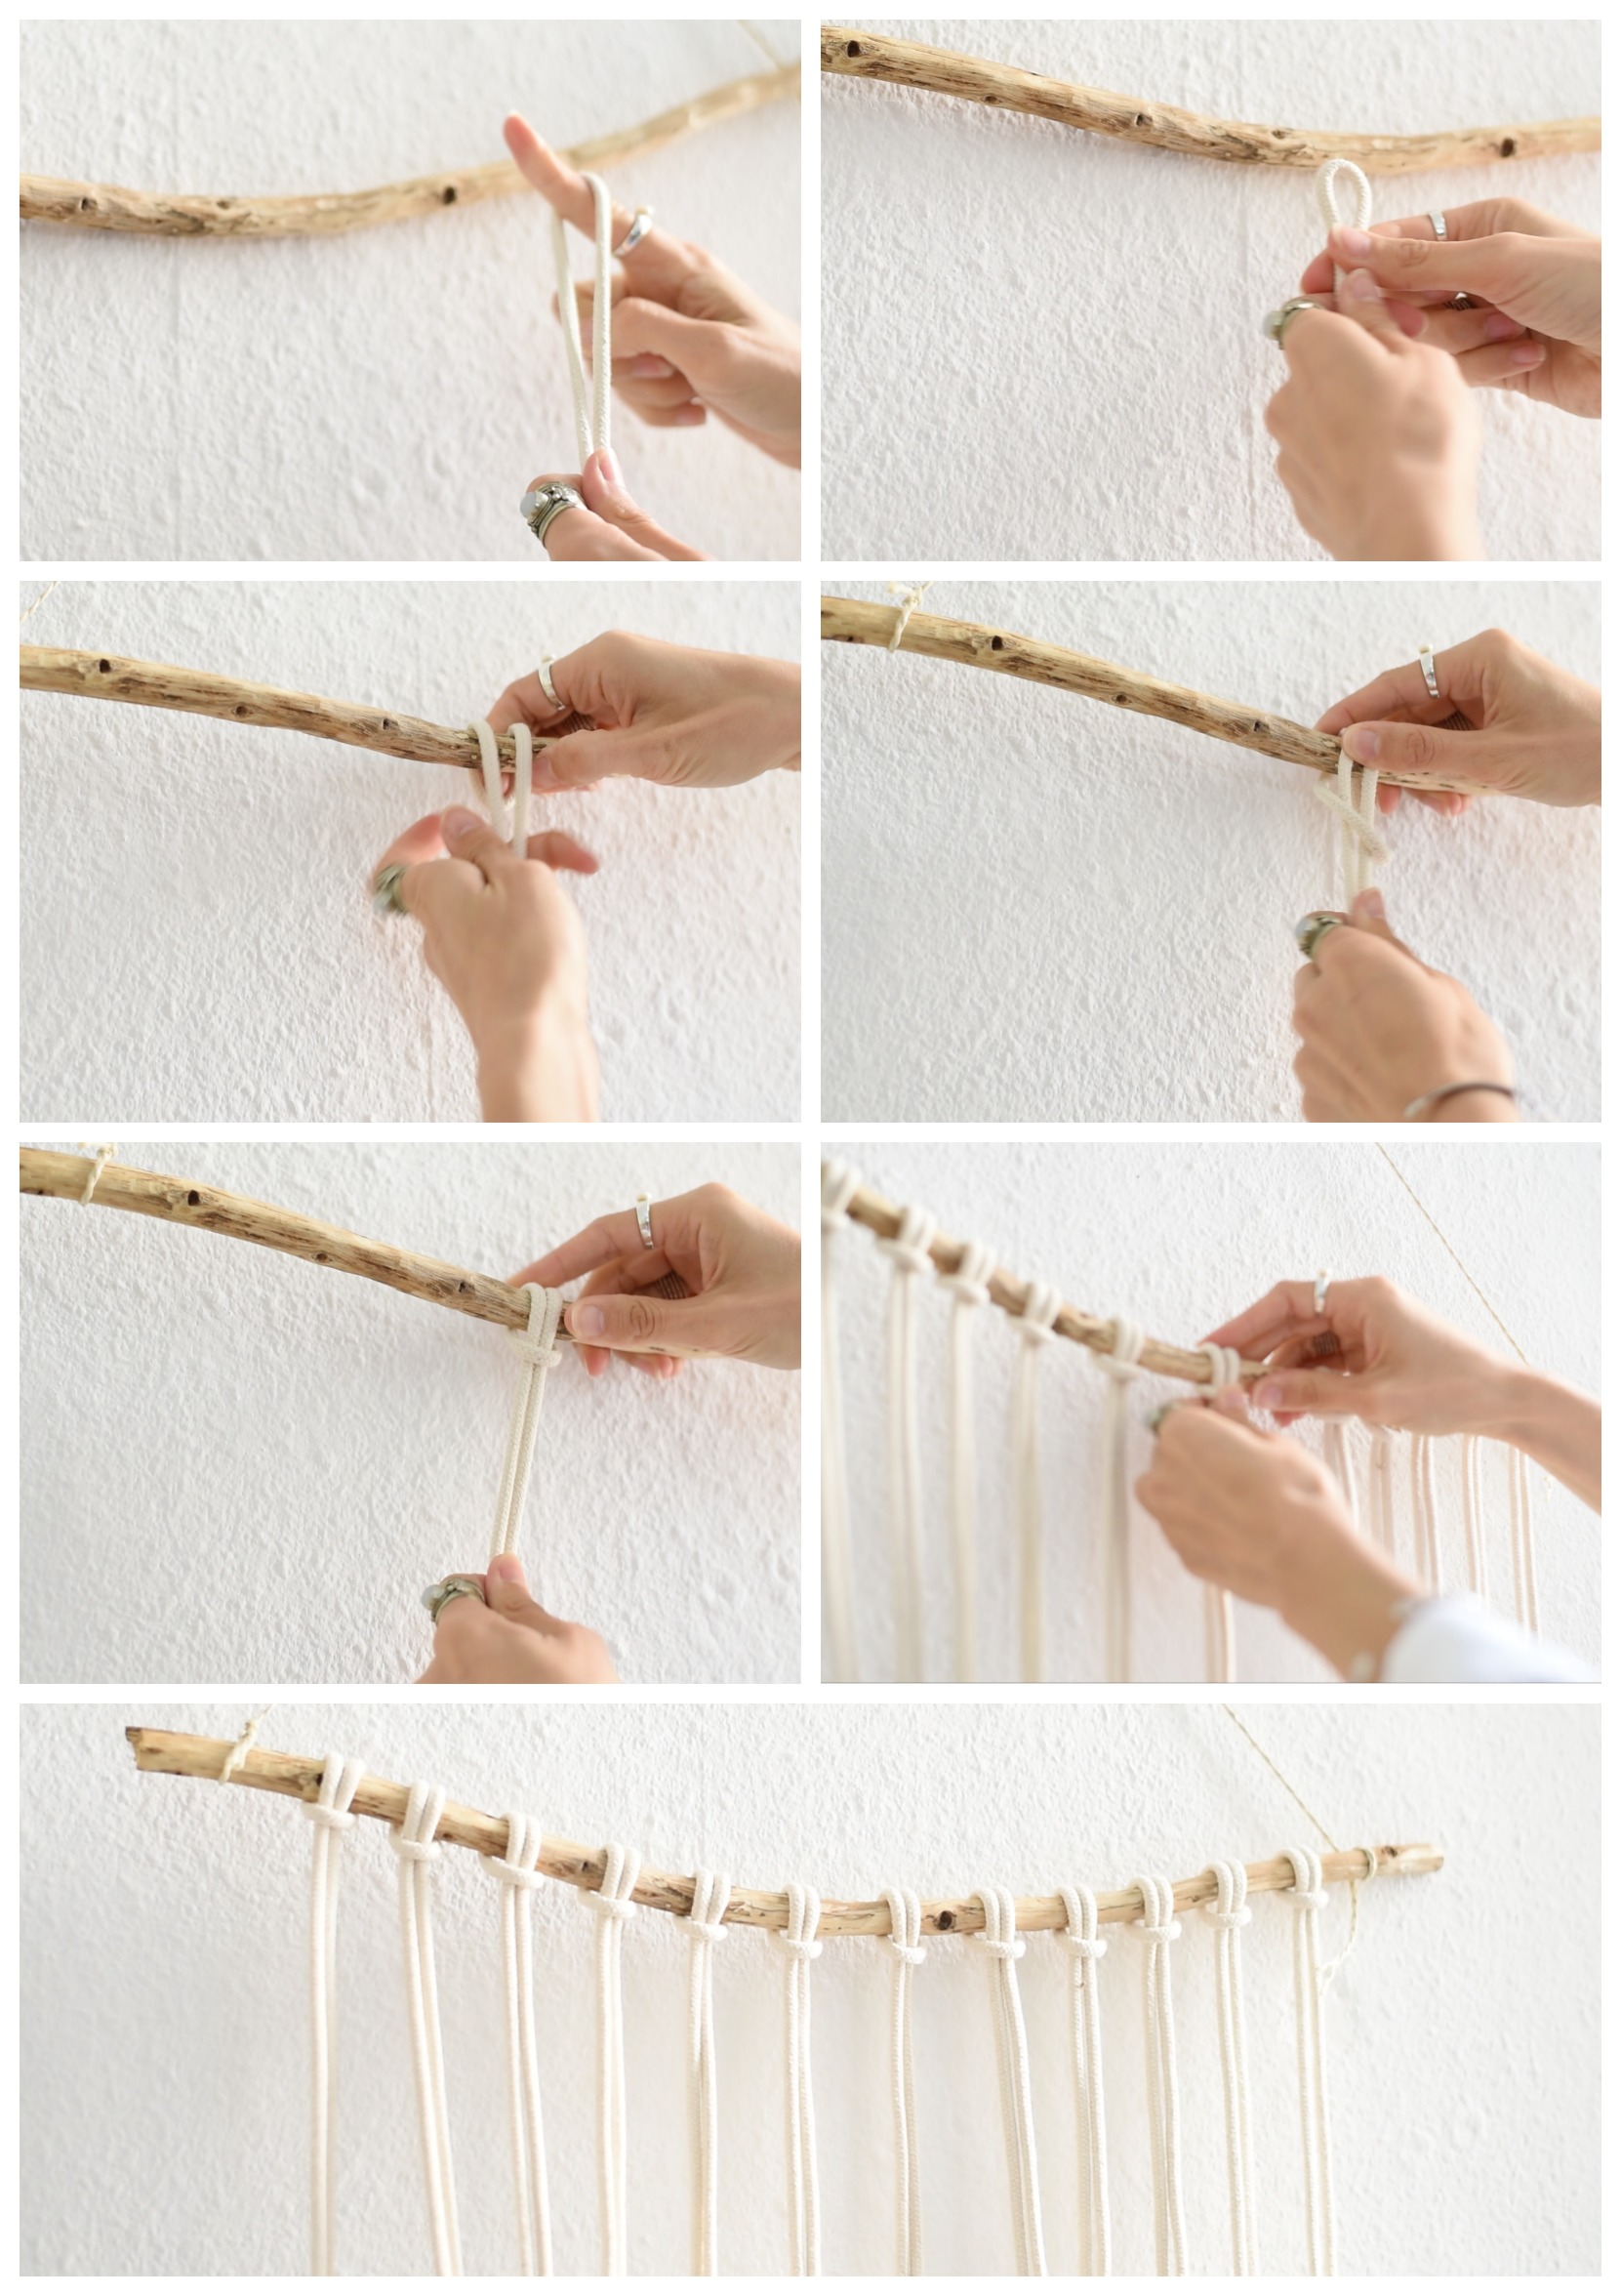
Then you take the thin and short string I mentioned at the beginning and knot it on the stick. Like that you can fix the stick somehow at a table, or as I prefer, hang it on the wall.
Step 3: Attach the strings
Then take one of the long cords, and fold it together so that a loop is created at one end. Place this loop behind the stick and then pull the rest of the cord through this loop from front to back. Pull this knot relatively tight. This knot is called Larks Head.
Do that for all 12 strings. When all are on the stick, move the knots to the right or left so that they are evenly spaced.
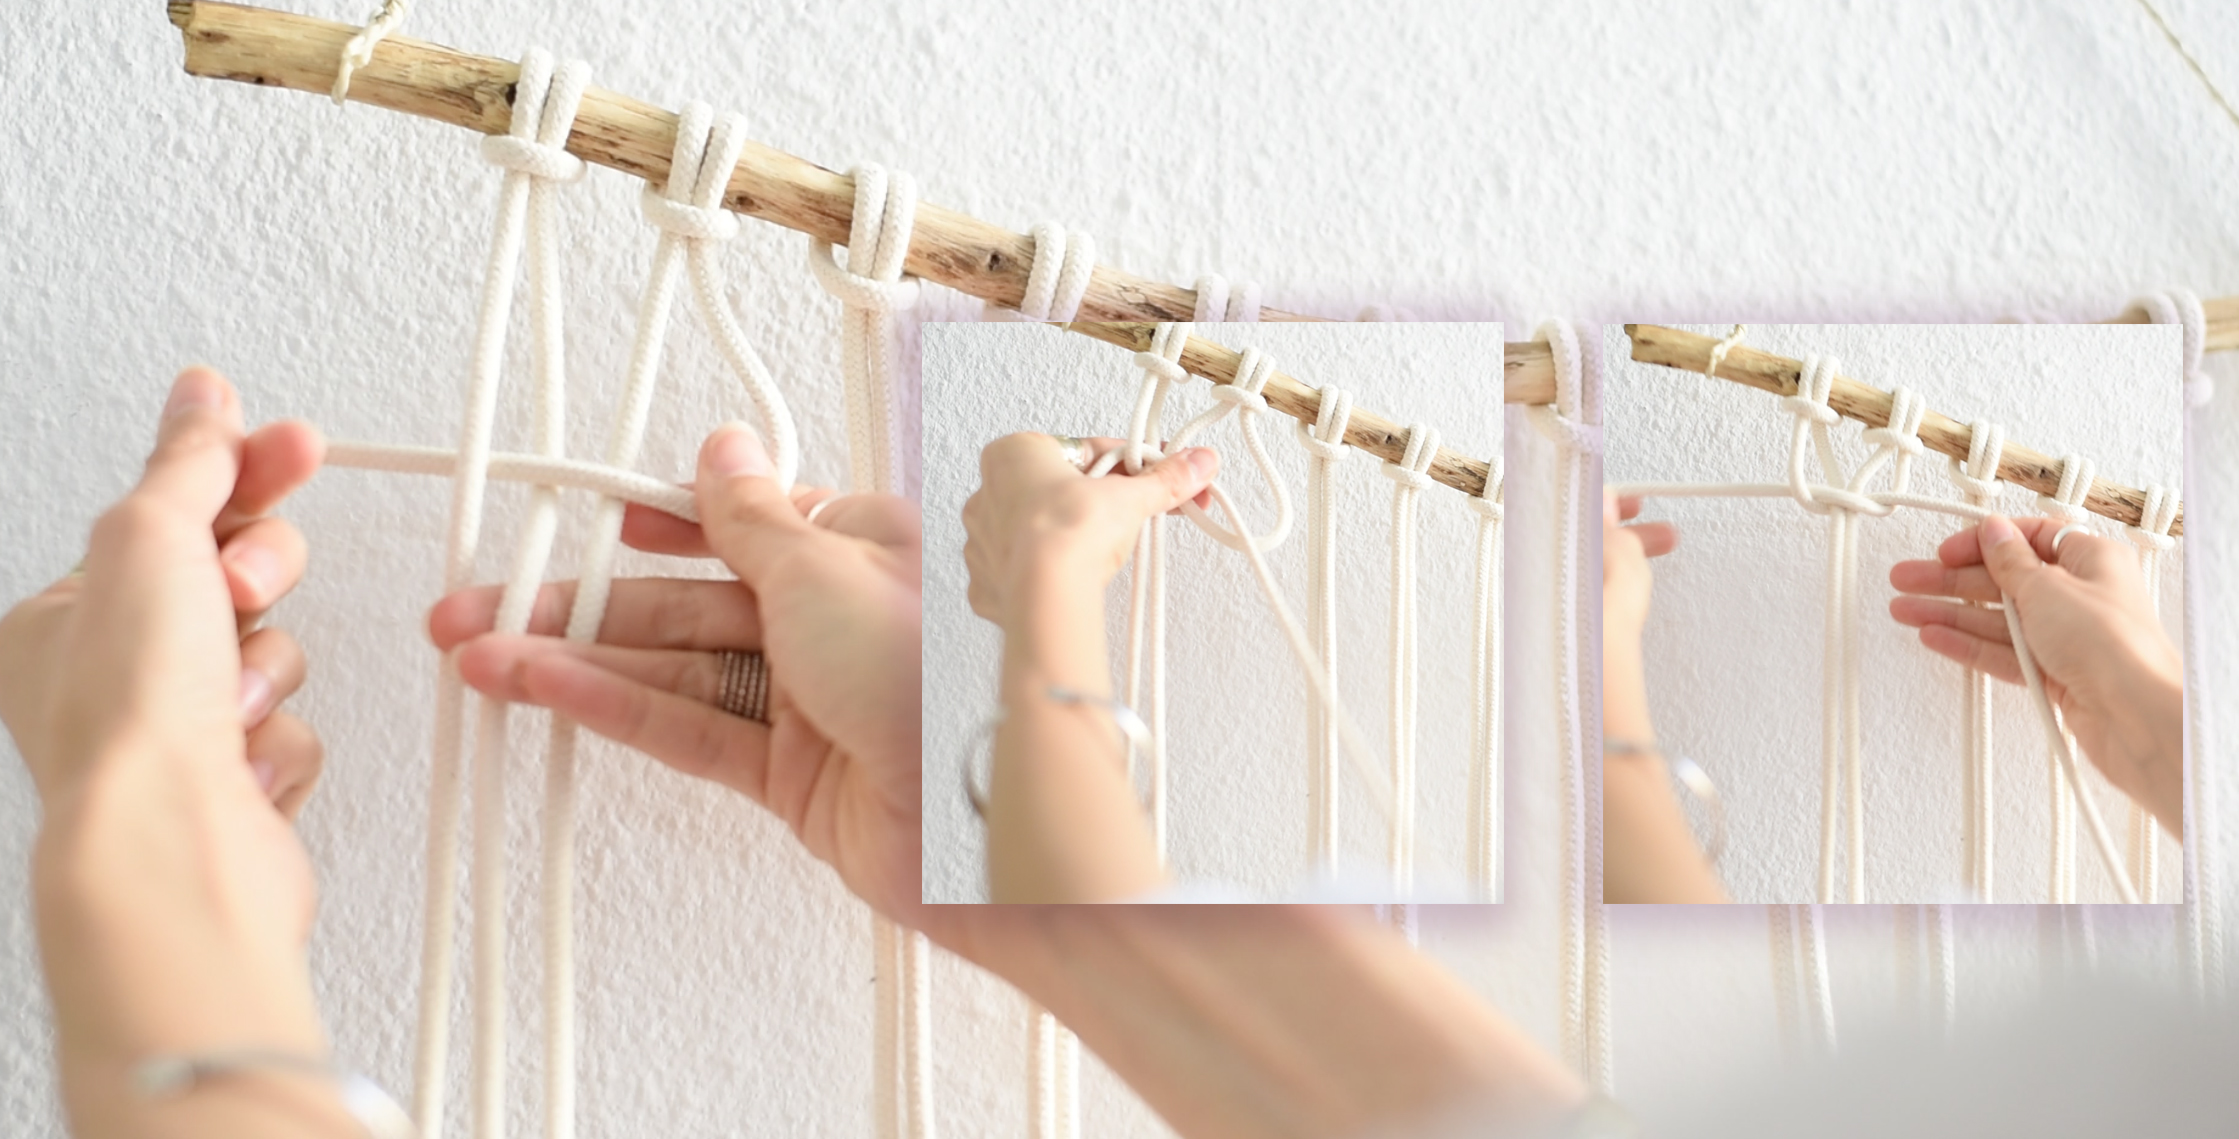
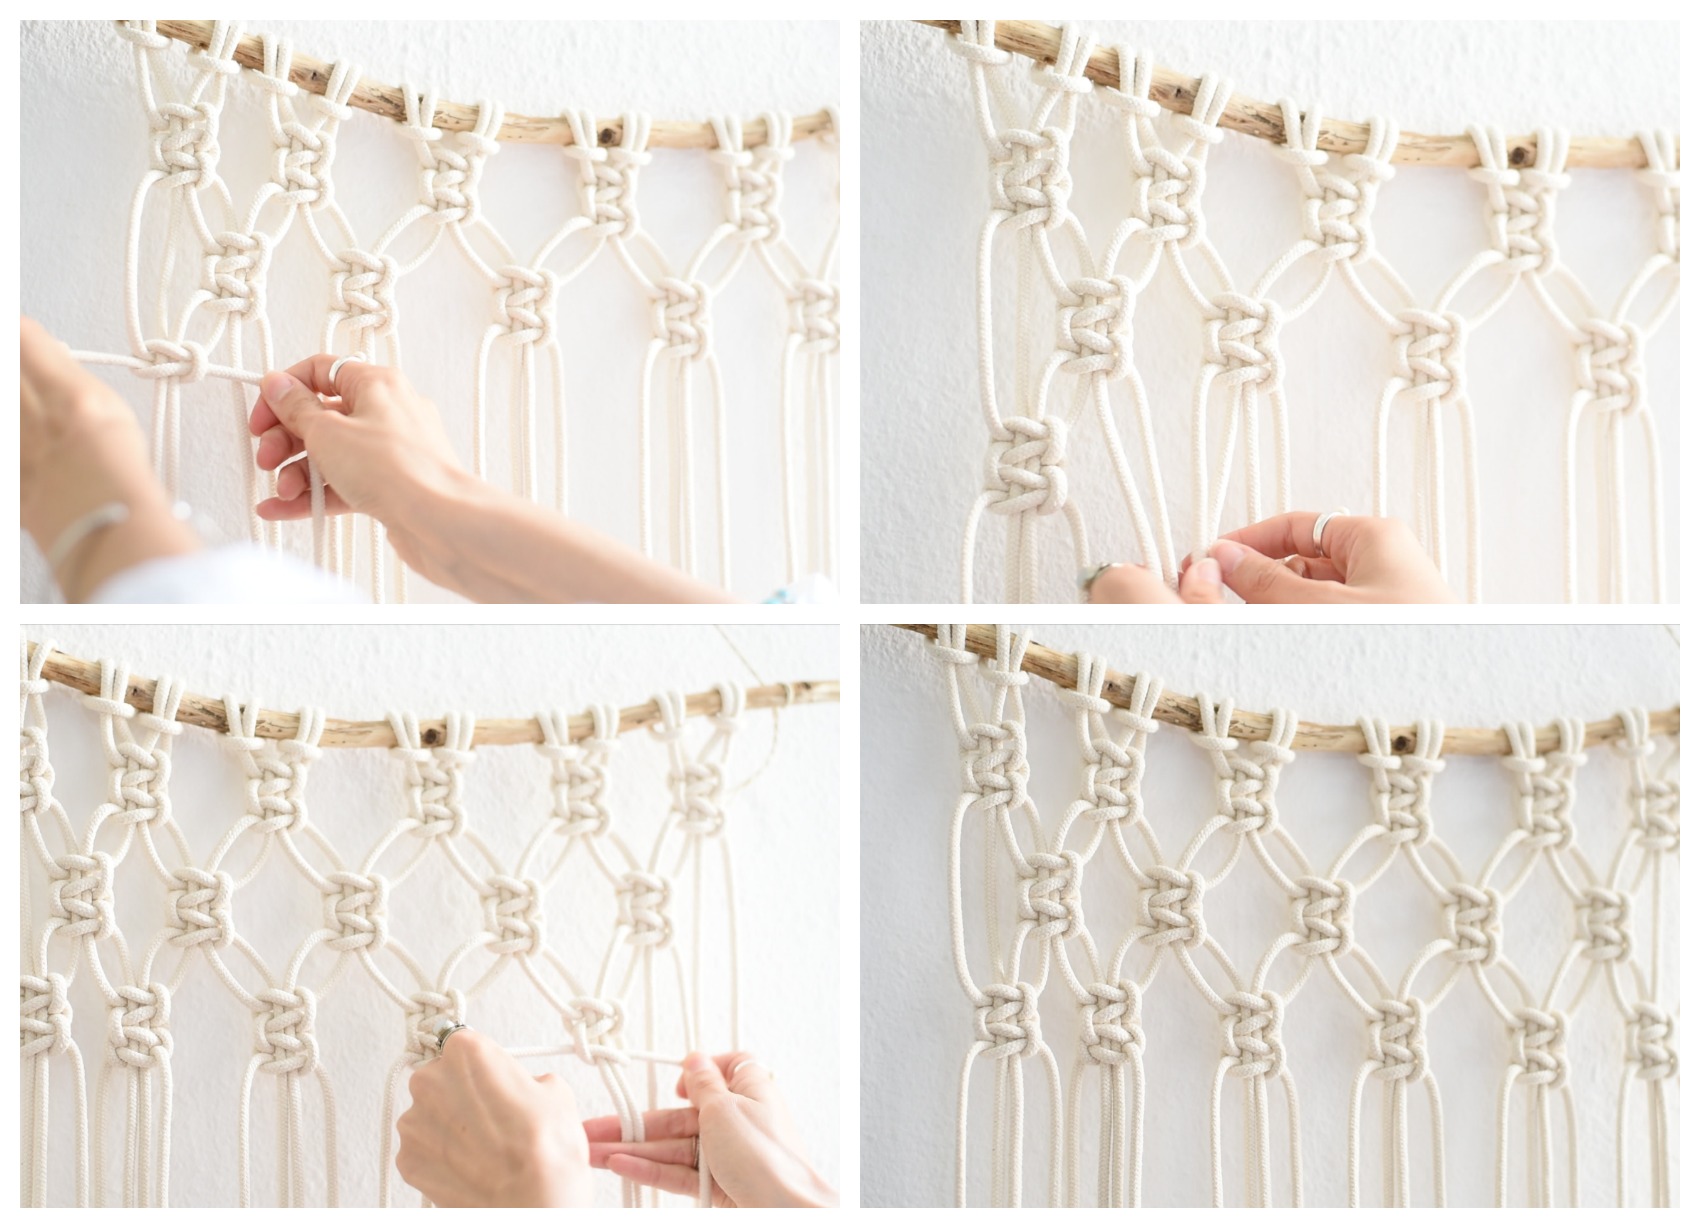
Step 4: Start knotting!
Now you start with the real knotting. You take the first four strings from the left. Start by folding the string on the far right, number 4, over the middle and under the whole outermost string to the left. This creates a loop on the right, through which you can pull the first string all the way through from the back to the front.
Do the same thing again, but in the other direction: Place the string on the far left over the middle and under the far right and then pull the right through the loop on the left from back to front. Repeat both steps.
Now you did the Square Knot twice. Now you know the Square Knot! Now do this knot twice with the other strings from left to right. With a crooked stick like mine you have to make sure that all the knots hang at about the same height.
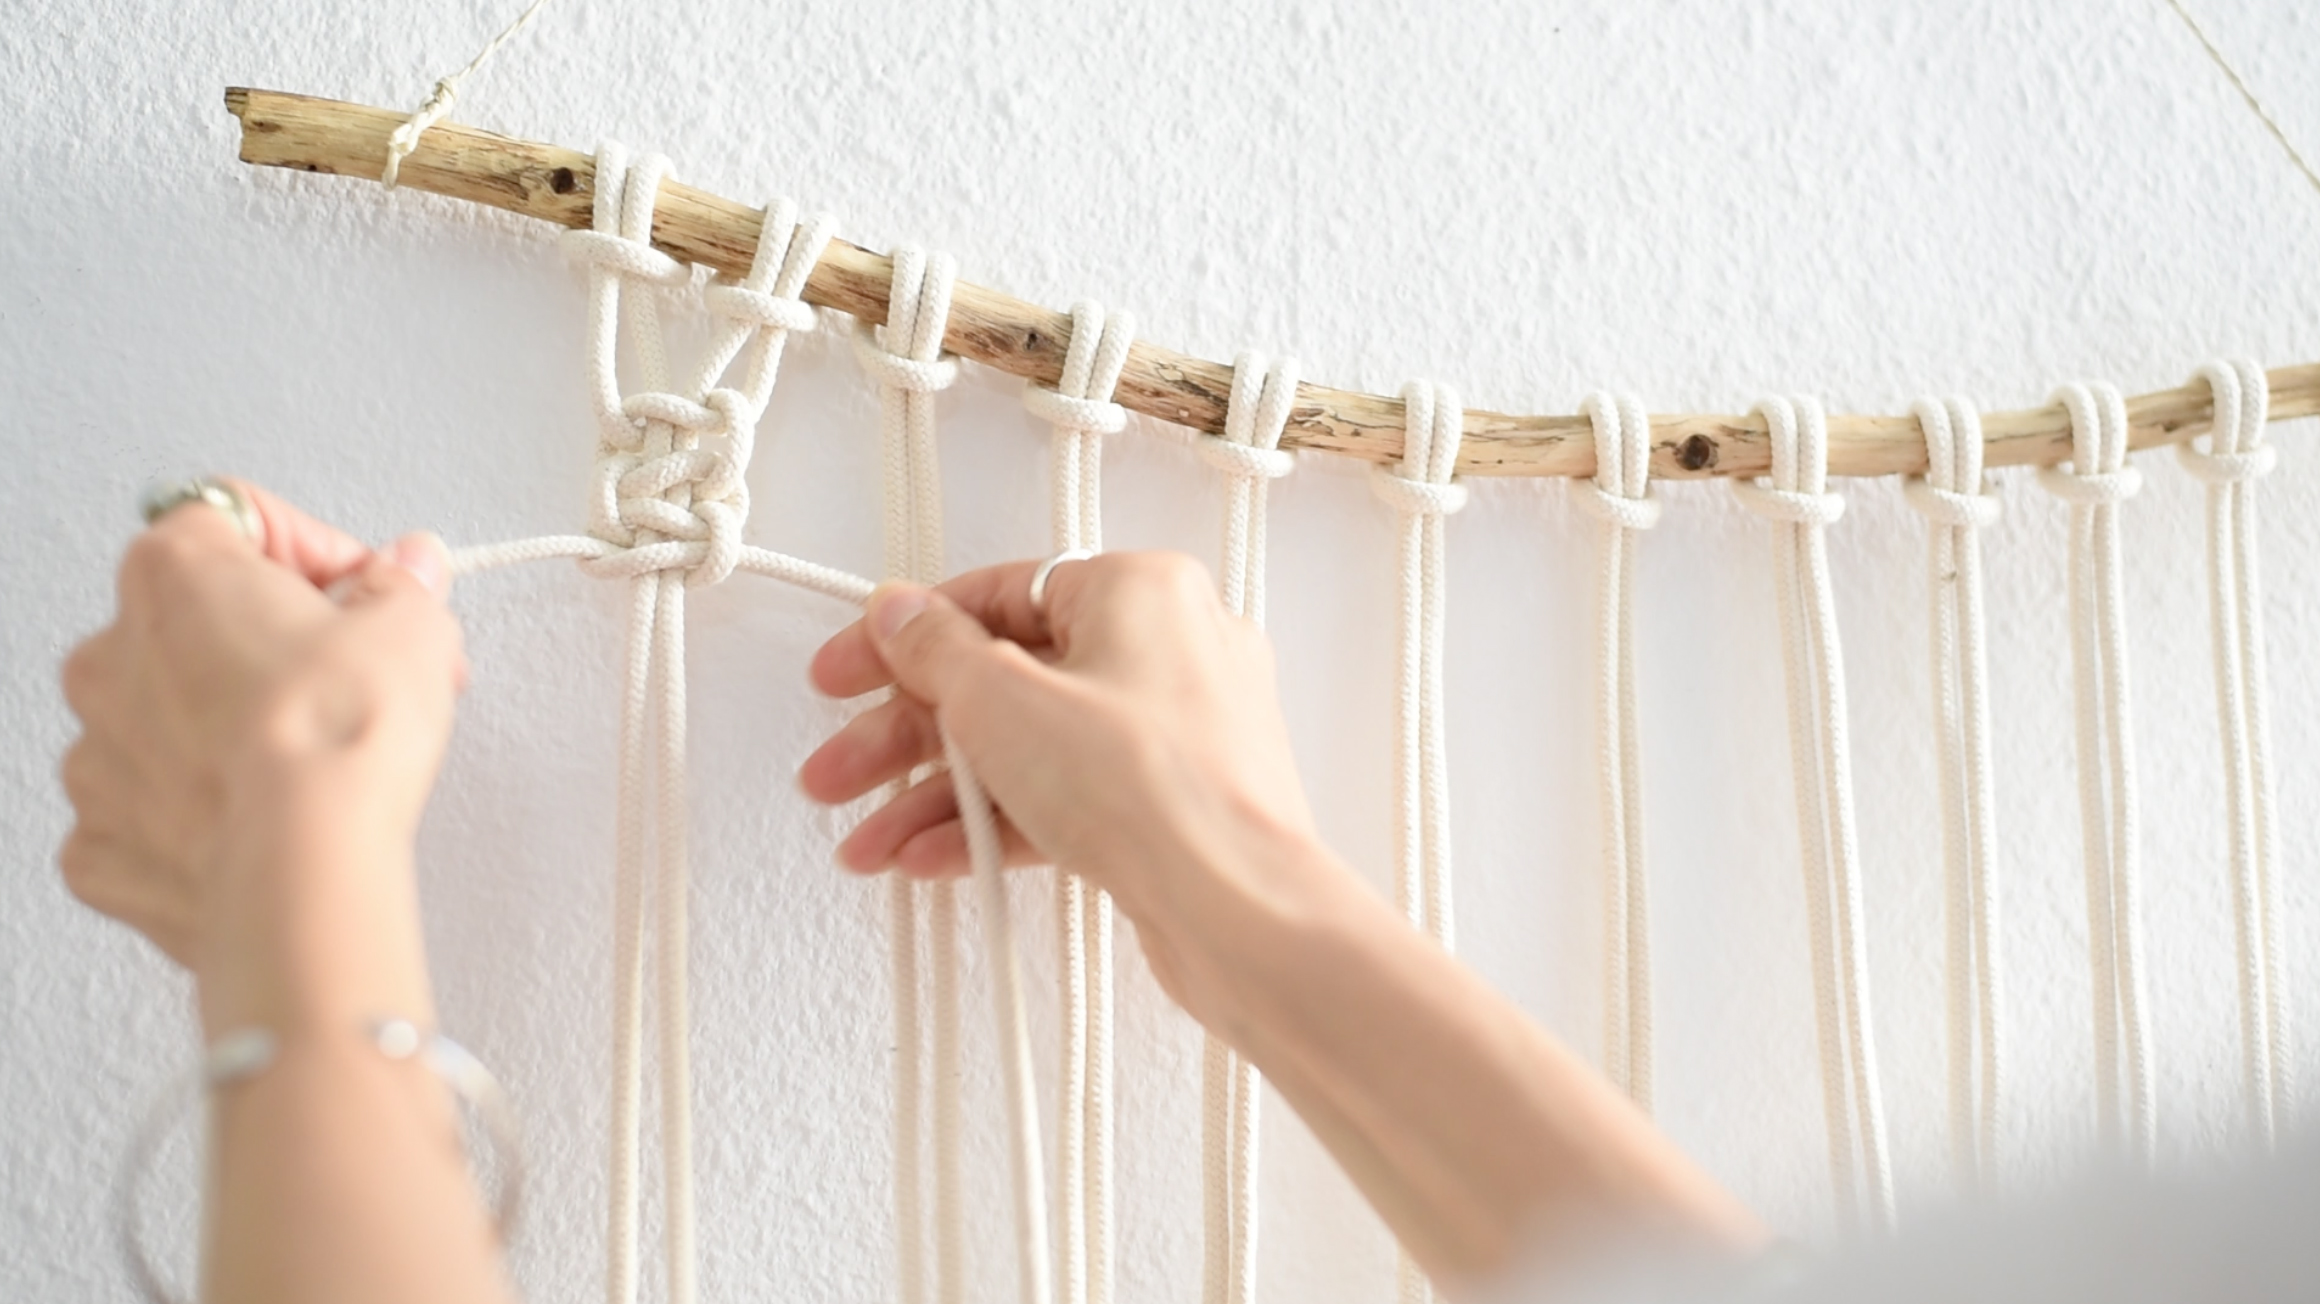
Step 5: Second row
In the next row you always take two string from the two adjacent knots. To be precise you grab the strings 3, 4, 5 & 6. The two left next to it you simply let hang. With these four (number 3, 4, 5 & 6) you now knot two Square Knots again. Pull the knot only gently tight and leave a little distance to the knot in the row above.
Then take a step to the right and take the next four strings to make two Square Knots again. Do that for the whole row. On the far right, two strings remain again.
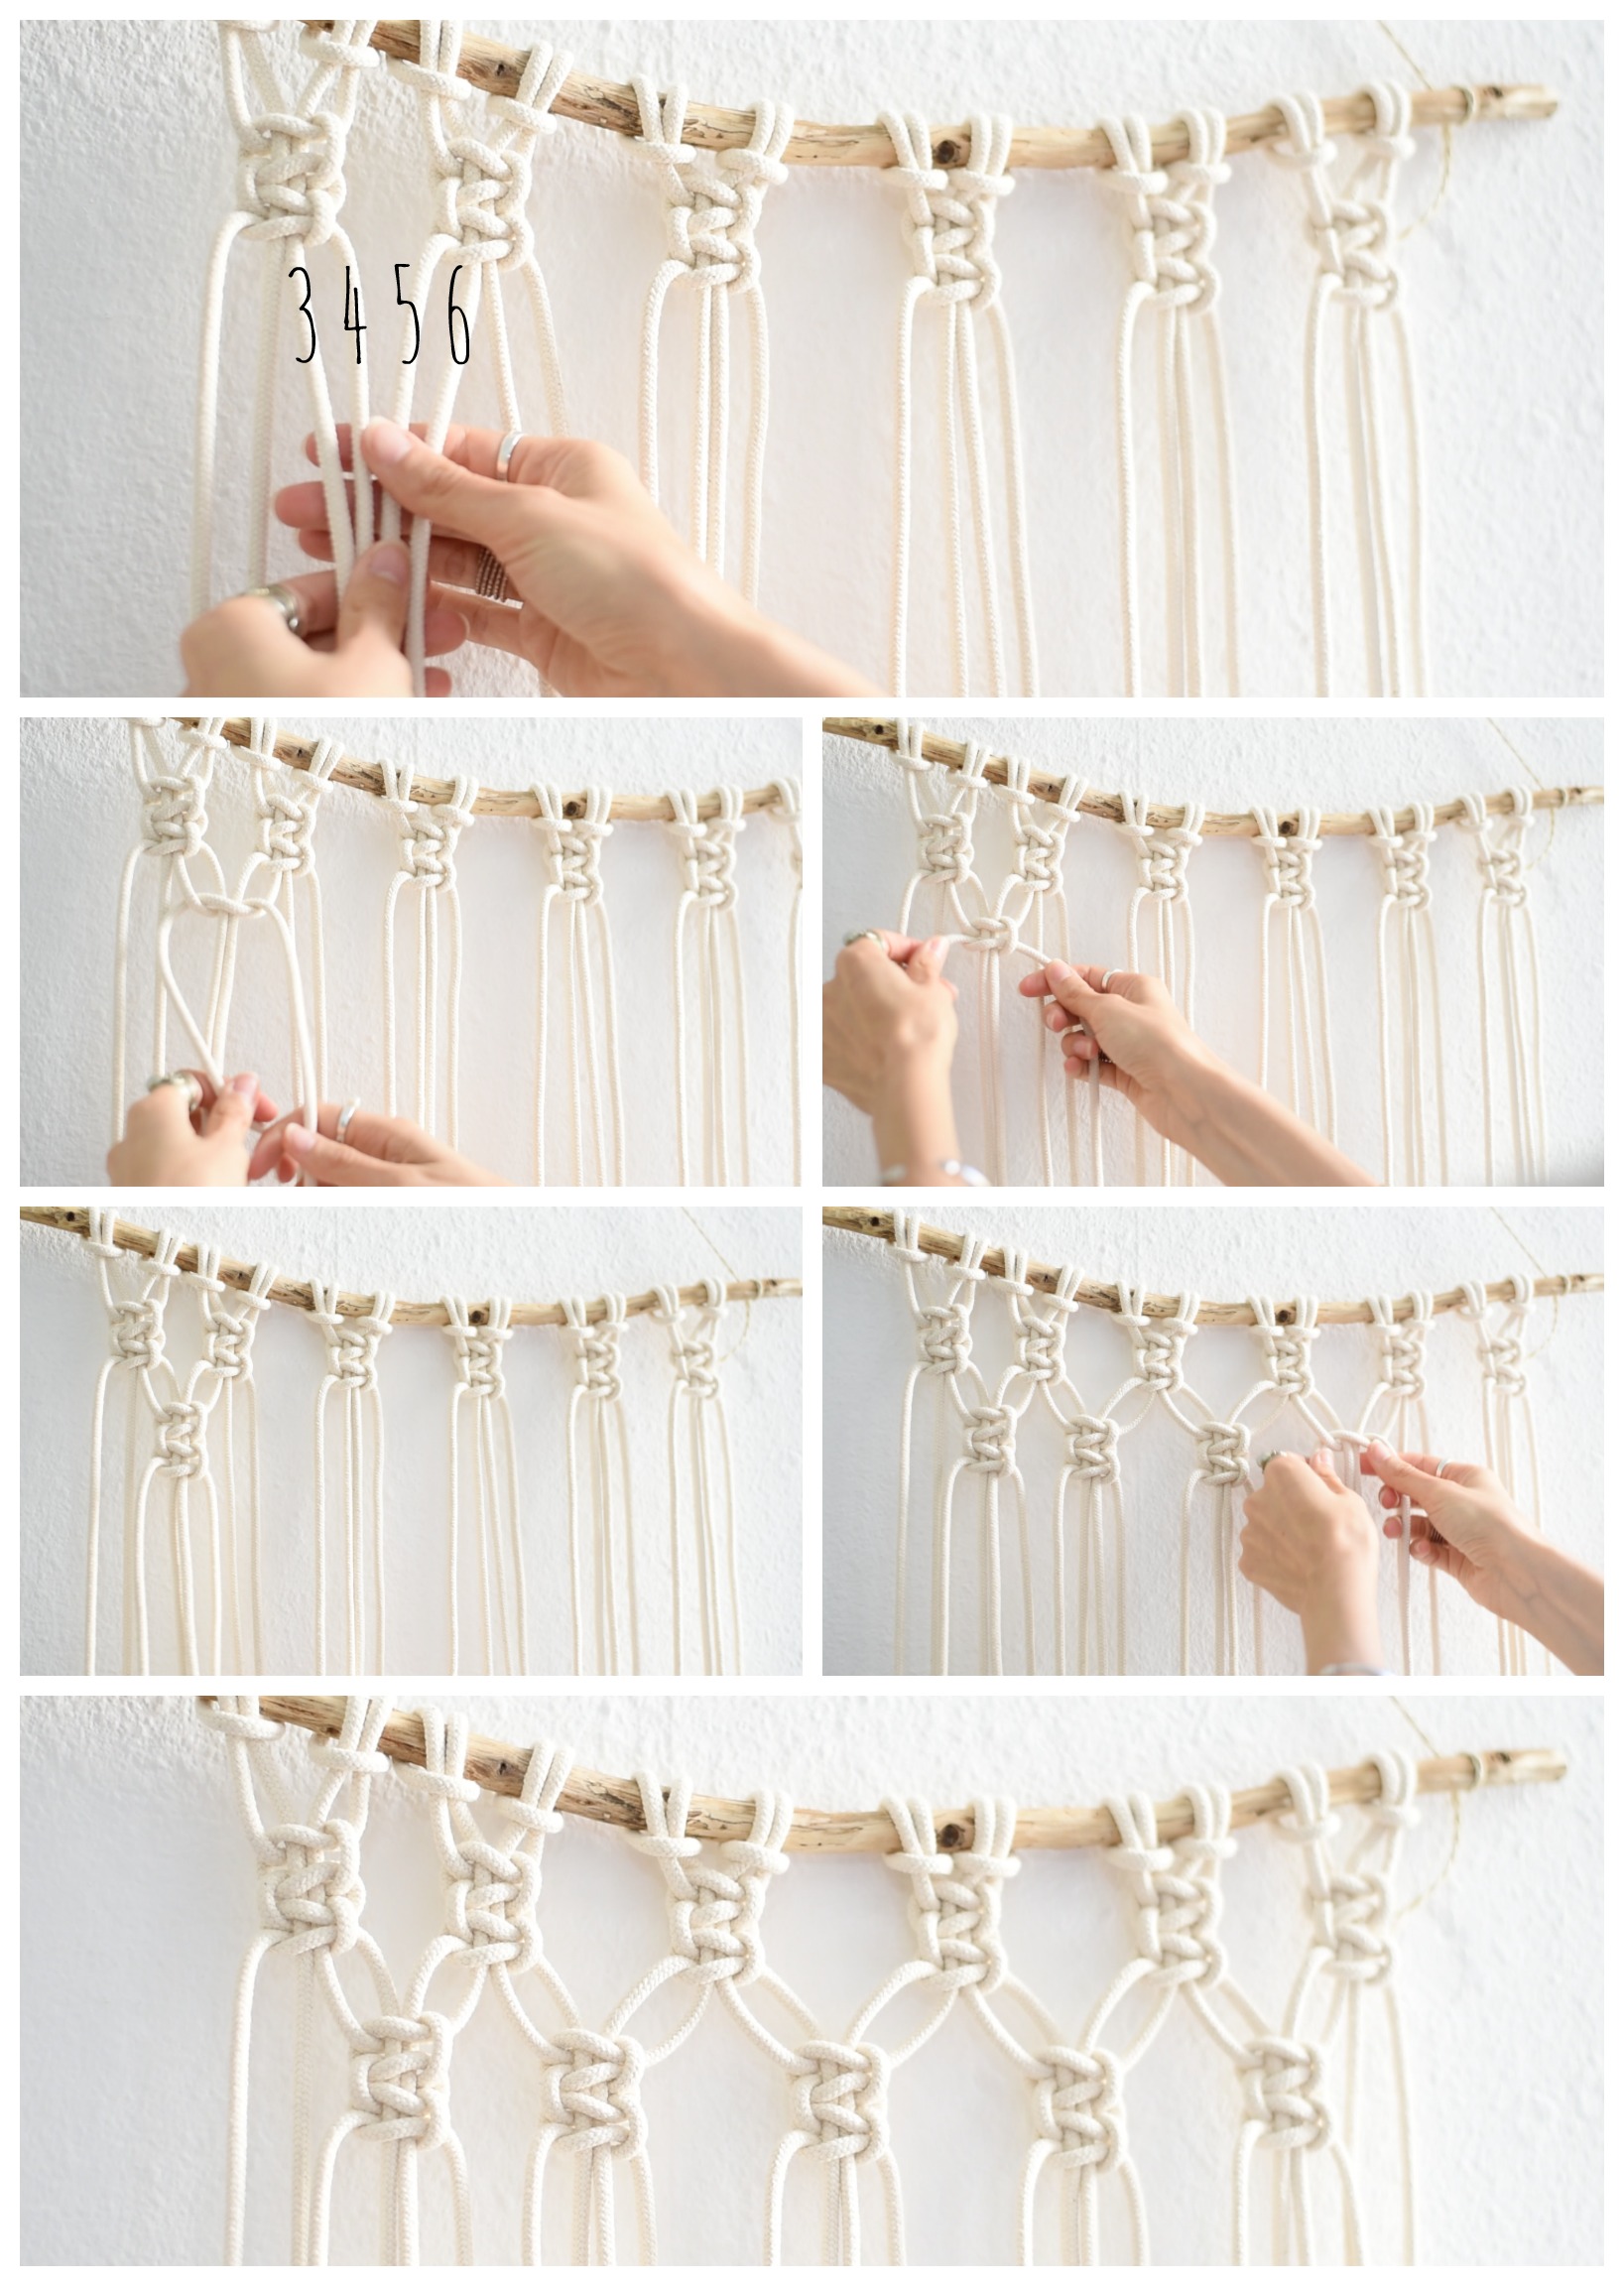
Step 6: Third Row
In the third row you, again, take the first four strings from the left (number 1, 2, 3 & 4). Here you make two Square Knots. Do not tighten them too much and leave a little distance. Also the string on the far left should just hang very loose, as well as the string to the far right.
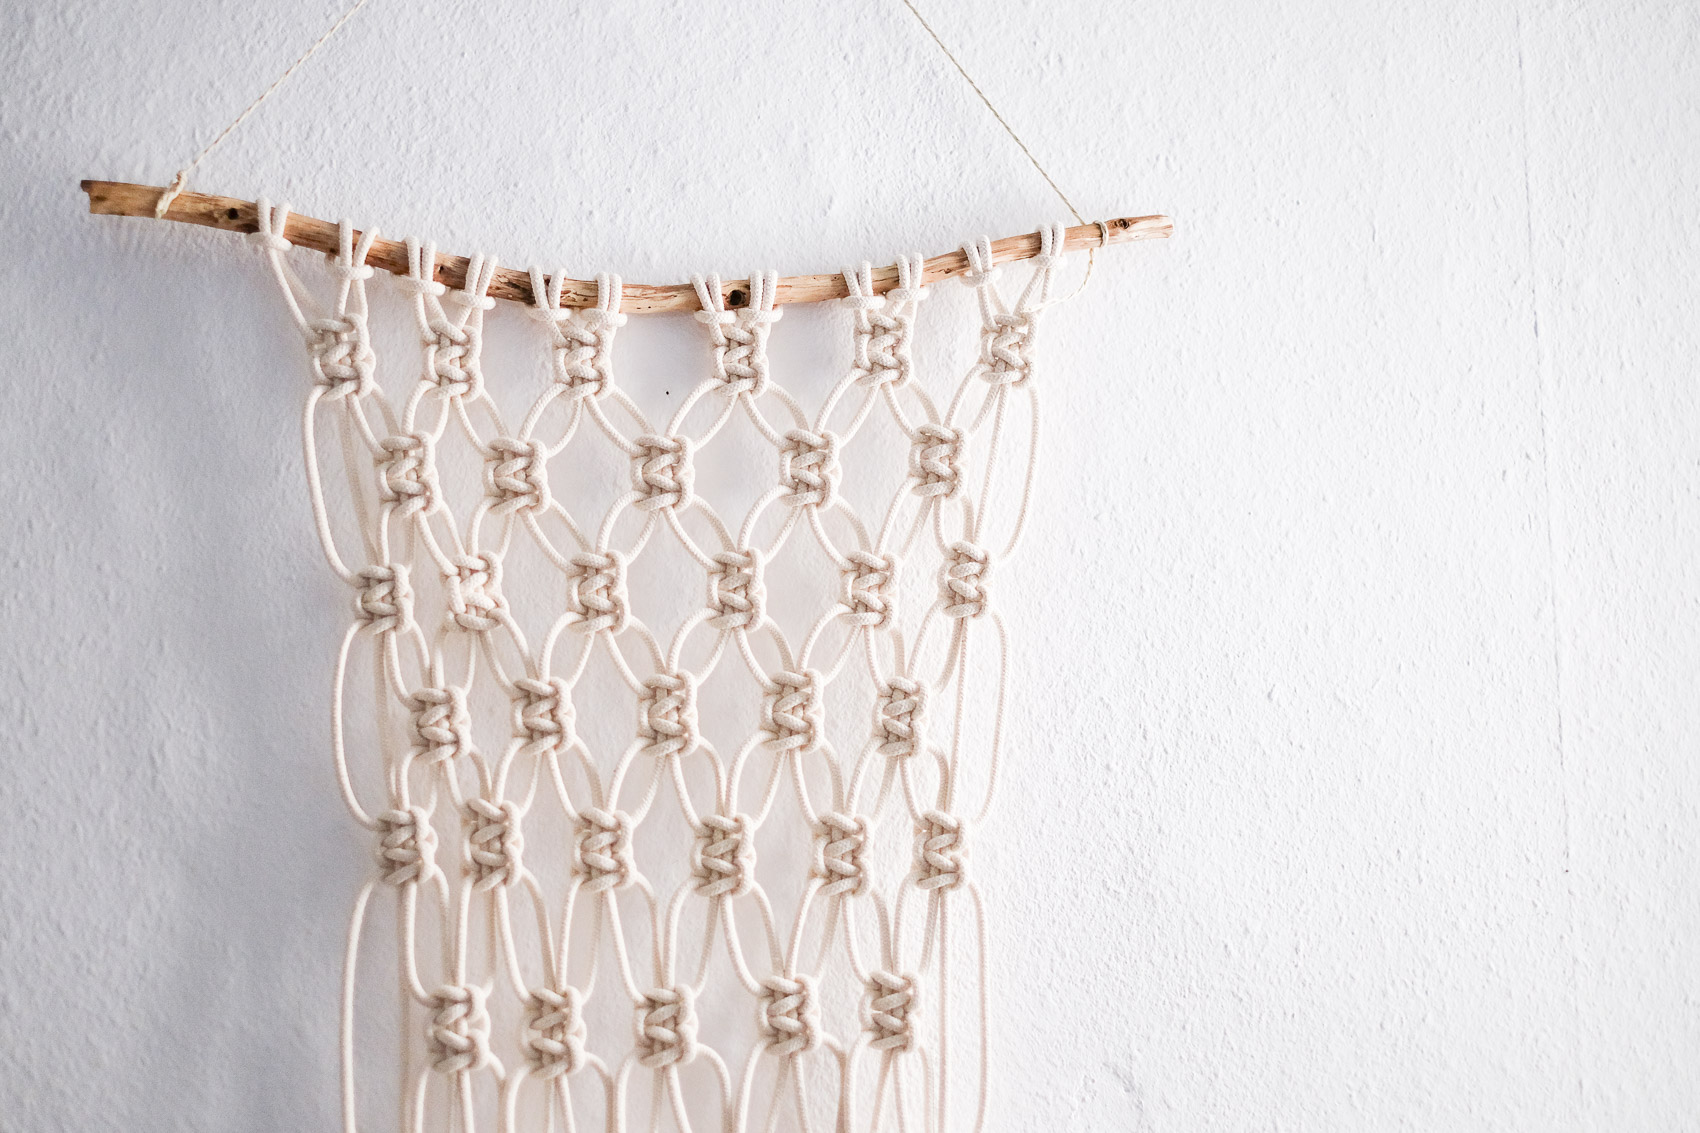
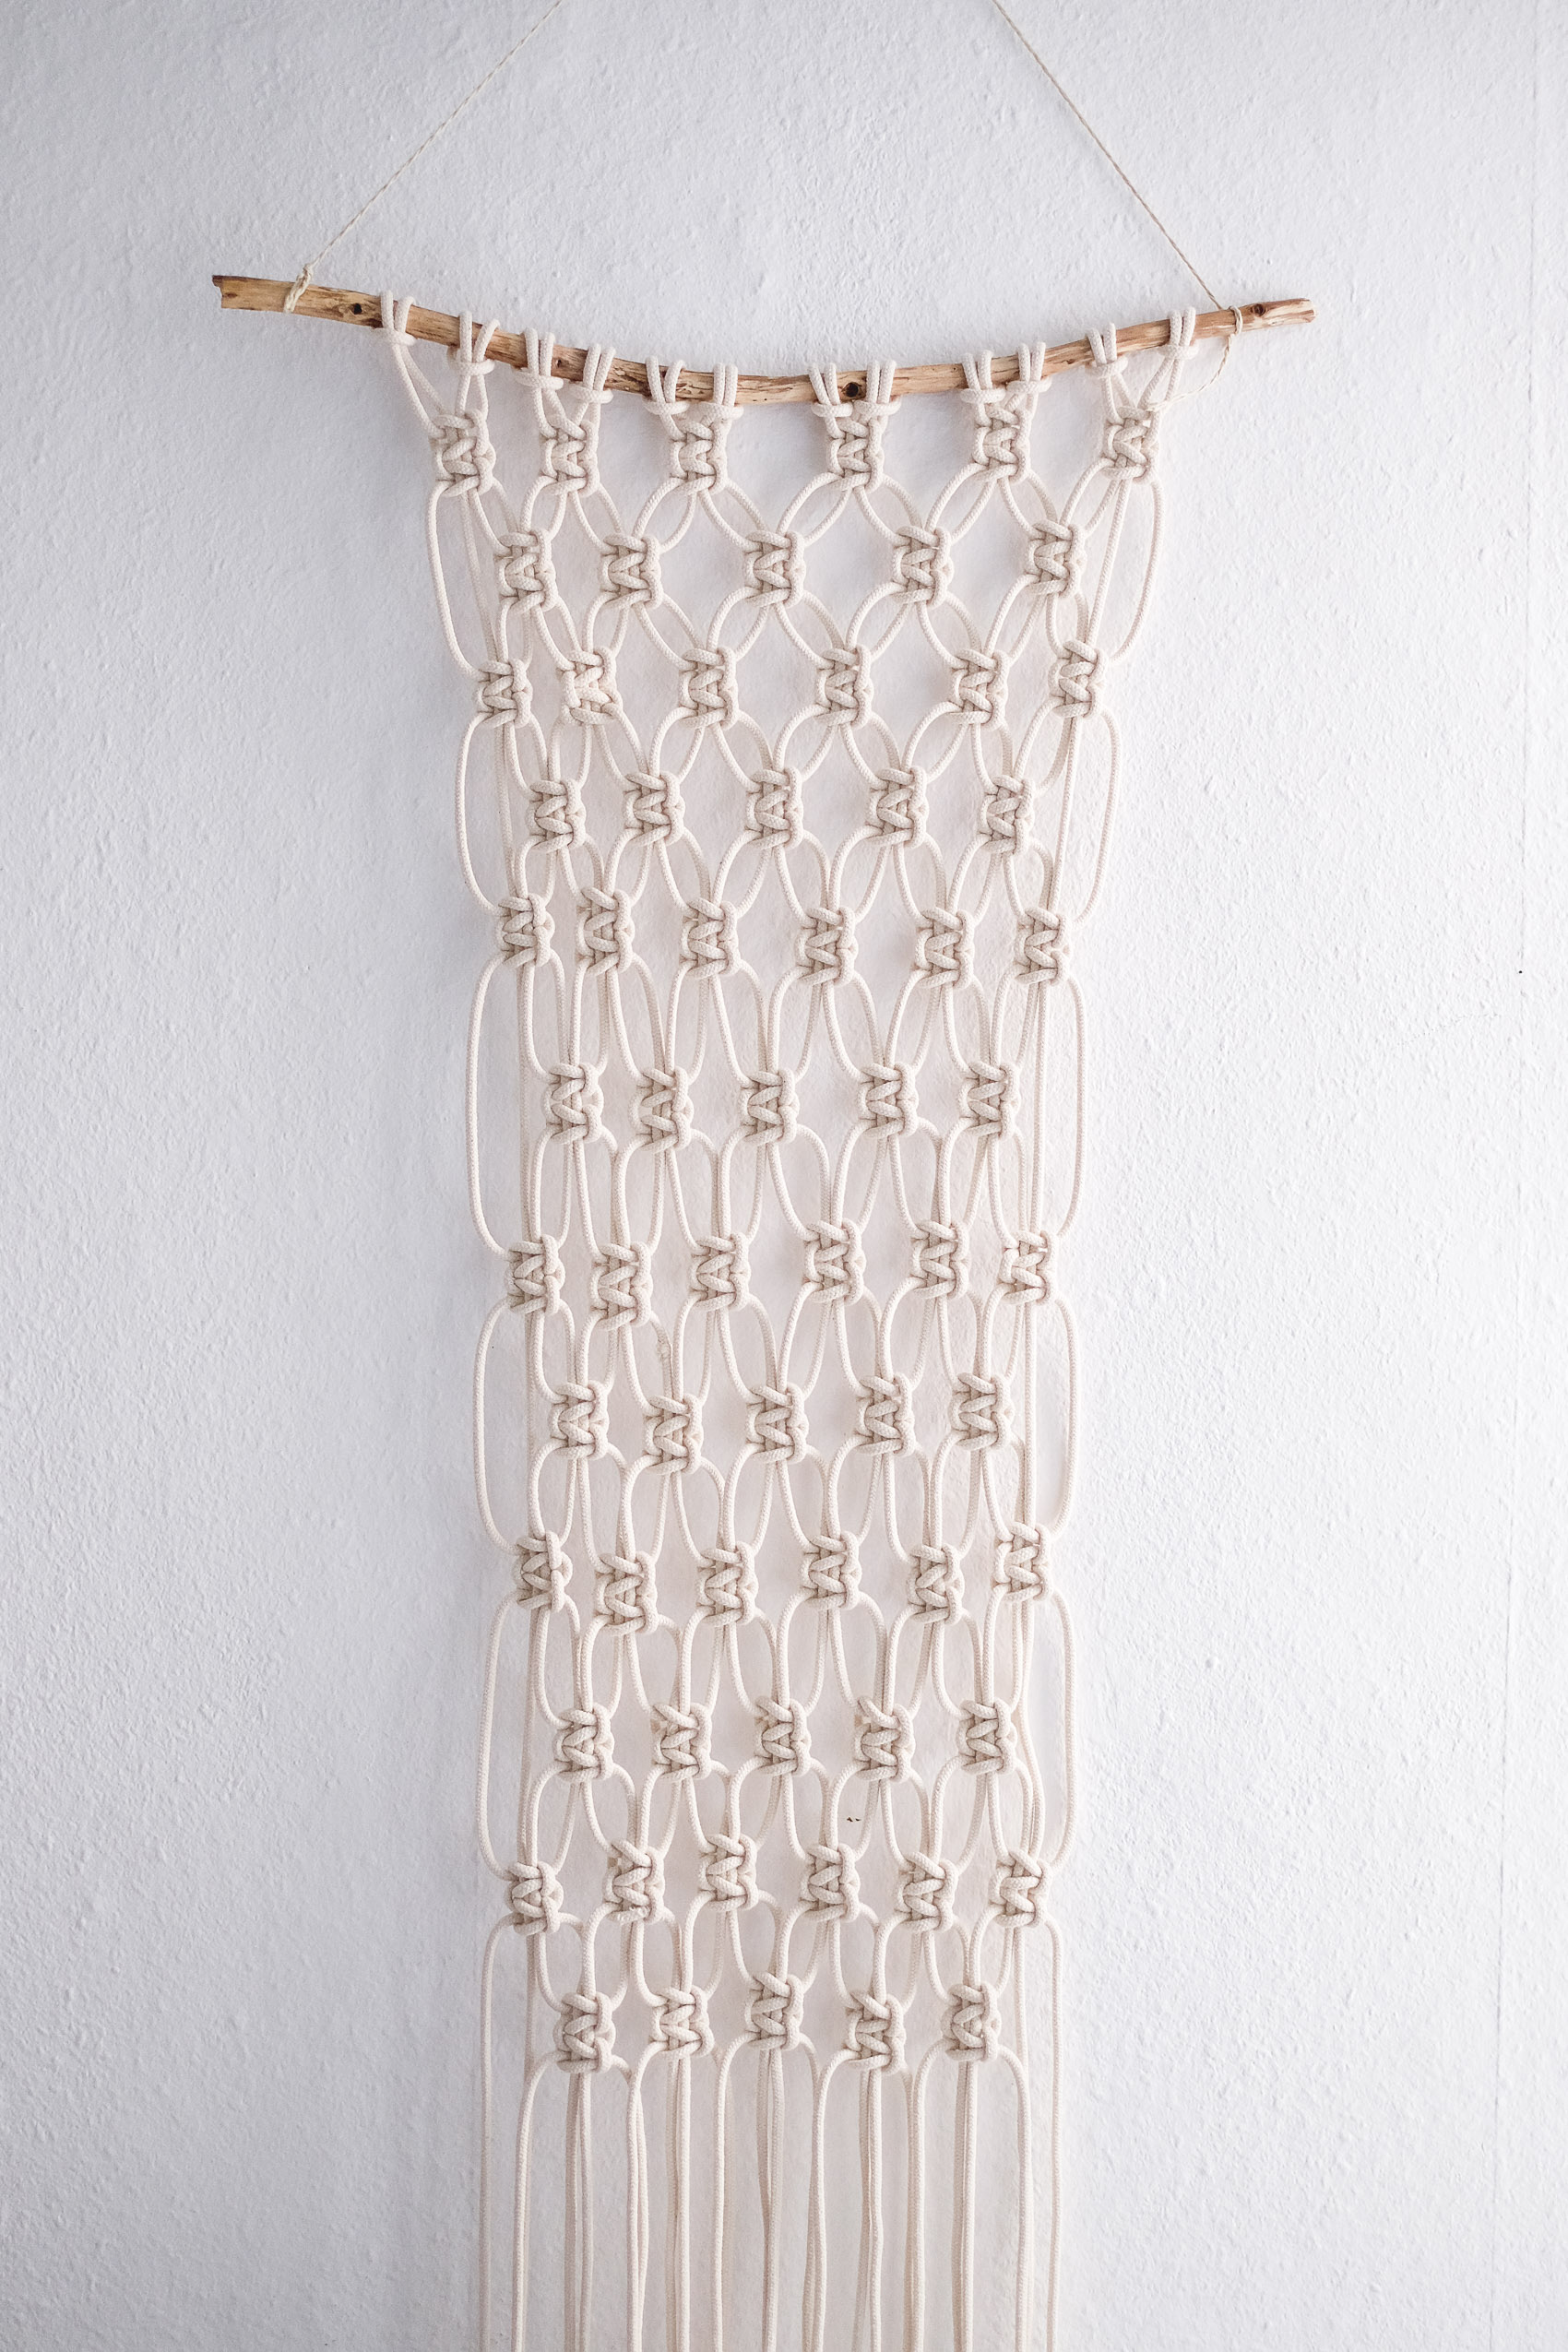
Repeat these steps for your desired length. For me, it was a really long macrame with 12 rows. But the length is up to you!
When done, the strings will hang at different lengths, so just shorten them as you wish with a scissor.
And that’s it! As I said, you can also watch the video for this macrame wall hanging tutorial (but it’s in German!) and if you want more, also check out my DIY macrame plant hanger tutorial, it’s also in English!


27 comments
Oh wow das sieht einfach so toll aus. Ich bin wirklich begeistert.
Ich wünsche Dir noch einen tollen Nachmittag.
Liebe Grüße Lisa <3
http://www.hellobeautifulstyle.blogspot.de
Hallo Mia,
das sieht richtig toll aus. Es erinnert mich auch an meine Kindheit – wir hatten das damals ( das hört sich jetzt richtig alt an) noch in der Schule gelernt. Ich habe mir jetzt für den Sommer vorgenommen, meinen Töchtern Makramee zu zeigen ( das Fach Handarbeit gibt es ja nicht mehr) und mir Deine Anleitung für die schönen Blumenampeln gleich gespeichert.
Unos macrames estupendos en hora buena
Love it, well explained thank you very much. From
Puerto Rico
Thank you so much for this tutorial! I just made this today, almost exactly two years after your post! I used cotton clothesline, so mine is chunkier but good for a beginner!
Thank you for the tutorial! I’m in Oklahoma, USA. I am doing a piece that isn’t from any particular idea I’ve seen. I am just trying things and seeing what I get. But I thought macrame would go nicely in the piece so I found this. Thank you. Very detailed and informative.
Love the wall hanger…Had forgotten how to do it but now i will start again. Thankyou…
Amazing Article, I want to create one Macrame Wall Hanger, here I found out how can I make that. thank you for sharing this amazing article. lots of love.